
**Since downsizing to a condo I realized that I need to curb my hoarding tendencies and begin using my stash - Today is day 1. Let Operation DeStash begin! Everything I used for this project was stuff I had on hand and some things I have had for years.**
My husband and I became 'empty-nesters' a couple of months ago and I'm still getting used to not seeing them for weeks at a time. I'm happy that they are happy, independent adults off following their dreams but they will always be my babies.
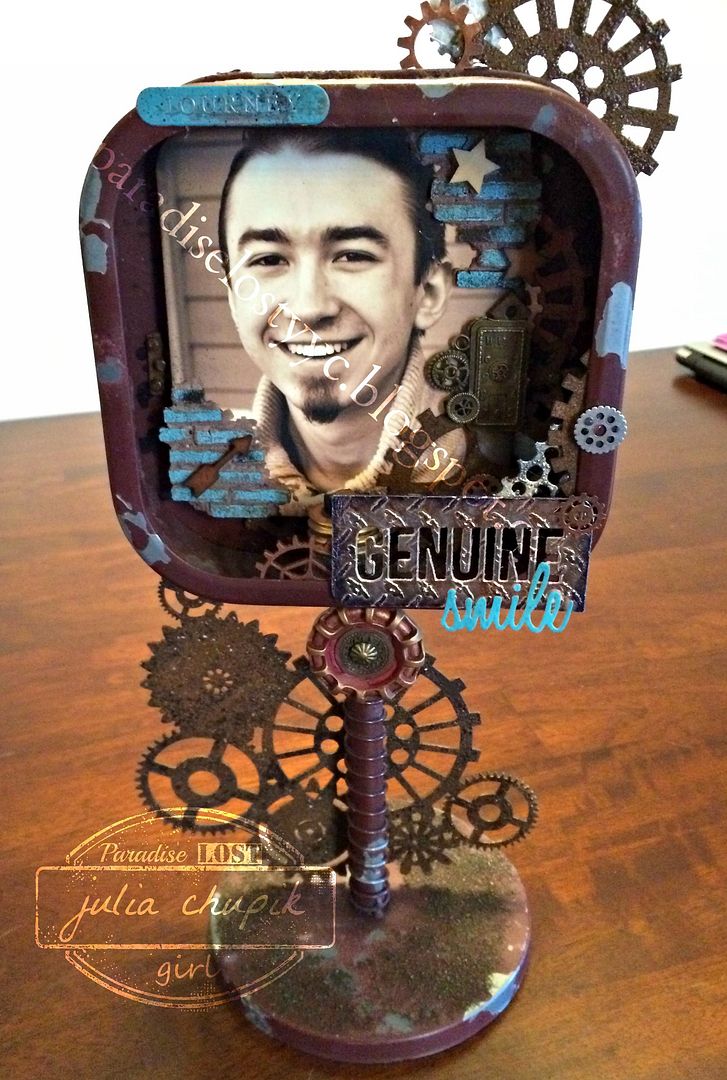
I was recently going through my stash and found these Altered Metal Frames from Prima and decided that they would make fabulous projects to showcase photos of my kids.
Today's project is all about my son, Daylen, and his genuine smile.
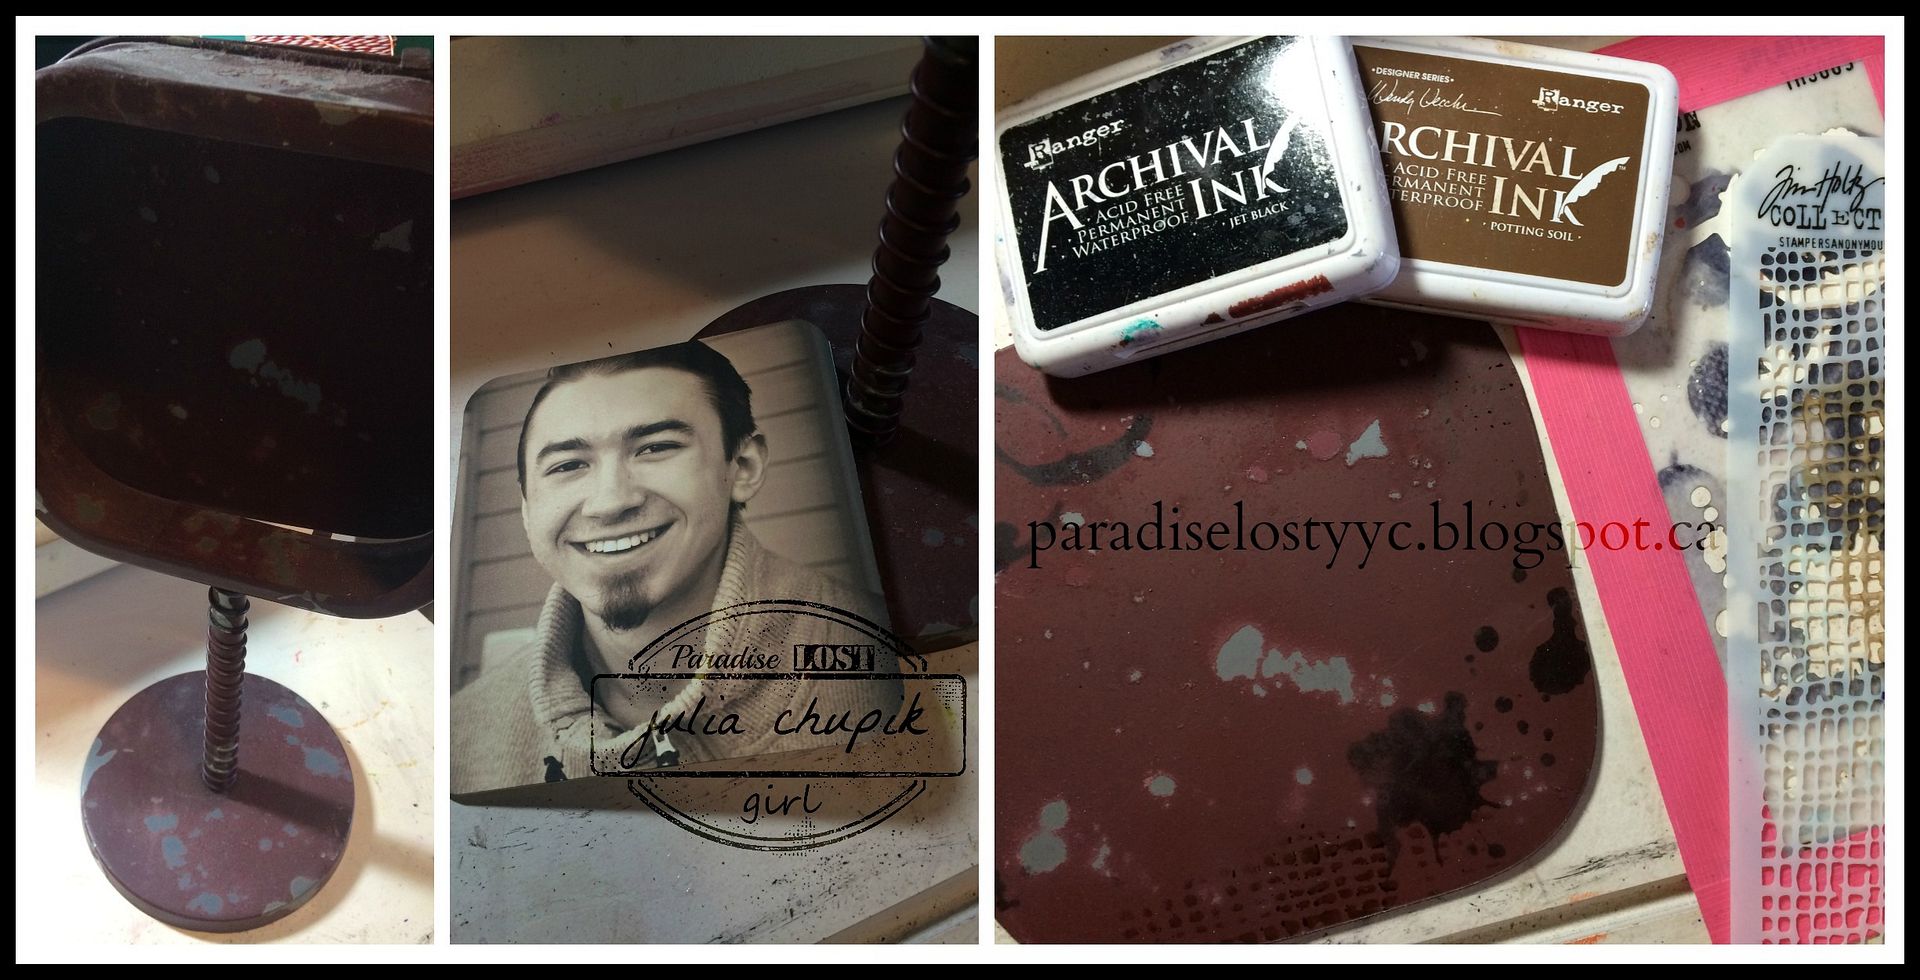
I started out by removing the back of the frames and adding some stenciling with Ranger Archival Ink & Splatters and Burlap Layering stencils from Tim Holtz.
Another stash find was this mini brick wall chipboard from Dusty Attic.
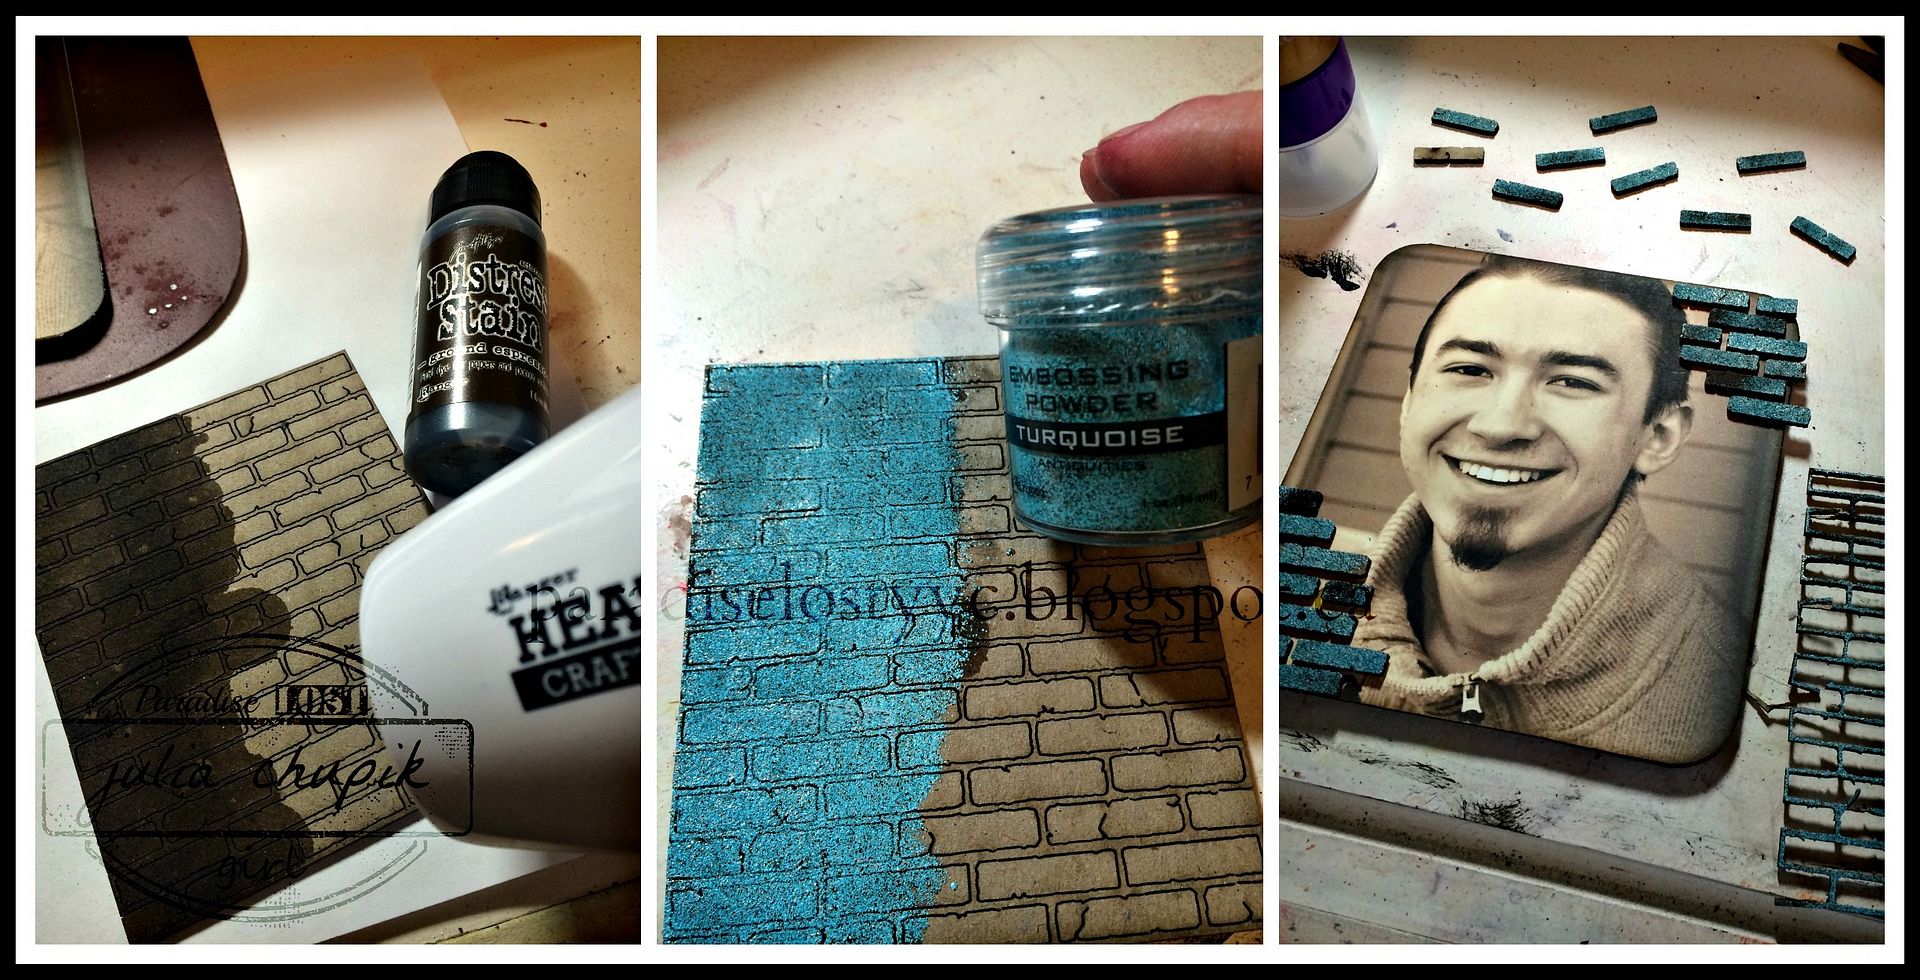
After a layer of Ground Espresso Distress Stain, I applied some Turquoise Embossing Powder from Ranger. After setting this with my heat gun and letting it cool I gently rubbed the embossing powders to reveal the edges. I then glued the bricks down with Tacky Glue making sure to leaves spaces in between.
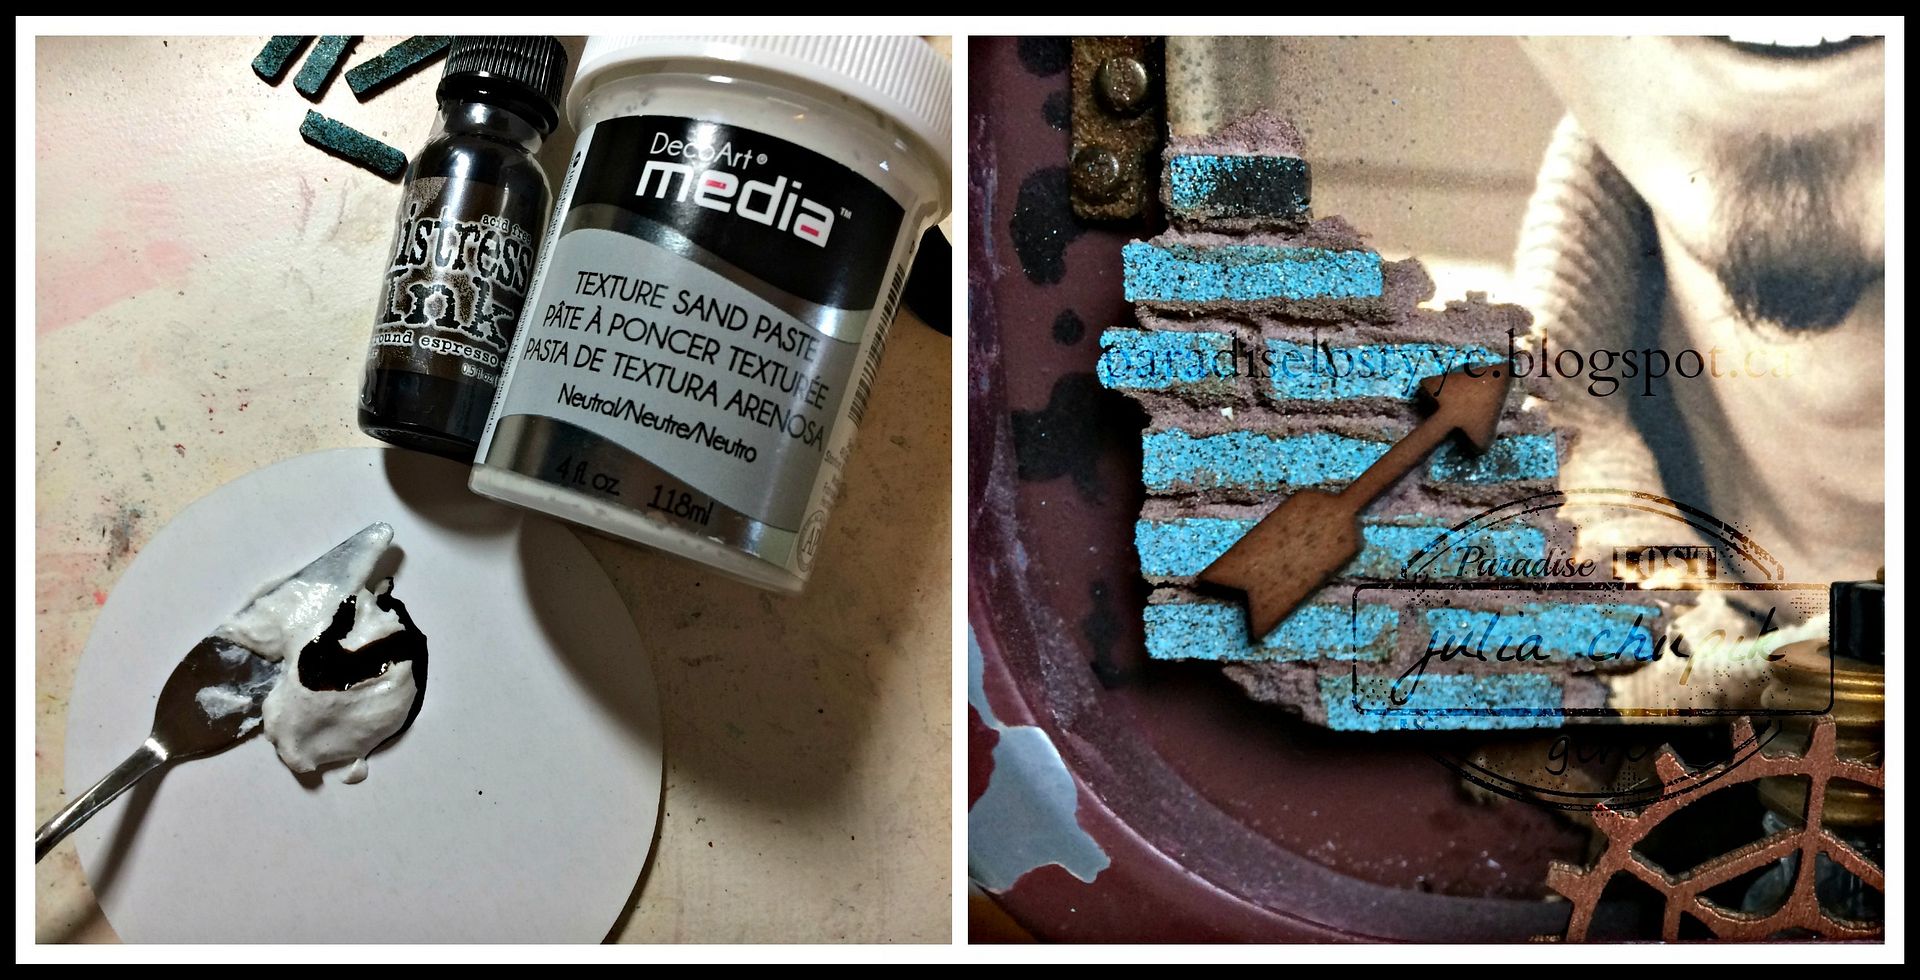
Bricks need mortar - so I made some using Texture Sand Paste from Deco Art Media and a couple of drops of Ground Espresso Distress Ink. I used a tiny spatula to spread this between the chipboard bricks.I love how this turned out!
I definitely was going for a Steampunk feel to this project and as luck may have it I have A LOT of gears in my stash. Metal gears, wood gears, chipboard gears.....so many gears!

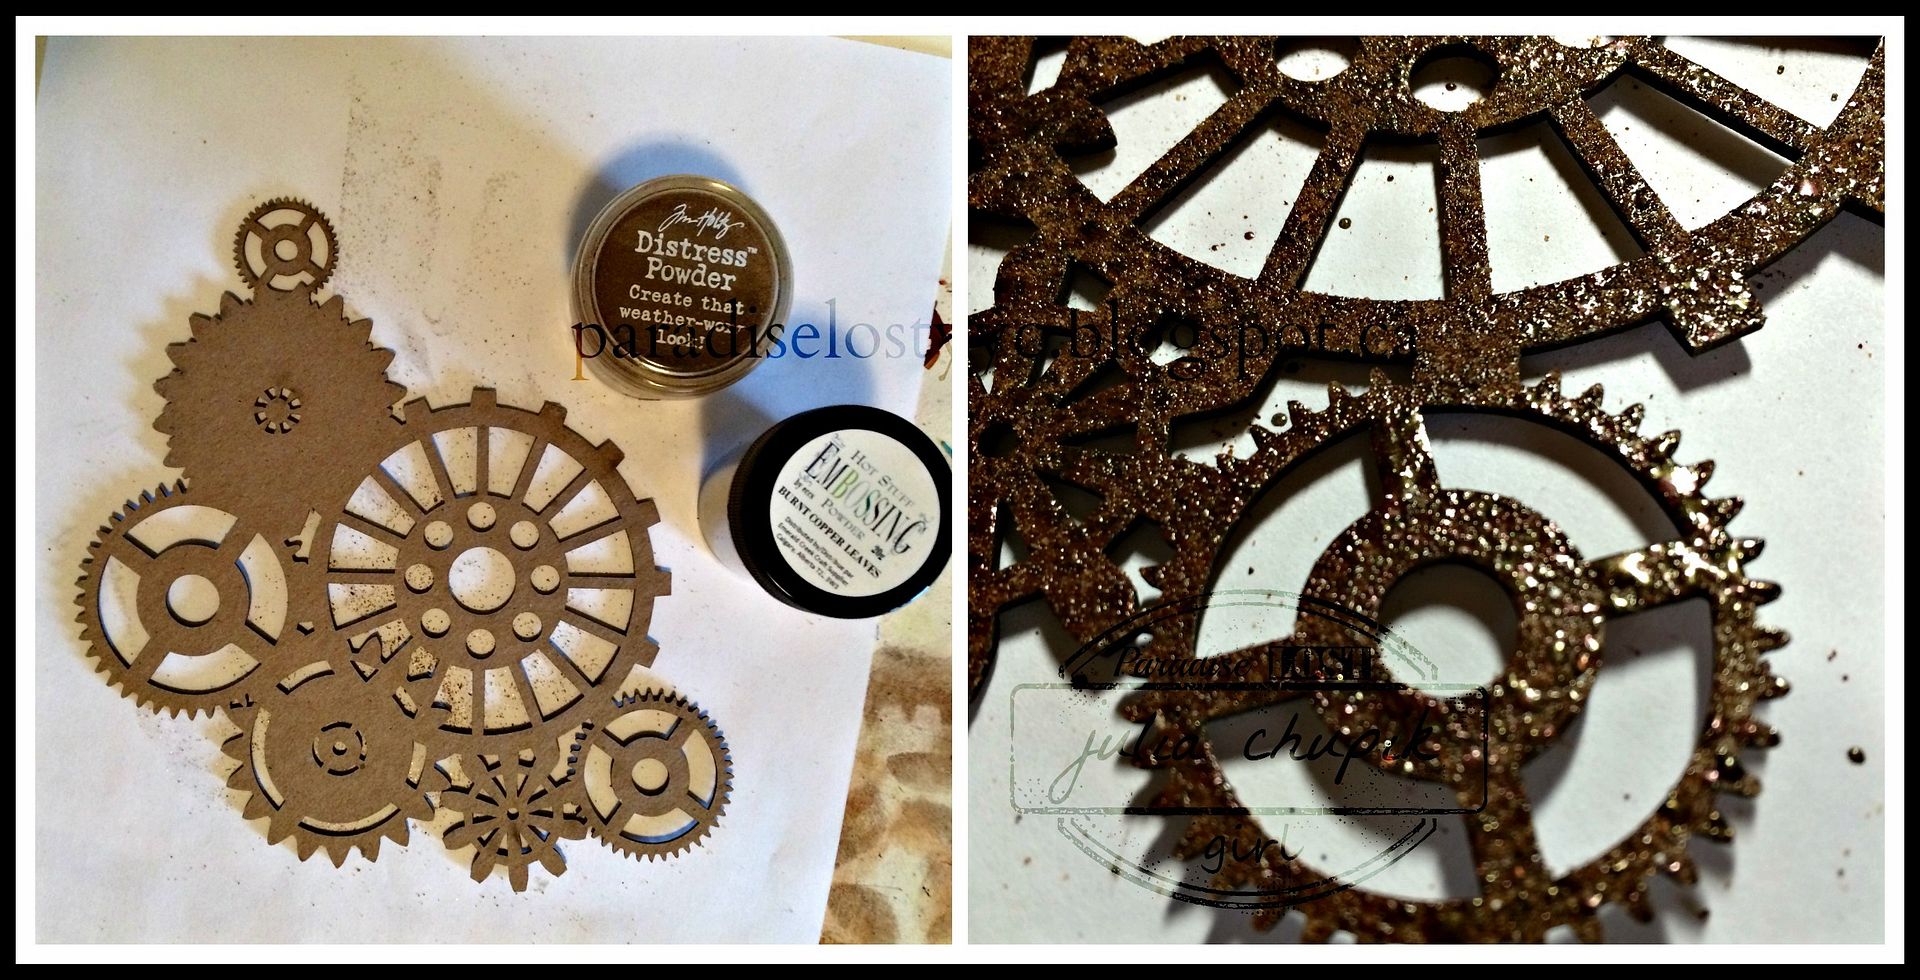
I wanted a grungy, rusty feel to this gear set so I decided to combine some Vintage Photo Distress Powder with some Burnt Copper Leaves Embossing Powder from Emerald Creek Craft Supplies.
I was absolutely thrilled with the end result - the perfect mix of rust and grunge!
I wish I knew who made this gear set - I checked a few sites but can't find it. Let me know if you recognize it!

The sentiment was embossed foil paper die cut with the word Genuine from the Friend Block Thinlit set and the word 'Smile' from the Friend Script thinlit set. I love this set because it so versatile. I have used it for many different projects & cards.
Assembling this project was a lot of fun. I found so many cool charms, gears & do-dads in my stash that worked so well!
Operation DeStash is well underway.
Thank you so much for visiting my blog today!

Challenges Entered:
SanDee & amelie's Steampunk Challenge - Anything Goes (Steampunk/Industrial)
The Dusty Attic - November Mood Board

The Dusty Attic - November Mood Board
Your first de-stash project turned out marvelously! I look forward to seeing more of your de-stash projects. :)
ReplyDeleteThank you so much, NeNie! I have several projects planned so stayed tuned!
Delete~~julia~~
This is so great and the texture is amazing! Love this :) You are getting into a great grove. Tutorial is perfect!
ReplyDeleteThanks Nicole! I am very lucky to have the Blog Whisperer on stand-by 24/7 ;)
DeleteWOW Julia - that is absolutely amazing!! Love it!
ReplyDeleteThanks Karon!
DeleteI love this project, Julia. It turned out really well. What a wonderful way to use your products.
ReplyDeleteThank you so much Sharon!
DeleteWOW - this is just awesome ! I LOVE the grout inbetween the mini bricks !
ReplyDeleteThank you for playing along with this months Mood board challenge as well
Jen
Thank you so much, Jen! The grout was my favourite part to do and the sand texture paste gives it a wonderful feel.
DeleteSuch a beautiful photo of a wonderful young man and such a fabulous alteration of that frame, Julia!
ReplyDeleteIt looks fantastic!
Thank you so much for playing along with us at SanDee&amelie's Steampunk Challenges!
Hugs,
Claudia x
Thank you so much, Claudia!
DeleteAbsolutely awesome, down to every last detail!
ReplyDeleteThanks, Deanna!
DeleteAbsolutely awesome, down to every last detail!
ReplyDeleteThis is awesome! I love the bricks and grouting - so clever!
ReplyDeleteGreat work with that frame and recipe :)
ReplyDeleteThank you for playing along with us at SanDee&amelie's Steampunk Challenges!
Thank you so much!
DeleteAbsolutely STUNNING....love your 'grungy' vibe and it's perfect for your photo.....you've used the Dusty Attic brick bg soooo effectively, too. Thanks so much for joining our challenge this month.... & I need to take a leaf outta your 'de-stash' book!!! GO YOU:)
ReplyDeleteThe struggle between using what I have and buying all the new stuff is really hard, isn't it?!?
DeleteThank for your comments ~ I really appreciate it!
And what a smile it is! He is precious, I know you are proud! Great way to use these awesome items! You pieced it all together just perfectly!
ReplyDeleteWhat a great project! Amazing texture and details. Thanks so much for joining us at the Mixed Media Monthly Challenge.
ReplyDeleteJulia, your project turned out so super cool!! Love how you used all those gears. So clever. And that Texture Paste?! Love that!! So glad that you joined us this month at the Mixed Media Monthly Challenge. xo
ReplyDeleteThank you, Lisa! The bricks & texture paste were my favourite part to do. They turned out better than I imagined. :)
DeleteWhat a amazing project, LOVE!!!!
ReplyDeleteThank you so much!
Deletevery very cool project!! love how you created your bricks, such a great idea! Thank you so much for playing with the Mixed Media Monthly Challenge!
ReplyDelete-Rachel
rwkrafts.com
Thank you so much, Rachel!
Deletevery nice...thanks for inspiration
ReplyDelete