Showing posts with label Dylusion Sprays. Show all posts

Thursday, 14 July 2016

All The J's - any my final canvas in my family series

Well, this series of canvases have been a lot of fun to make.
It has also helped me use up A LOT of chipboard letters I have been hoarding in my stash.

This canvas features a recent photo of myself that my husband took during our last trip out to 
Lake Louise, Alberta.

Before we get to the process photos here is the finished canvas ~

For this canvas I used Dylusions Ink Spray in Postbox Red and Distress Spray Stain in Carved Pumpkin & Wilted Violet.

Once I was done with the sprays and dried the entire canvas with my heat tool - I starting applying Distress Ink with a blending tool.

Next, it was time to apply some texture stamps with Archival Ink.

At this point, I took a small paint brush and gesso and painted the entire background leaving the letters. It helped blend the background colours and make the letter pop.
Unfortunately, I forgot to take a photo. Ooops.

My focal point consisted of paper and flowers from the Prima Stationers Desk line.
They worked perfectly with the canvas. The metal bee embellishment was another stash find.


Friday, 8 July 2016

All The G's - another letter canvas.

I'm back with another chipboard letter canvas - this time it's all the G's - and features a recent photo of my husband Glenn. 

Here is the finished canvas ~

As with my other canvases - I started with a plain 8x10 canvas that I adhered every single chipboard 'g' that I could find in my stash. I used every single one! Once the matte medium was dry I covered the entire canvas in gesso.  
After the gesso was completely dry I began spraying my canvas with Dylusions Ink Sprays ~ Fresh Lime, Calypso Teal & London Blue.
I couldn't let all the awesome colour go to waste so I grabbed a couple of tags and my art journal to soak it all up for future projects.

Next I added some stamping using some of my favourite texture stamps and Archival Ink in Jet Black, Leaf Green & Potting Soil.

I grabbed my Distress Crayons next and used them to apply some highlights to the embossed textures on some the letters.

I even out the background & to help the letters pop, I painted around the letters with Dylusions Paint ~ Fresh Lime & Vibrant Turquoise. I love Dylusions Paints - they are so lush and smooth!


Next up - my trusty Black Distress Crayon to dirty things up a bit.

I used my white Sharpie paint pen to add highlights around the letters of his name and a few added splotches of paint in white and black to finish it off before adding the focal point.


To anchor my photo to the canvas I took some cheese cloth and rolled it in some Squeezed Lemonade Distress Stain. To grunge it up I rubbed my Walnut Stain Distress Ink Pad over it.
my next layer is a piece of wood veneer paper from MME that I have had in my stash for quite sometime. I used Walnut Stain Distress Ink & my blending tool to add some colour then the spritz & flick technique to remove some colour and to add interest.

Here is a close up of the layers ~

And another one of the canvas ~ 

~Finished canvas~


Monday, 6 June 2016

All The D's ~ Dashing Daylen

Hello! I am back today with another mixed media canvas I created 
using chipboard letters from my stash. This canvas features a selfie photo I 'stole' from my son's Facebook page. He's my youngest and this past fall went off to college to pursue his dream of becoming a graphic artist/character designer. Check out his artist page on facebook to follow his journey and to see some of his art - Daylen Chupik ~ Artist.

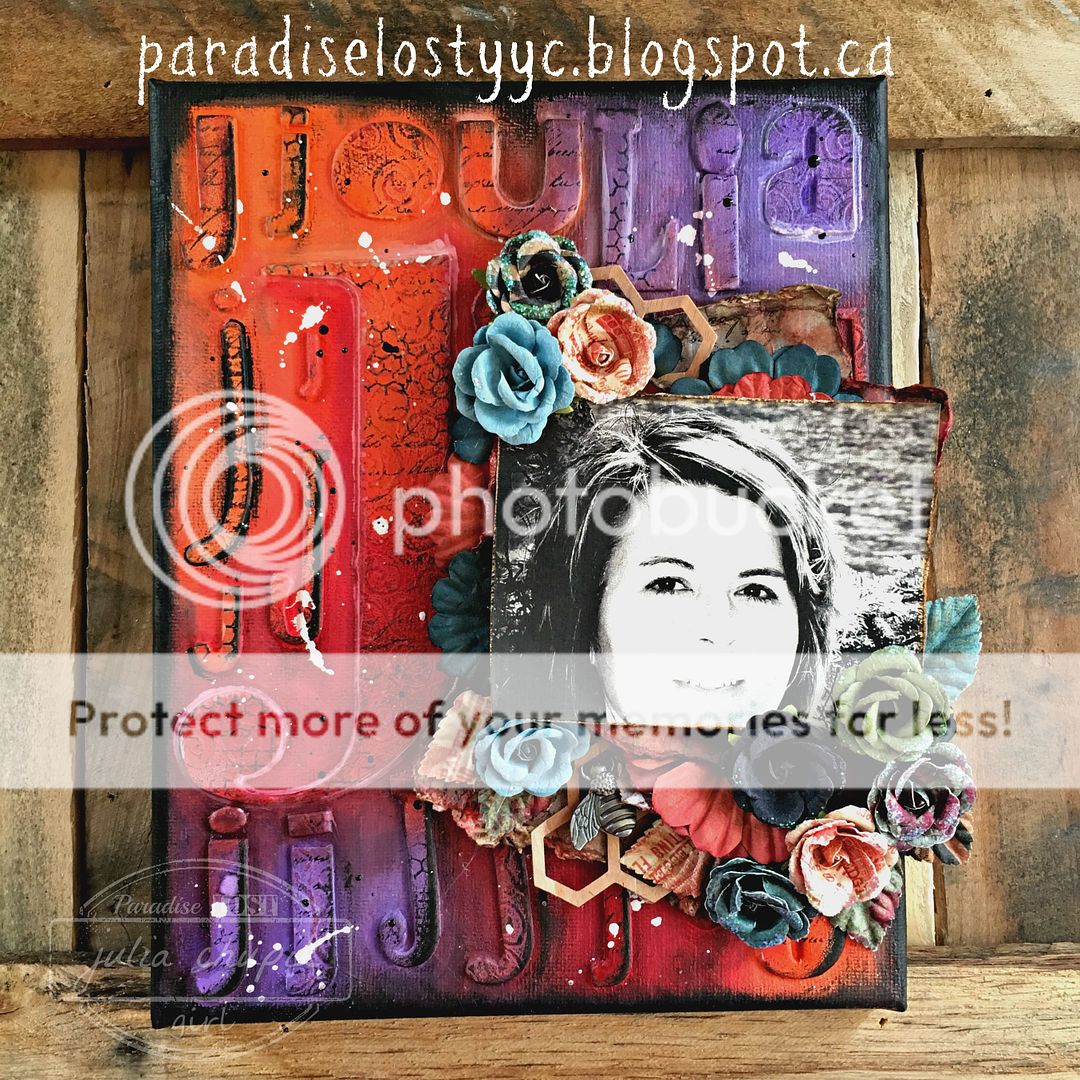
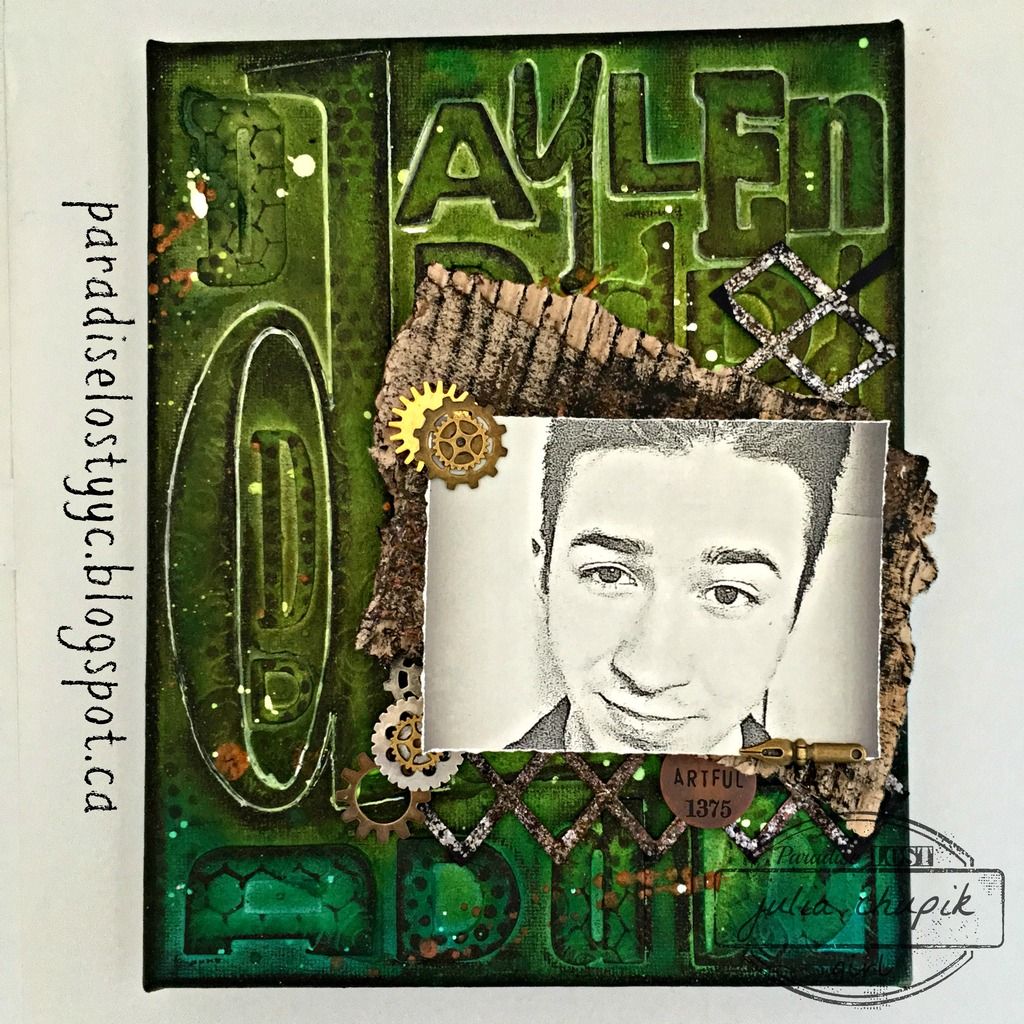
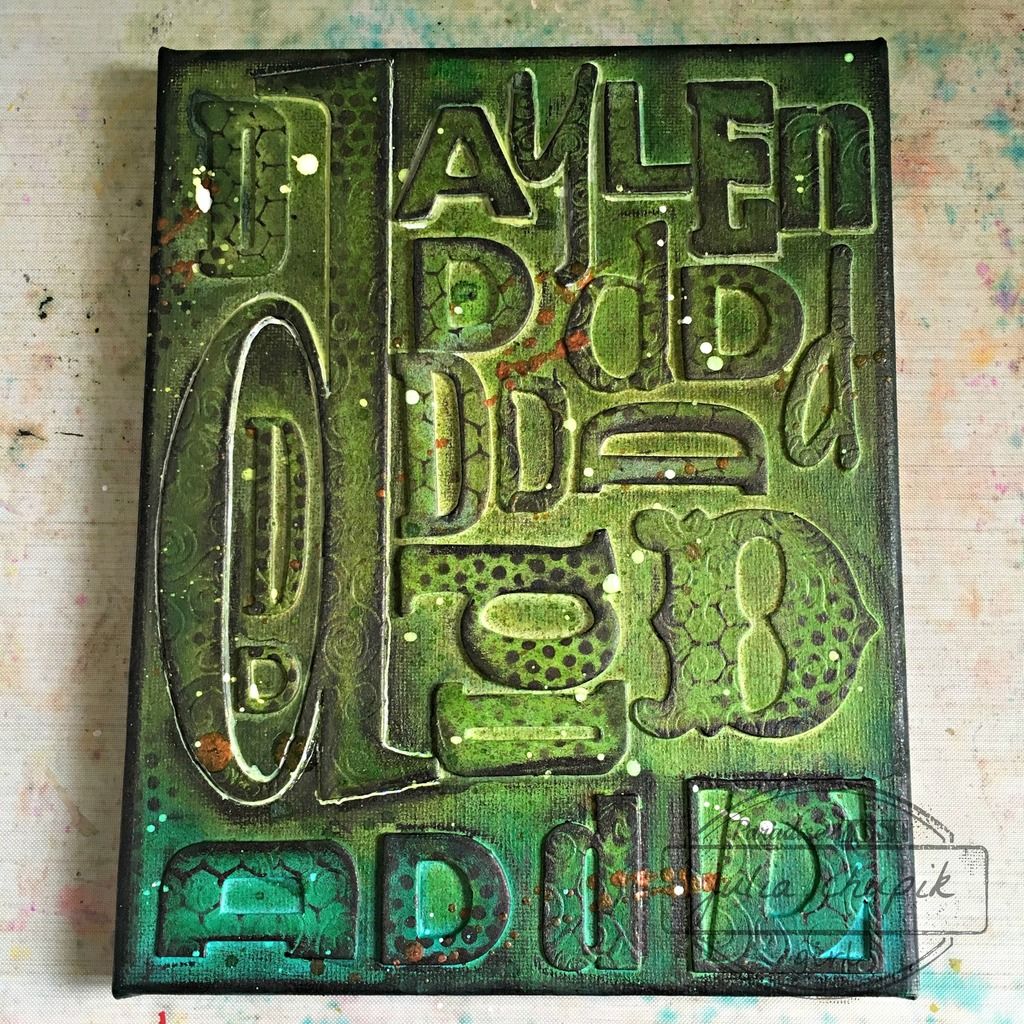
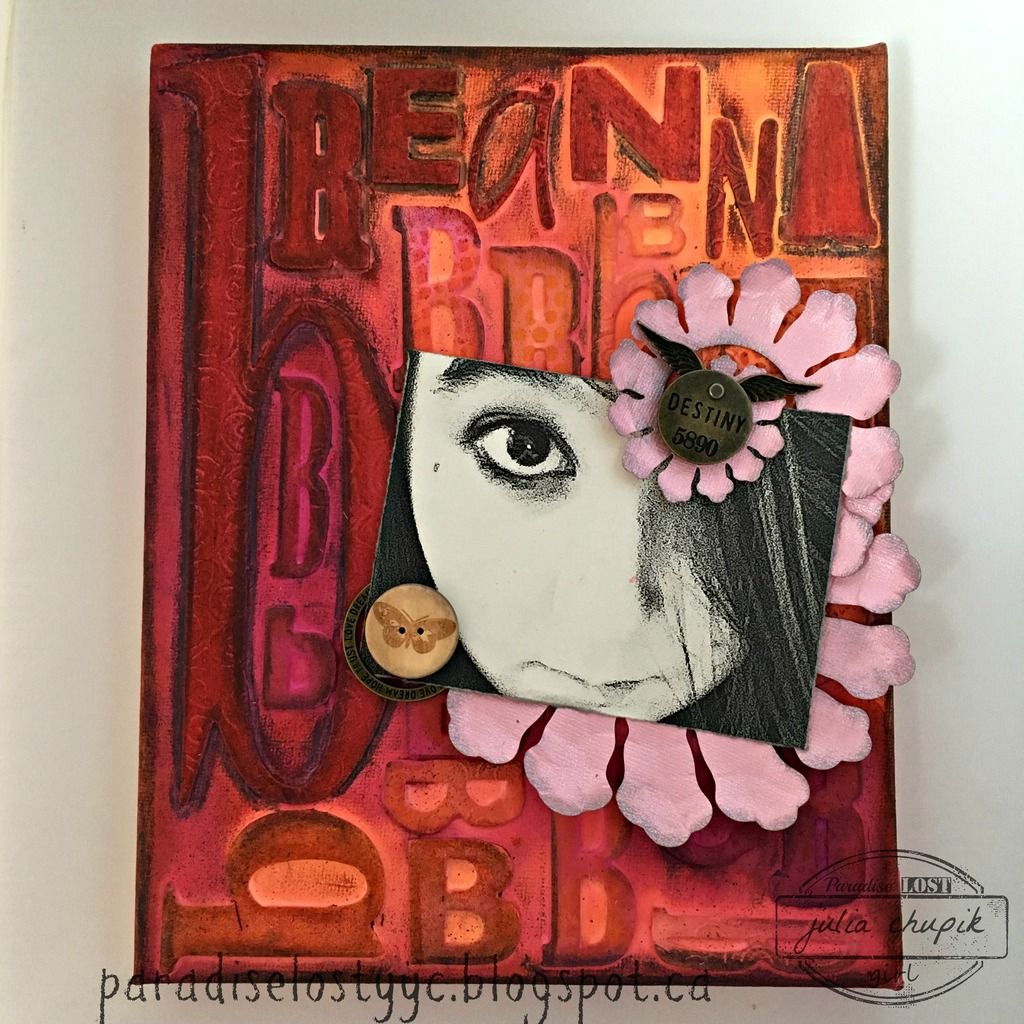
Here is my finished  canvas ~ 

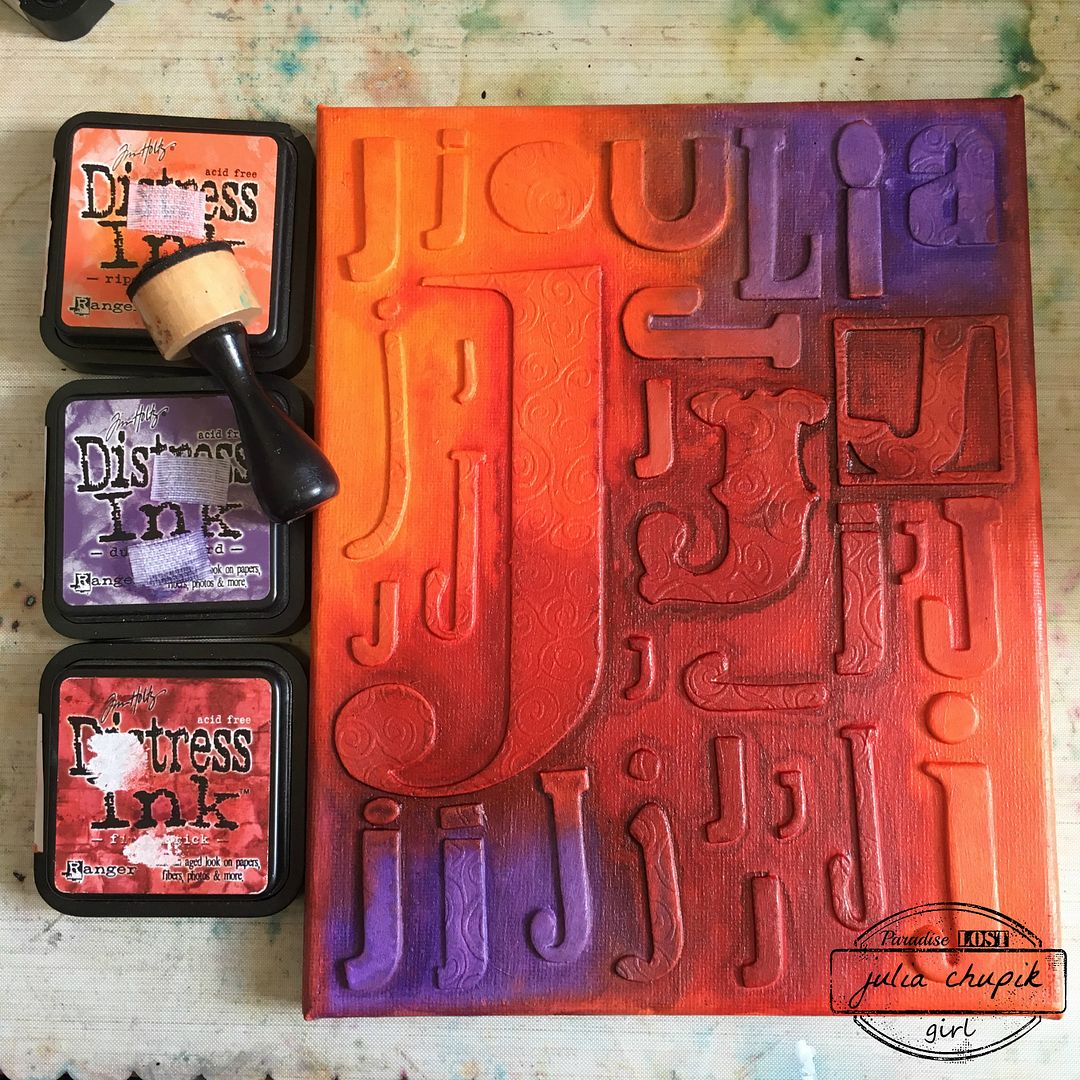
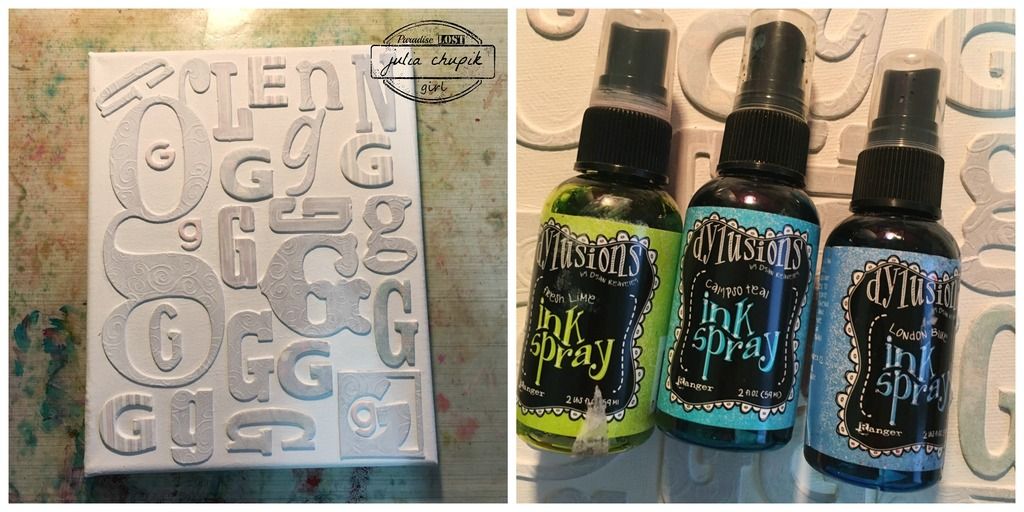
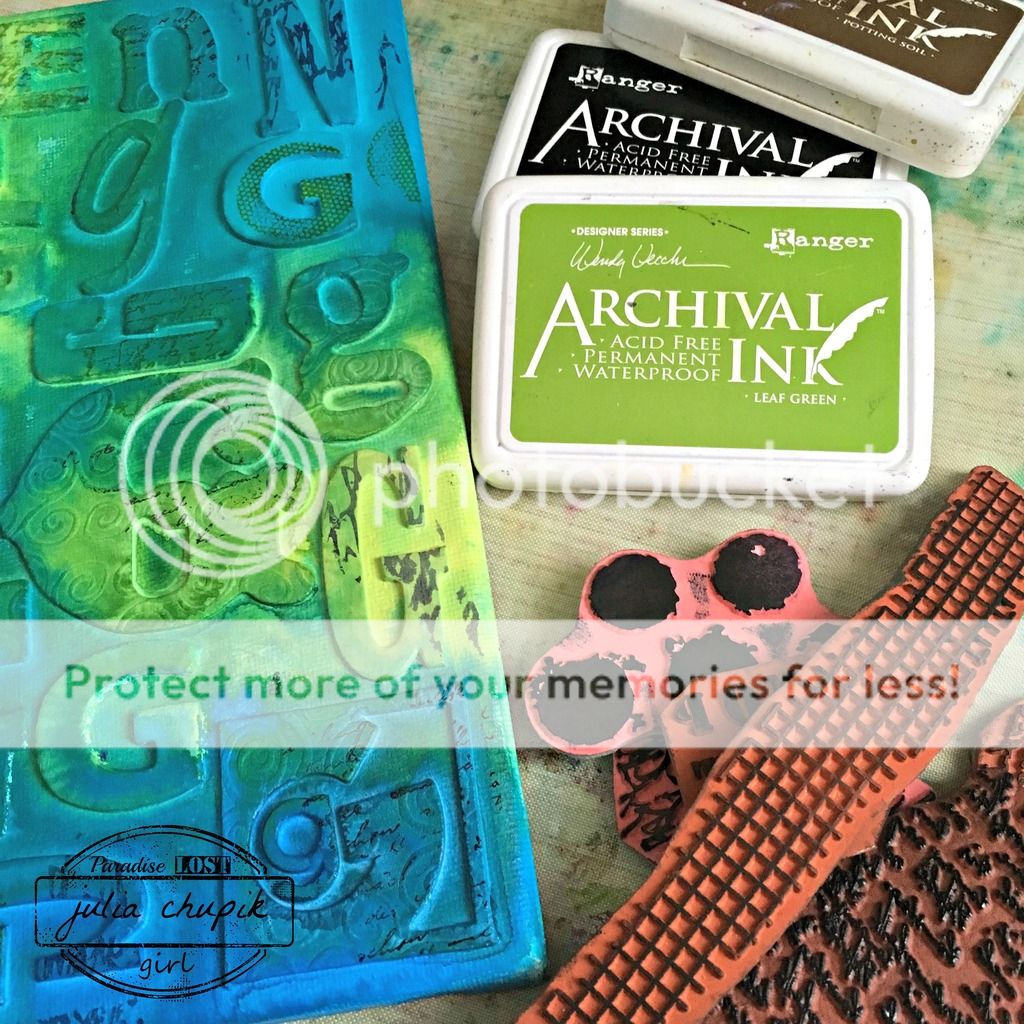
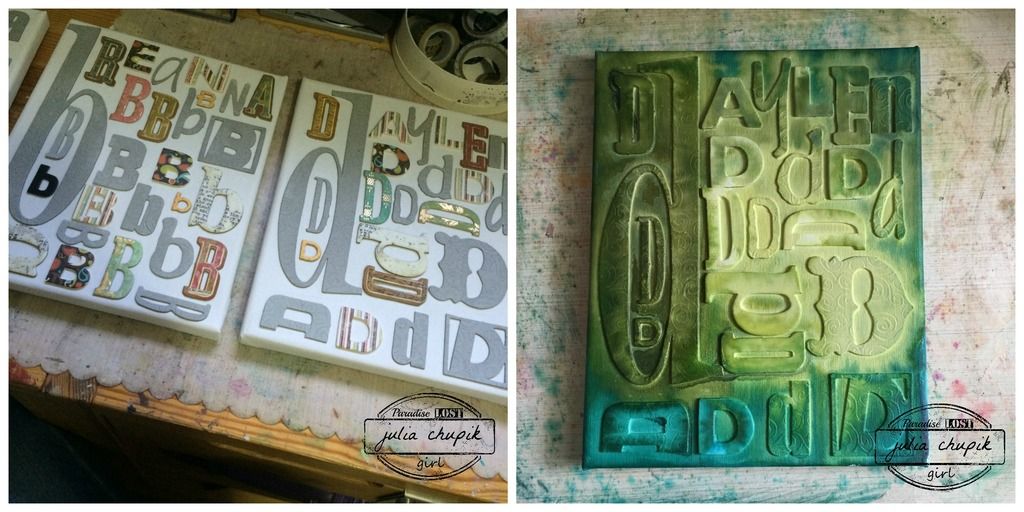
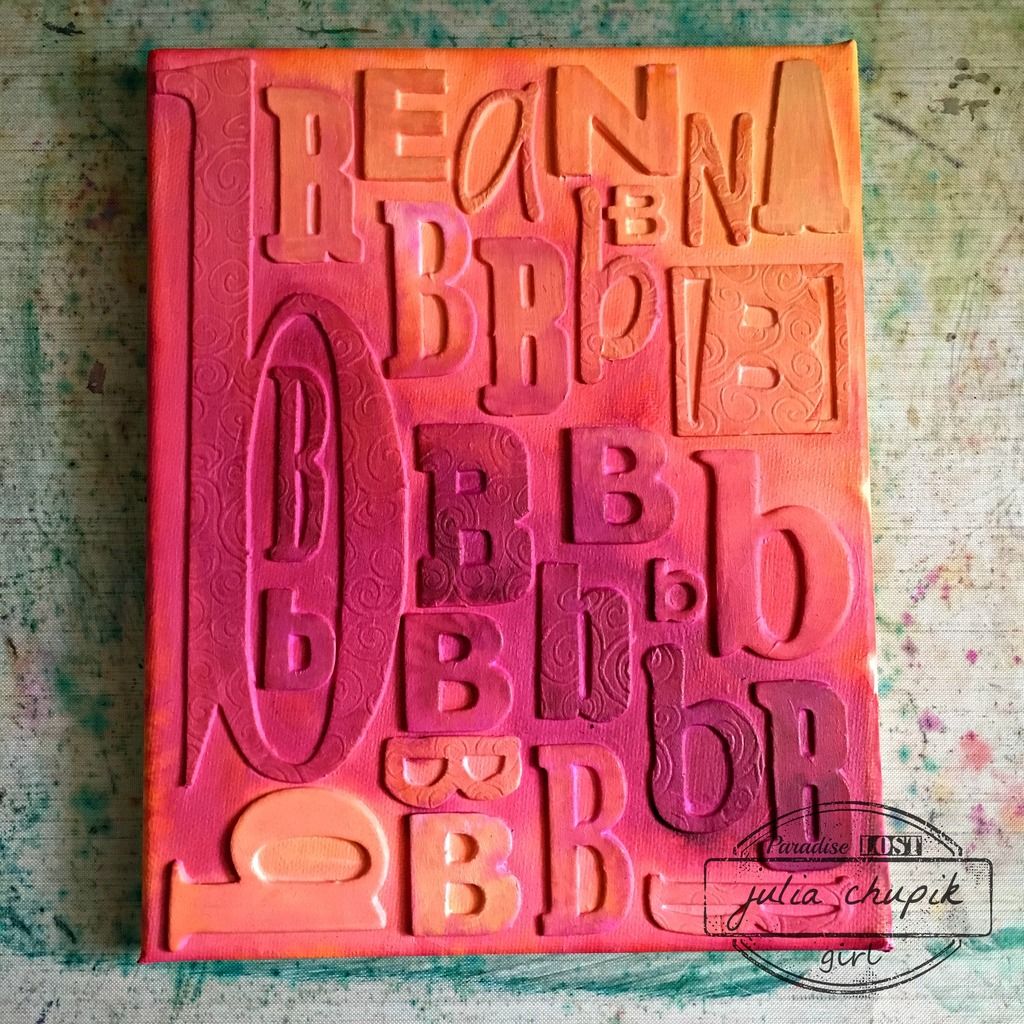
First I started with an 8x10 canvas and adhered my chipboard down with matte medium
then covering it the entire thing in 3 coats of gesso.
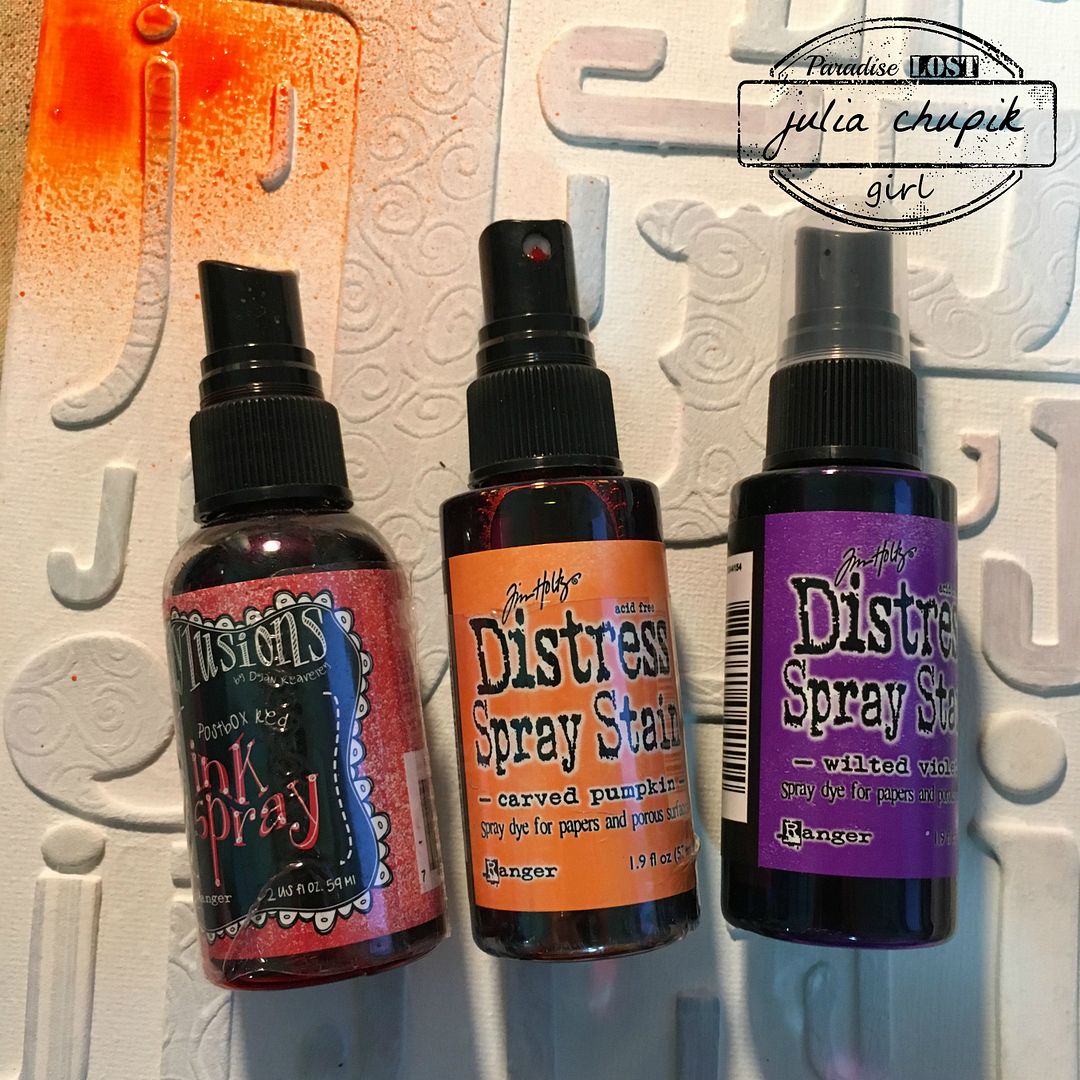
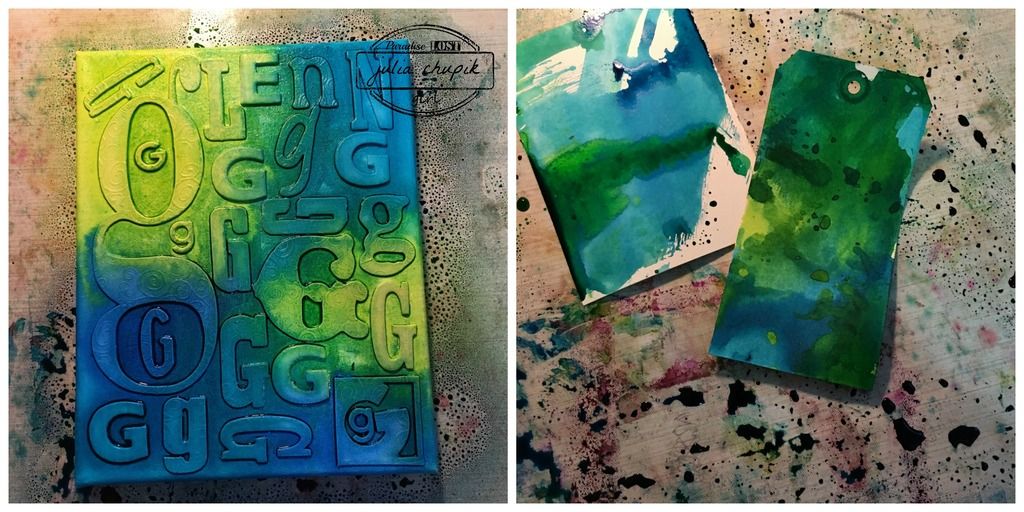
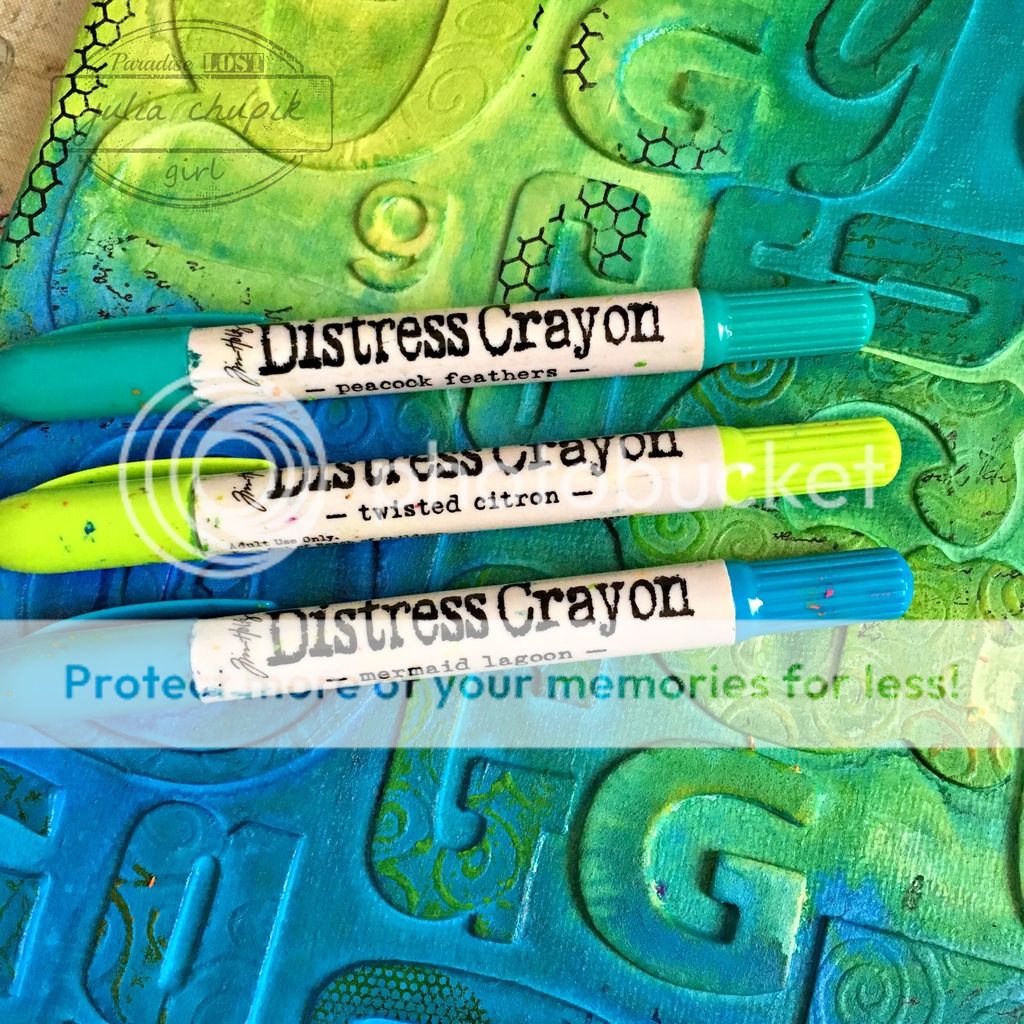
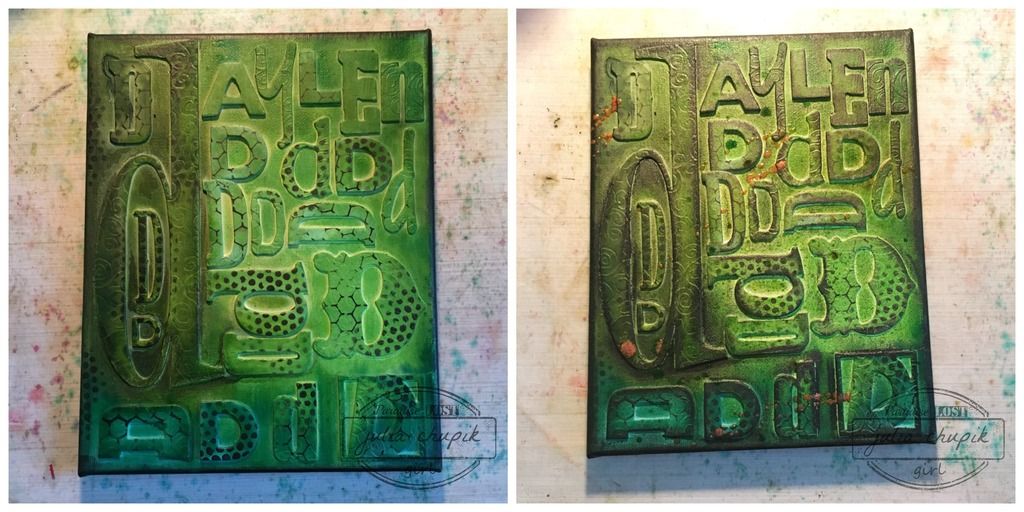
Once everything was dried, I started spraying my canvas with Dylusions Sprays ~
Fresh Lime, Dirty Martini, Polished Jade.

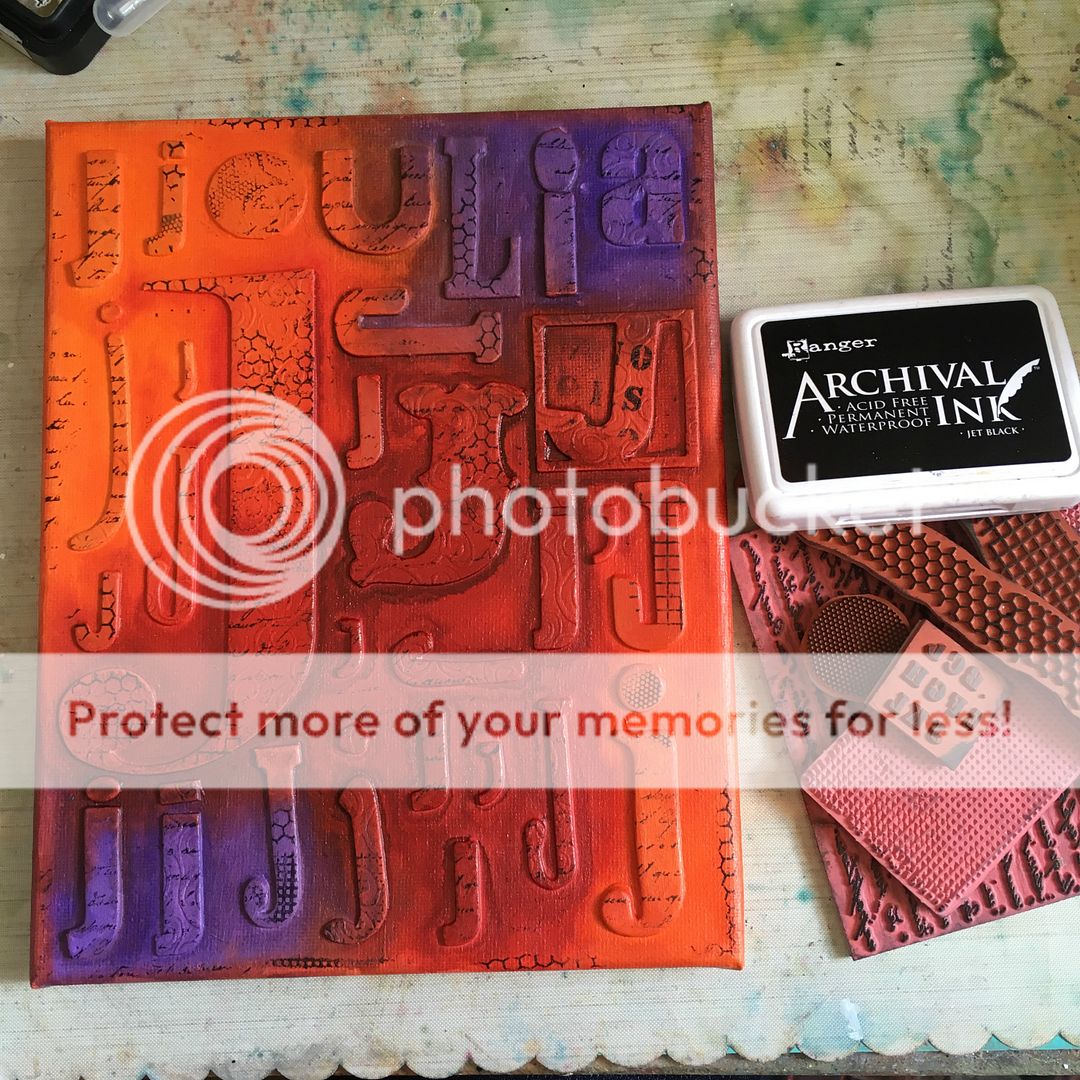
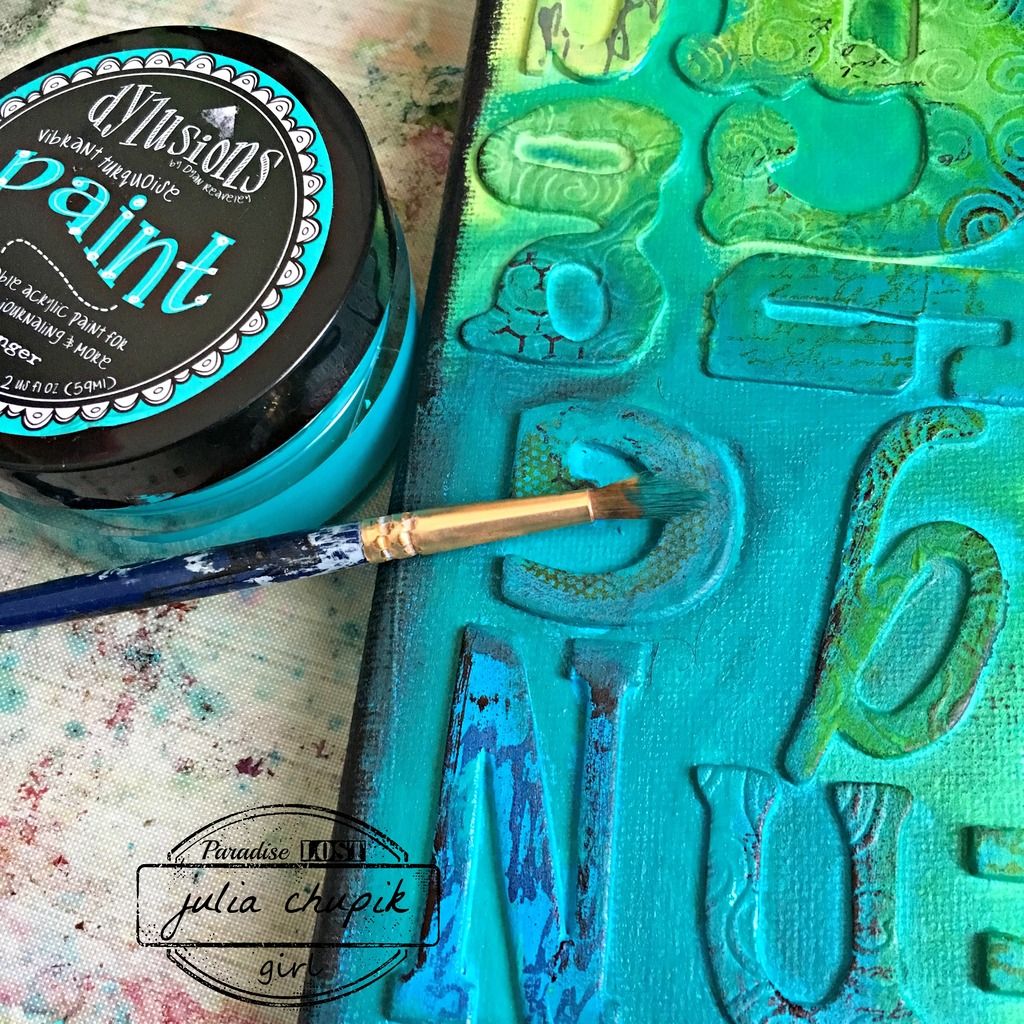
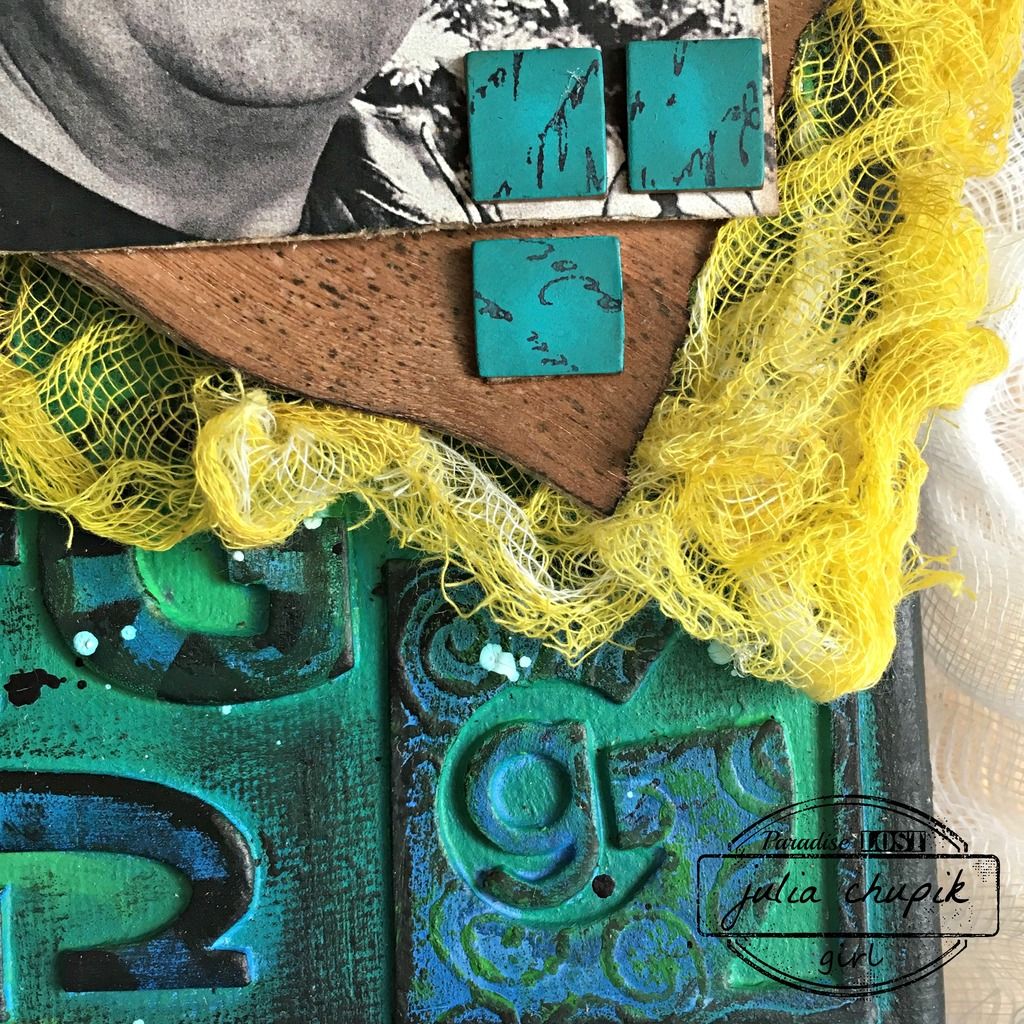
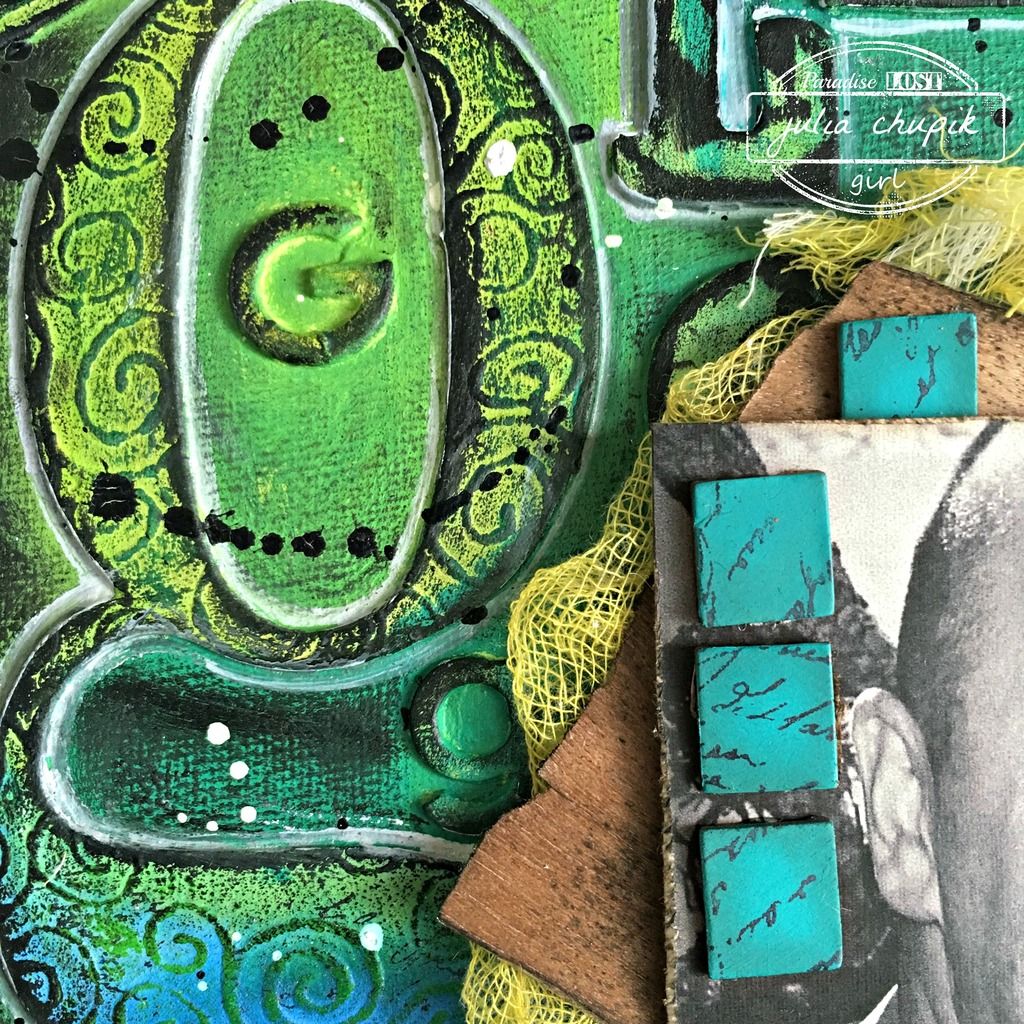
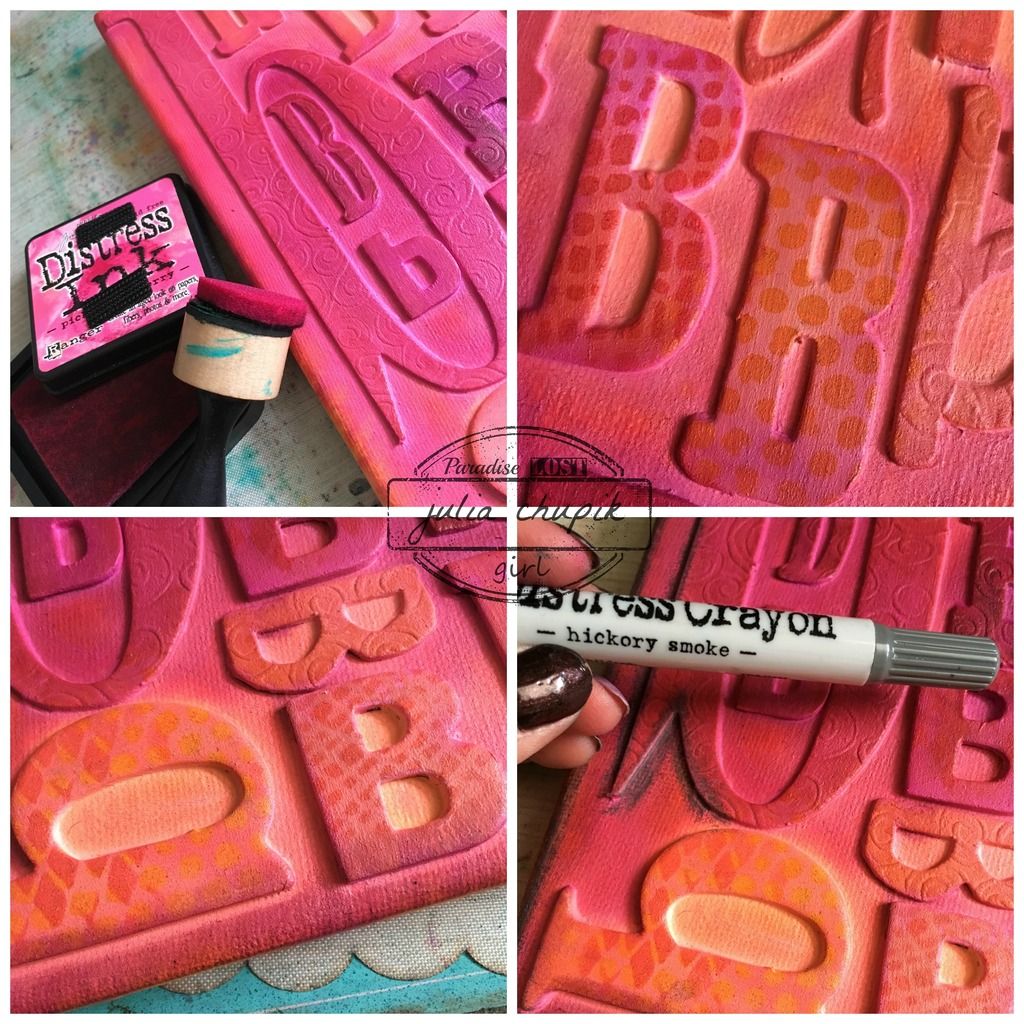
Once the sprays were dry I used my Black Marble Distress Paint & blending tool with a couple different layering stencils to add some random patterns & added some Peeled Paint & Cracked Pistachio Distress Ink. The copper splatters are irRESISTible Texture Spray from Imagine Crafts.

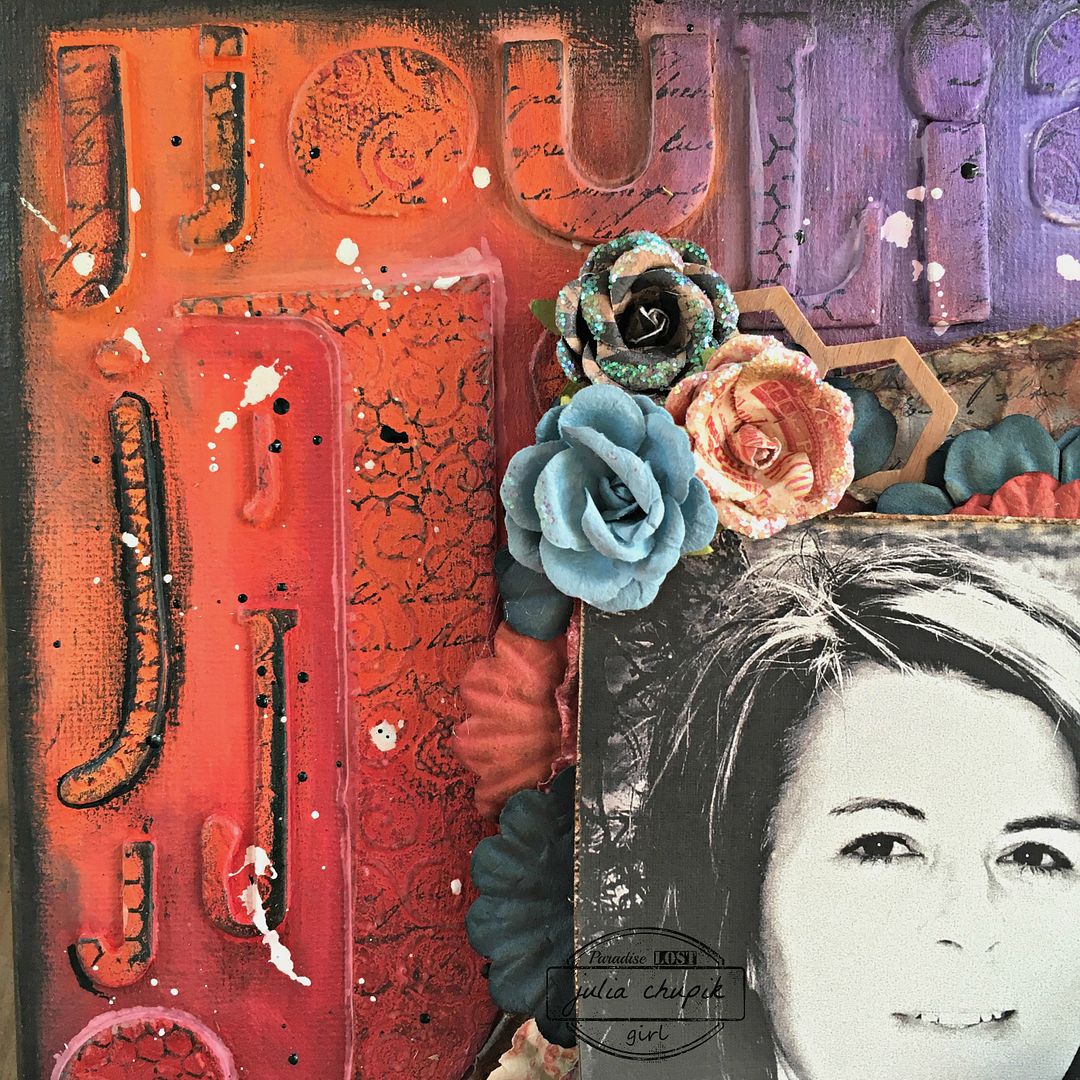
At this point, I realized that the letters of my son's name needed a little help to pop off the dark canvas background so I took a white fine point Sharpie Paint Pen and traced around them. I also used this pen to add some white splatters to help break up the darkness of the canvas.
To help 'frame' the canvas I added some more Black Marble Distress Paint with a blending tool
 to the sides and edges of the canvas.

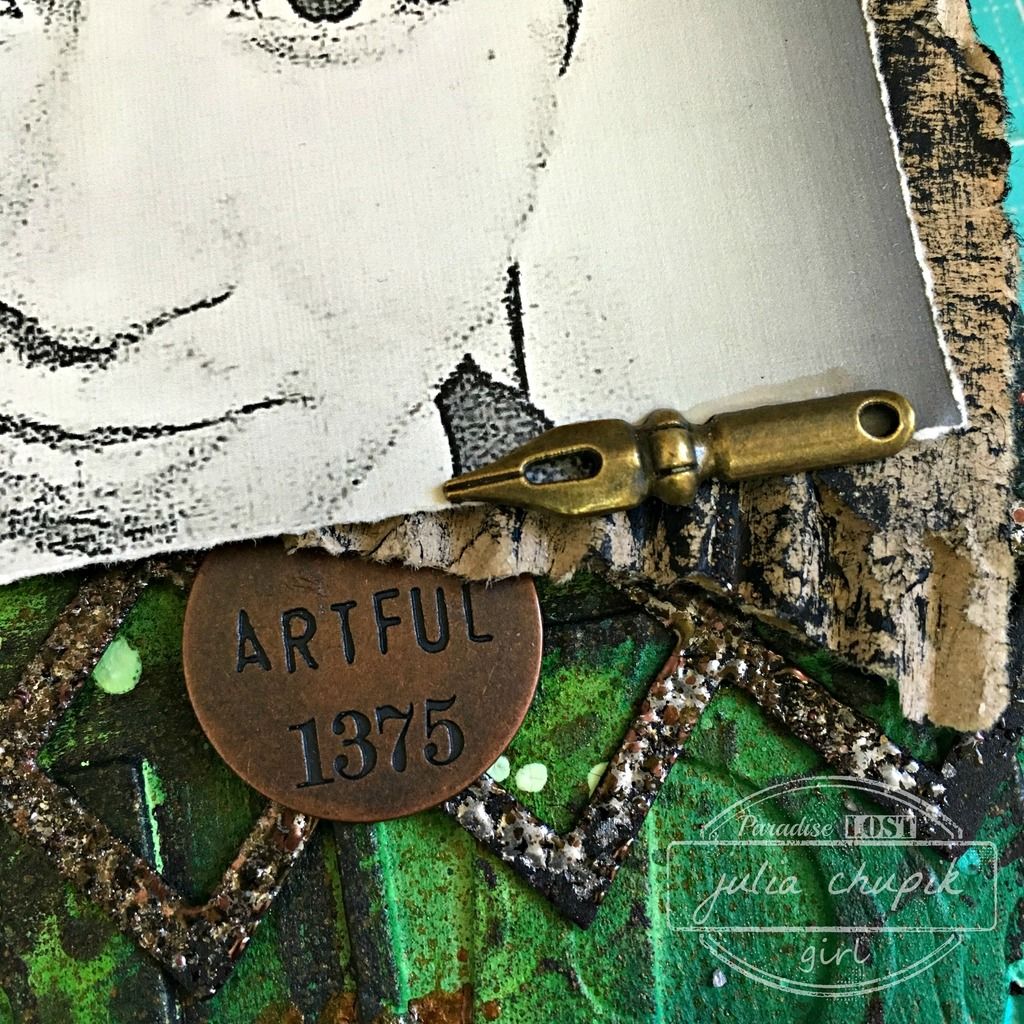
Now on to my focal point ~ the photo was a selfie I took off my son's Facebook page. I downloaded it and did some editing in PicMonkey before printing it off on linen cardstock.
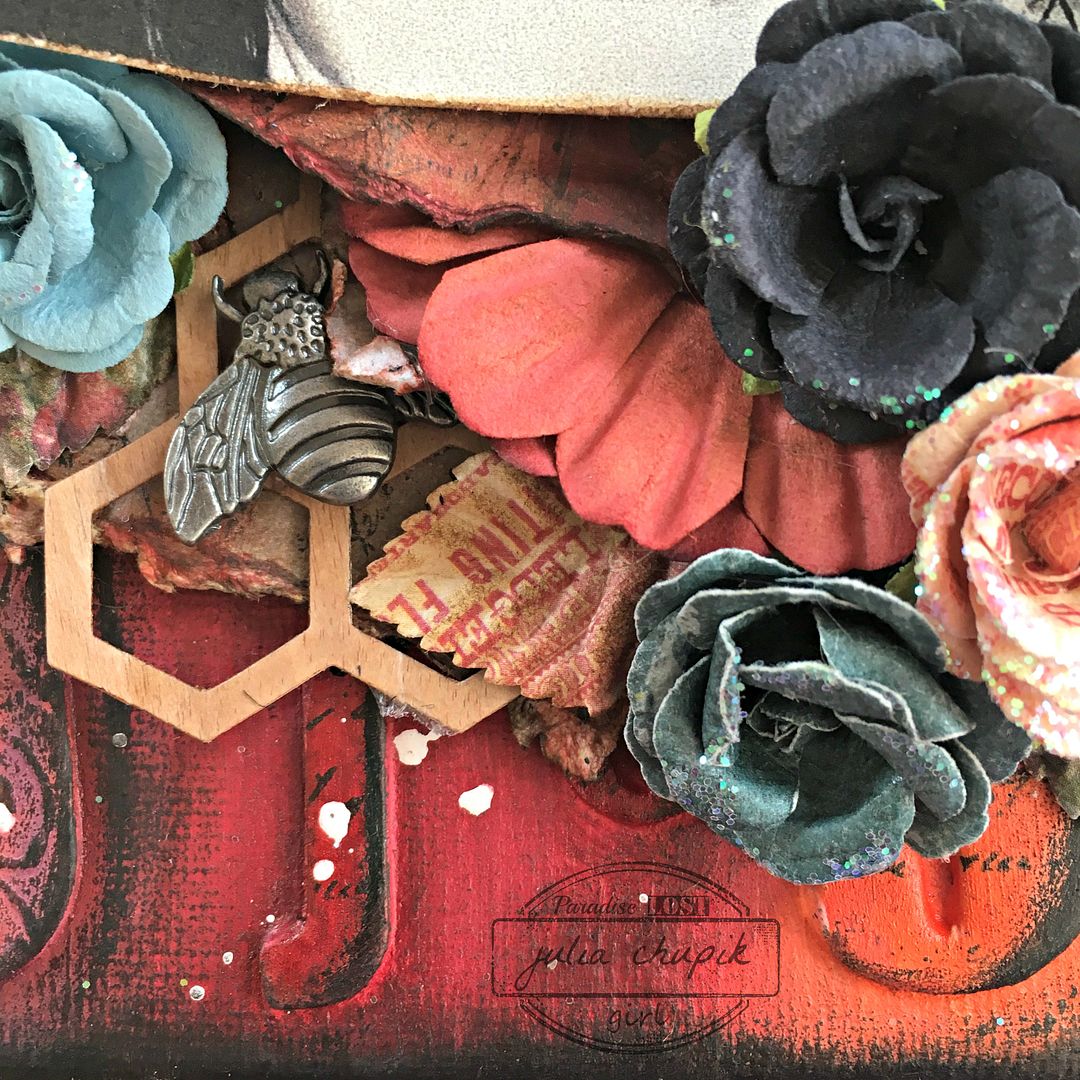
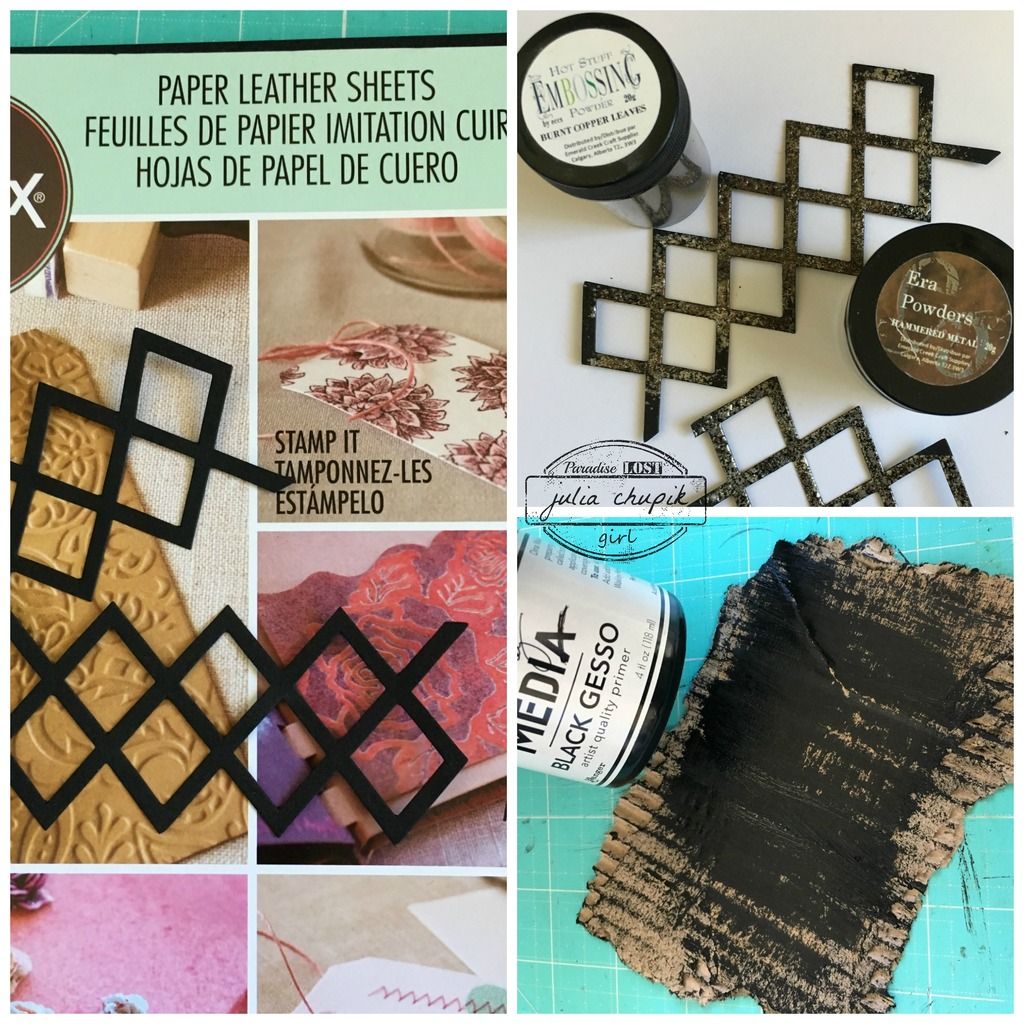
I used the Lattice Framework Die from Sizzix with the new Leather Paper Sheets also from Sizzix.
I added some Burnt Copper Leaves & Hammered Metal Embossing Powder from Emerald Creek Craft Supplies  to add a rusty metallic feel to the lattice.
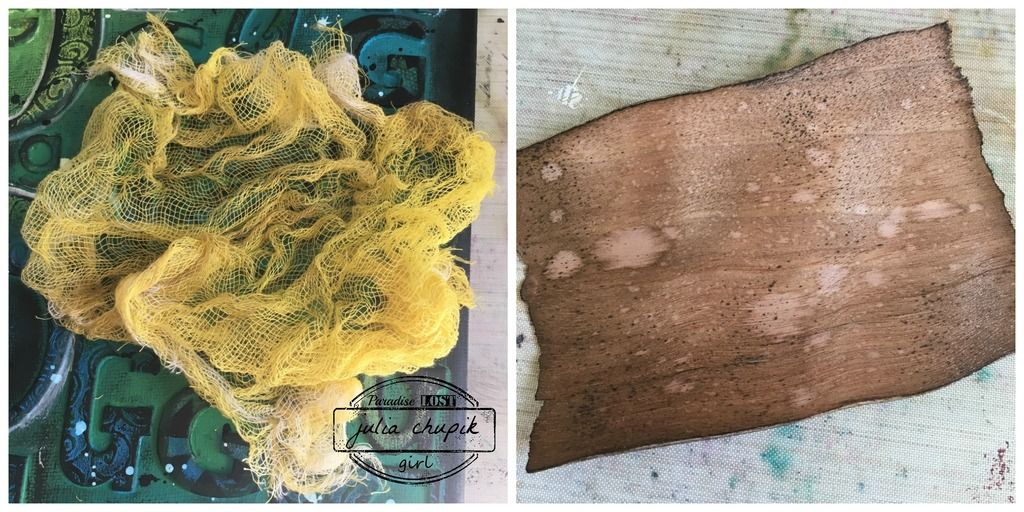
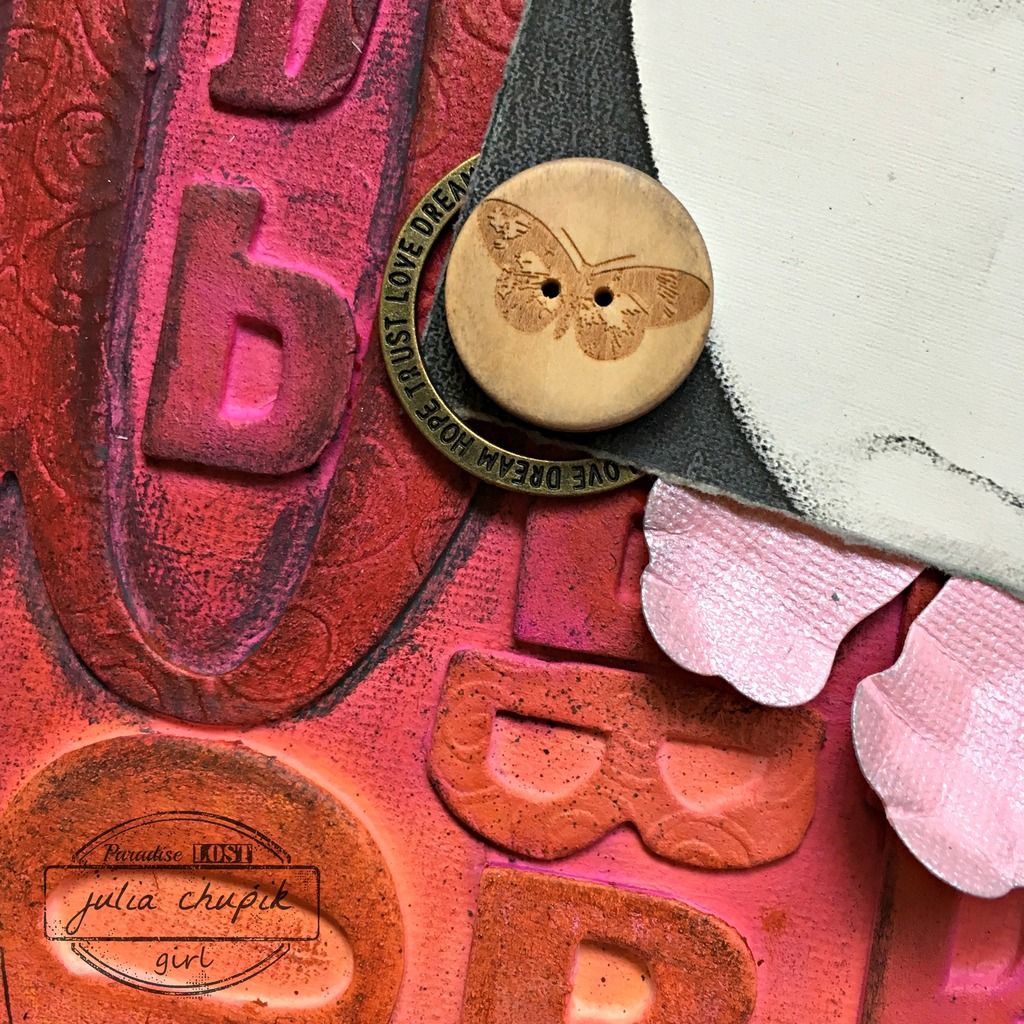
 The anchor piece for my photo was some cardboard that I roughly torn up to be a little bit larger that my photo & dry brushed some black gesso over.

Here is a close-up photo of the lattice die with the embossing powders from Emerald Creek.
These powders are so delicious! I love every single one I have ever tried. Be sure to check out
the Emerald Creek store for these and so much more!

Once again ~ the final project. I enjoyed making these much and using up so many chipboard letters that I am also making more! One for me, my husband, our dog, a family one.....so many ideas!


Thursday, 2 June 2016

All The B's - Being Beautiful Breanna

Hello! I'm back this week with an idea that I have had going
around in my head for some time. When I was cleaning/organizing/purging my
craft room a few months ago I realized that I had accumulated quite quite a lovely collection
of chipboard & grungeboard alphabets. It was time to start using these.

This is what I decided to do ~~~


I started with an 8x10 canvas and my collection of alphabets.
I first went through and spelled out my daughters name then pulled out all the B's.
I figured out the layout then using matte medium adhered them all down to the canvas. I then covered the entire canvas in the matte medium. I let this dry completely then applied 3 coats of white gesso.


I was finally ready to add my colours -
Dylusion's Sprays in Pure Sunshine, Squeezed Orange & Funky Fushia.
I love these colours together! So bright & sunny.

Next I added some Distress Ink in similiar colours just to help the letters pop a bit.
I also added some patterns using my layering stencils.
Lastly it was time to add a bit of grunge with my Hickory Smoke Distress Crayon along the edges and around the letters.

It was time for a few embellishments - 

I kept the embellishments pretty simple. 
Thanks to my craft bestie Nicole Wright for letting me browse her impressive die collection - thats where I found the new Rolled Flower Die from Sizzix by Eileen Hull.
I cut the die cut in half stapled it back together in the shape you see here and using the blunt end of a paint brush shaped the petals. Before adhering to my frame I added a bit of Hickory Smoke 
Distress Ink to the edges.


submitted to the following challenges:

Rhedd's Creative Spirit - June Challenge