Showing posts with label Distress Ink. Show all posts

Wednesday, 18 April 2018

Some Fur Babies Have Spikes - A Wild Whisper DT Project

Hello! 
It has been a crazy time in my life so not a lot of creating is happening.
I did manage to get another Fur Baby project finished for Wild Whisper.
This weeks project isn't so much about fur as it is about spikes. A spiky hedgehog to be exact.

Here is a sneak peek pic of the little pincushion. Head over to the Wild Whisper blog for more photos and details on how I created this page.

Don't forget to use the promo code DTJulia when placing your order at the Wild Whisper Online Shop. You'll save 10%!


Wednesday, 11 October 2017

Twisted Trinket Box

Welcome back! 
I am here to share a 3D Halloween decor piece today.


I used the 3 In 1 Trinket Box Scoreboard XL die by Sizzix from designer Eileen Hull. 
I cut our the pieces using white mat board. I painted these with Dylusions Paint: Tangerine Dream.
Then sanded the edges.

Next I inked them with Walnut Stain Distress Ink. The sanded areas picked up the ink really well to give the painted mat board a dirty distressed look.

Then I added some more grunge with Black Soot Distress Crayon.

Before assembling my box I added some stamping.

One of the focal points of my box was this Ghost Die - Tim Holtz Bigz Die from Sizzix.
I painted these with Dylusions Paint: White Linen.

I sanded the edges.

Then inked the edges with Black Soot Distress Ink.

For the inside of my trinket box I added some Black Soot Distress Crayon to 
these resin bones from Tim Holtz Idea-ology.

I added some mini Paper Dolls from the Tim Holtz Paper Dolls - Ancestors  Pack.


To add the light element behind the bone pile I made a small cut on the back of the box and inserted a tea light. I left it white for the photo but then later on painted and inked it to blend in more with box.

I added a small skull rub on to the boys face. The hand and spider are also rub ons.
A few Chit Chat stickers and a word token and my Haunted Trinket Box was ready to be displayed.
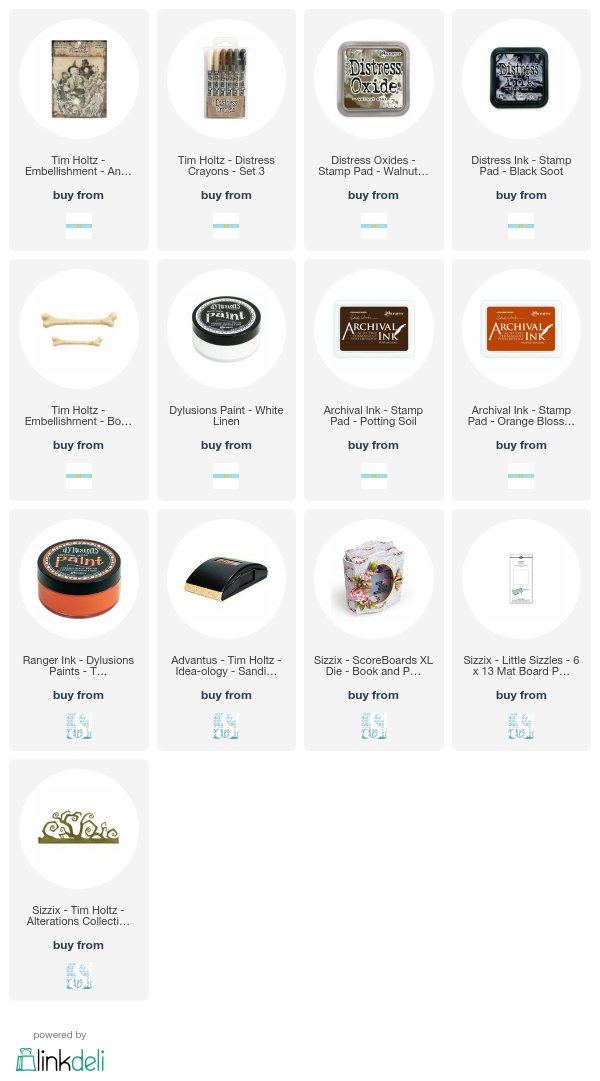
Here are the affiliate links for the products used for this project:
Wednesday, 28 June 2017

You Little Rebel.....A Hipster Birthday

Hello! I'm back with more Hipster love. I've been following the Hip for Summer hashtag on social media and love all the creative ideas and projects.

I decided to use my Hipster Monkey stamp with a cheeky sentiment stamp set to make this birthday card for a friends husband.

Here is the inside of the card....

The party hats & presents are stamped and die cut from the Crazy Accessories
Set from Stampers Anonymous and Sizzix I used Distress Oxides & a water blender pen to colour these. I love how well the Distress Oxides show up on the kraft paper.

I used Glossy Accents from Ranger on my Hipsters glasses.


Thursday, 4 May 2017

My Paper Doll Family

Hello & welcome back!

I'm here to share yet another Etc tag. I love these! LOVE!


Here is one I made using the medium size tag -
click on the photo to see more details and close-up photos.


The tag I have to share with you today is using the large Etcetera Tag.
The first thing I did was paint my tag with white gesso then set it aside while I 
worked on my focal point piece.


I started with a Tim Holtz Idea-ology Cabinet Card frame. I carefully opened it up and removed the front frame part from the back.

I used the smoosh technique to add some Distress Oxides ink to the inside of the back piece.
(not shown in photo - I smooshed the front frame into the left over ink to add some splotches to it)

Then used some Distress Ink & the Ornate Layering stencil with the stencil monoprint technique to add some interest over the Distress Oxide.

I added my Paper Doll parents to the background with some foam dots then added the frame
 with 2 layers of foam tape. To finish off the edges of my frame I cut strips off the packaging insert from a layering stencil and adhered them with tacky tape.


The gesso is now dry on the tag so its time to start adding my paint. I chose to use Pomegranate Seed & Black Marble Dylusions Paint for this. First I applied the Pomegranate Seed with a
dry brush. I then applied the black with a brayer. Once the paint was dry I used a sanding
block to distress the edges a bit.

Taking the same Ornate Stencil that I used on my cabinet card frame, I applied the some Picket Fence Distress Ink in a few spots on the tag. I also added some script stamping with black Archival Ink.

My next step was to mix some Distress grit paste with some Peeled Paint Distress Oxide.
I applied this through the Floral Layering Stencil on to the tag. Once the green grit paste dried I decided to add another layer of grit paste in a contrasting colour - this was Worn Lipstick Distress Oxide ink.

I assembled my focal point with my 3D cabinet card frame and various pieces of ephemera from my stash. 

I still wasn't happy with the edge of my cabinet card frame so I added some 
jute twine with a bit of hot glue. 

I used a couple of metal embellishments that I found in stash to cover the hole in the tag.

My finished tag - 

Tuesday, 28 March 2017

Get Distracted & Celebrate

Today was the first day in almost a week that I felt like getting creative. I have been fighting off a nasty cold/flu and it was a doozy. To get myself back into a creative groove I decided grab my Distraction Journal.

Click on the photo below to see how I created this journal.

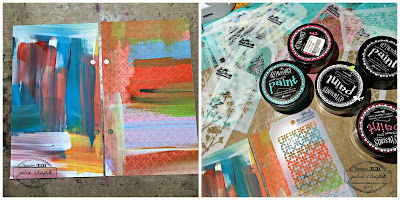
I flipped through my journal, chose these 2 pages and gathered up some materials: Dylusions paints & mini layering stencils.

I applied some stenciled images randomly over both pages. At this point I had no idea where this was going - I was just enjoying the process.

I am really enjoying using mask & silhouette stencils at the moment but I only one set and it was too big to use for these 7"x 5" pages so I decided to make my own. I used a piece of acetate packaging that I had been saving and my Butterfly Duo die from Sizzix.

I used Black Marble Dylusions Paint & a foam applicator with my die cut stencils. I then used some bright Distress Crayons to apply a bit colour to the edges of the butterflies.

I chose the Celebrate Life sentiment from a Dina Wakely Stamp Set to use and the Picket Fence Distress Ink worked great over the black paint. 

To finish off my page I used extra fine point Sharpies in pink & purple to trace the outline of the butterflies and add some splatters.

Creative juices restored! I'm back and ready to get crafty.


Submitted to:


Tuesday, 21 February 2017

Hipster Birthday Card

The move is done and everything is unpacked. 
**insert happy dance here**
I worked at lightning fast speed because I couldn't wait to start playing 
with my new Distress Oxides & Hipster stamps.

I just so happened to need a masculine birthday card and the 
Hipster Monkey was perfect!


My most favourite tool at the moment is the Misti. I can now get a
perfect stamped image on cold-pressed watercolour paper.

Now that I had a nice crisp image, I was ready to use my Distress Markers
to add some watercolour. For this one I used Wilted Violet, Hickory Smoke, Lucky Clover, Ground Espresso & Walnut Stain.

I applied a Thin layer of Distress Micro Glaze to my watercolour image to
protect it for my next step.

For my background I chose Wilted Violet Distress Ink and Vintage Photo 
& Broken China Distress Oxide.

I applied these colours to my craft sheet and spritzed with some water before laying
 my card in the inks. I repeated laying the card in the ink a few times & using my heat tool to dry
in between.

I absolutely love the oxidized effect of the new Distress Inks. Its gorgeous!

To finished off my background I used my ink blending tool to apply some black Dylusions paint through a couple of layering stencils. I stamped my sentiment words on some scrap watercolour paper: trimmed it out and inked the edges. I attached the words to the card with some dimensional foam adhesive.
I am definitely a fan of the Distress Oxides and can't wait to play with them some more!