
If someone had told me a year ago that I would be living in Edmonton, Alberta, have my own blog and be on a design tem I would thought they were crazy!
But here I am and I am so happy!
I hope, that no matter how you spend this holiday season, you are able to spend time with your family & friends making memories! I really appreciate each and every single of you that follow or visit my blog ~ you bring crafty inspiration into my life and I am forever grateful!
Now on to my Holiday project for Emerald Creek Craft Supplies.
This project is a bit of a de-stash project, with a whole lot of Sizzix dies, Tim Holtz Idea-ology and my favourite charms & embossing powders from Emerald Creek.
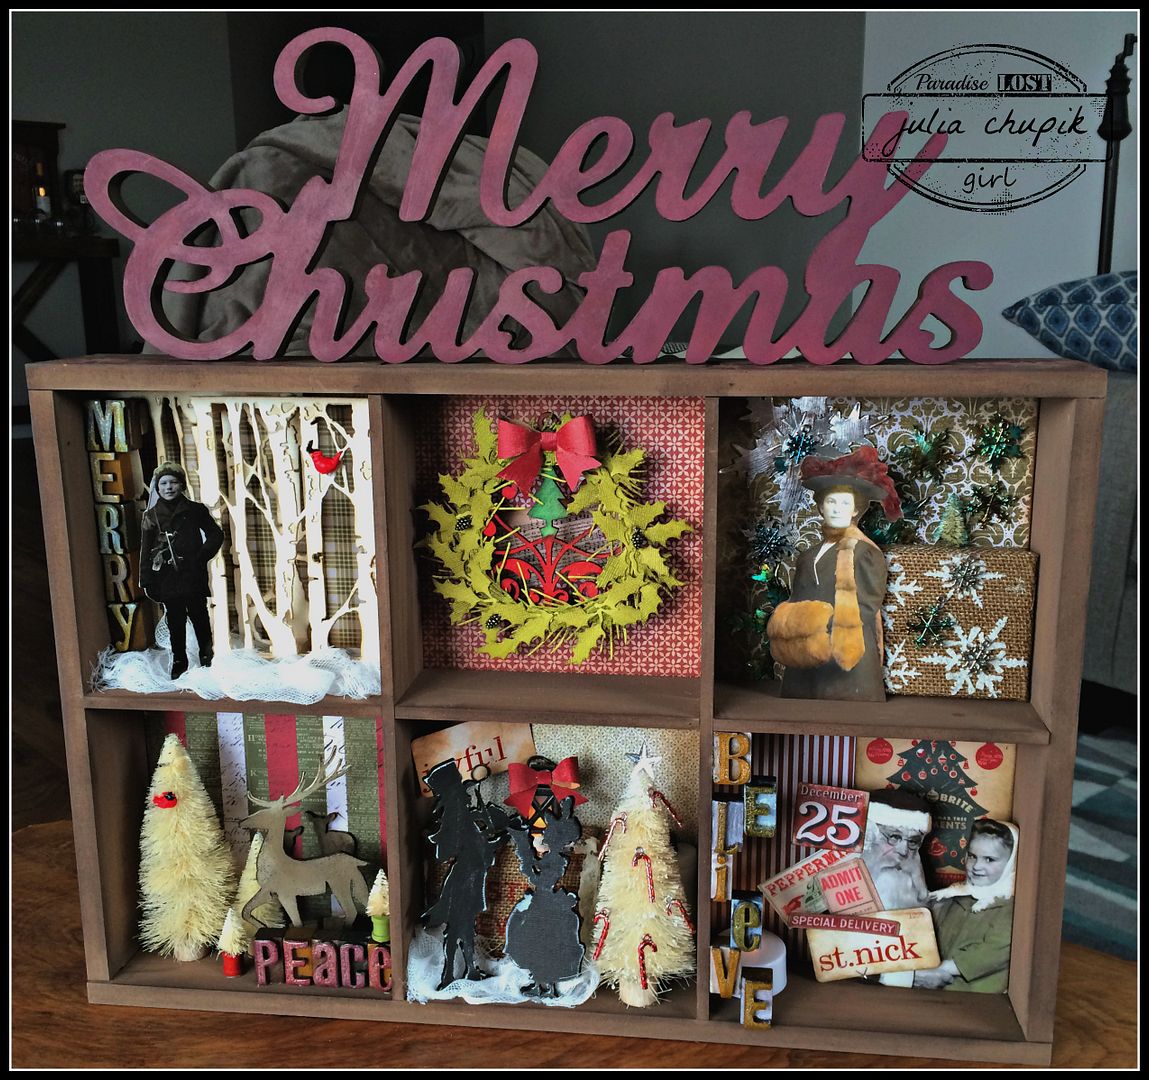 I used a 6 frame shadow box from KaiserCraft that I had in my stash. The 'Merry Christmas' sign sitting on top is also a KaiserCraft and a long time lurker in my stash.
Let's take a closer look at each box and some of the techniques I used.
Let's take a closer look at each box and some of the techniques I used.
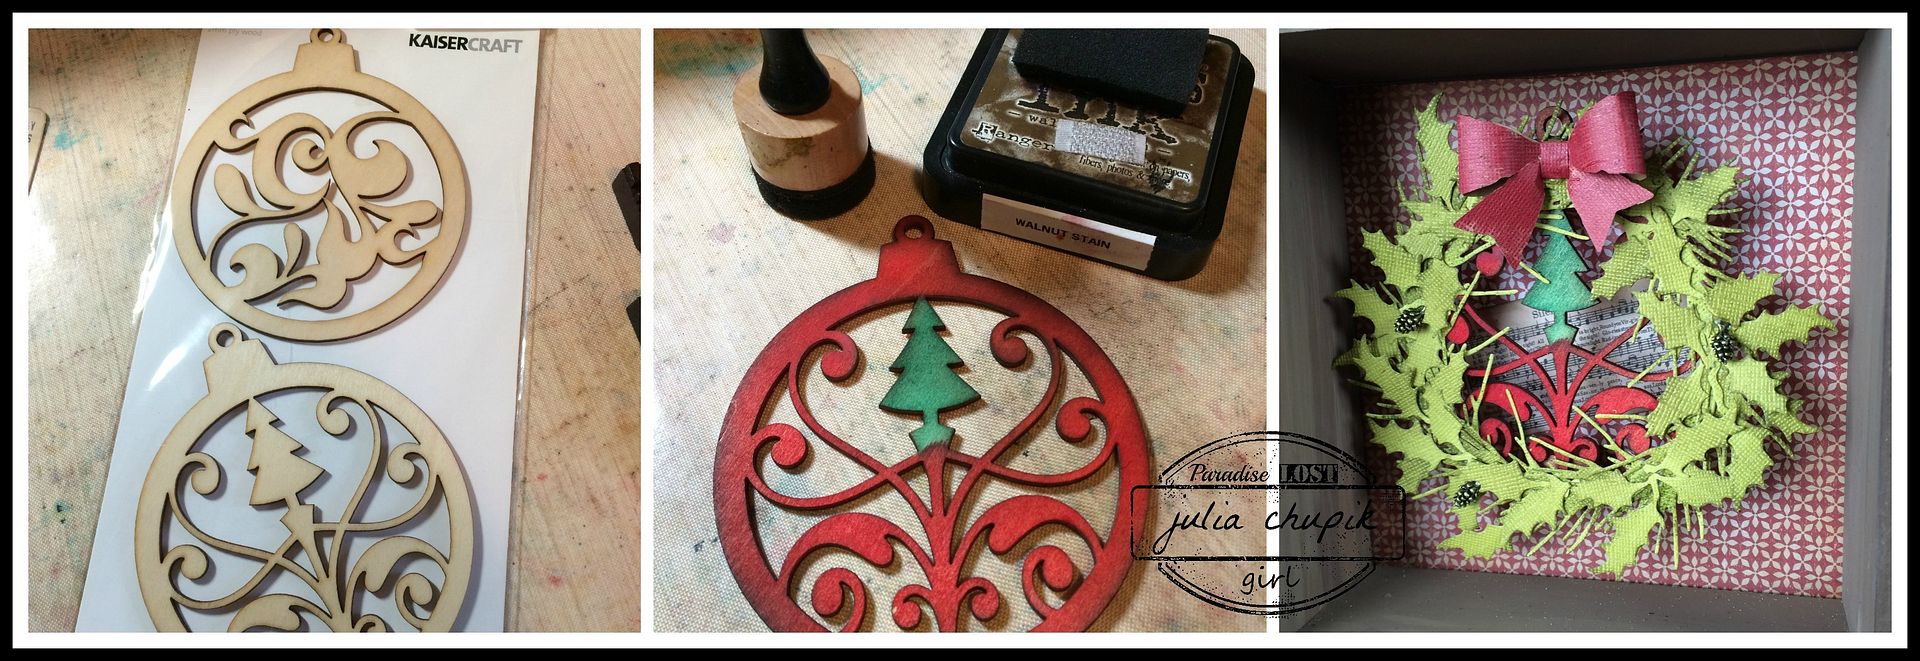
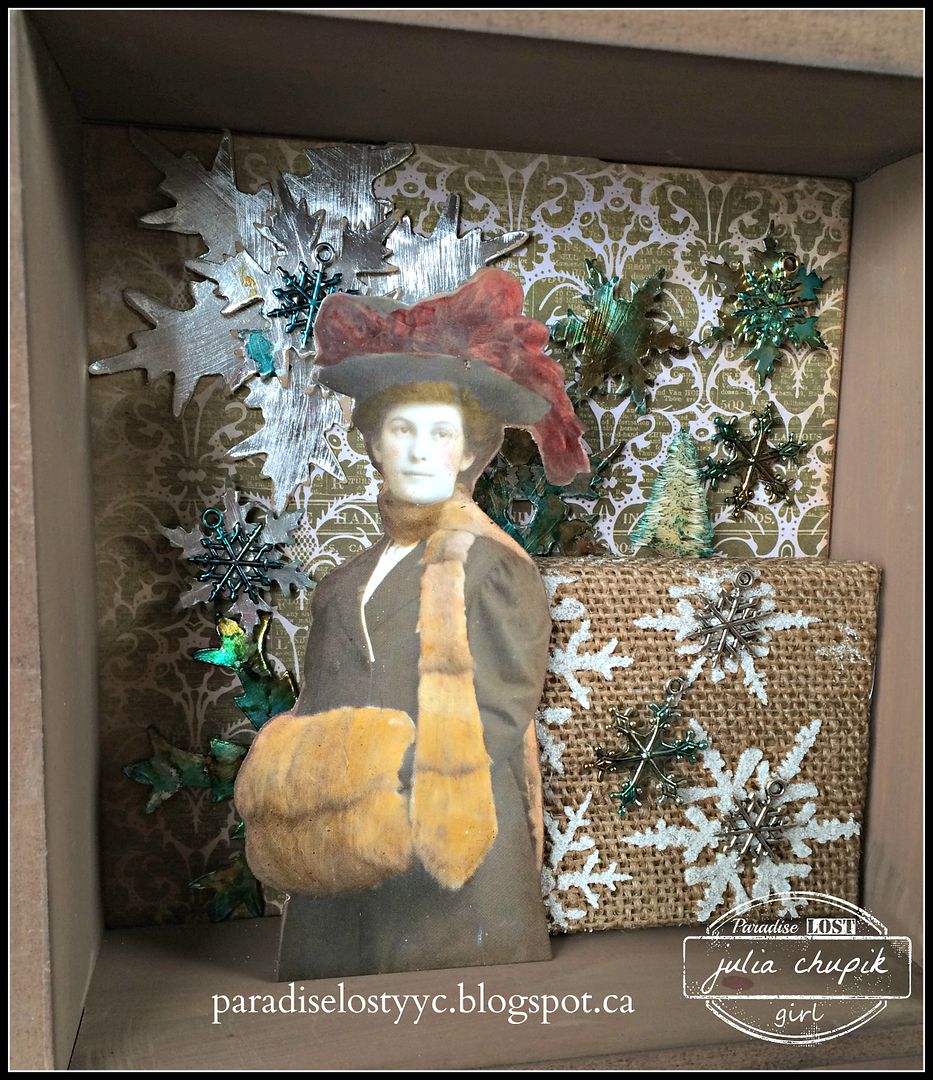
Oh! Look! More KaiserCraft! I decided that these wood veneer 'ornaments' would make a great base for a wreath. I first used Barn Door & Lucky Clover Distress Stains to add colour before using Walnut Stain Ink to tone down the bright colours. Festive Foliage die set was used for the wreath and I added a few Pinecone charms from Emerald Creek Craft Supplies.

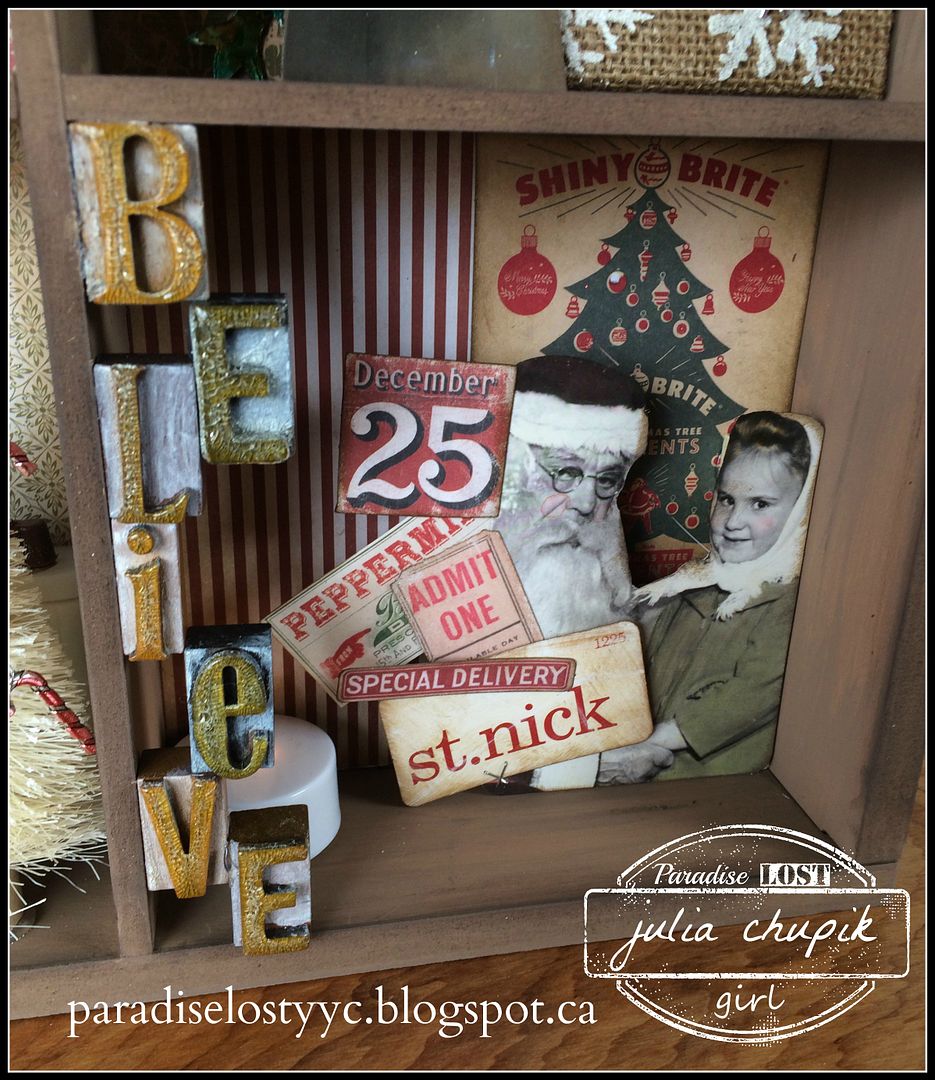
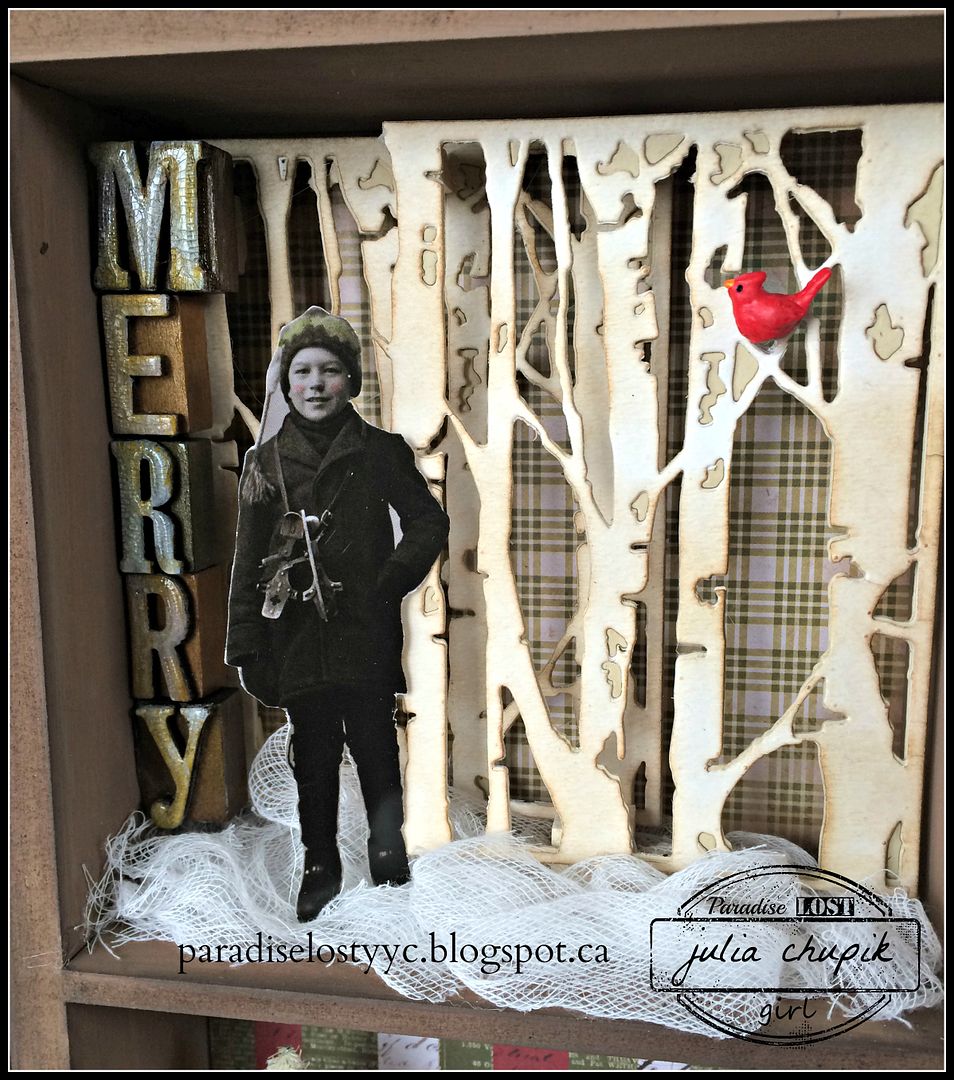
I bought a set of Tim Holtz Holiday LetterPress just for this project. I added some Distress Paint before dipping my letters in Distress Crackle Clear Rock Candy. I just love the look of this stuff when it dries!

I just love bottle brush trees. I usually will tint my trees with Distress Stain but for this project I decided to leave them natural. Except in the next frame - I decided to add some Soft Fallen Snow Embossing Powder from Emerald Creek Craft Supplies to the tips to give my tree a frosty feel.
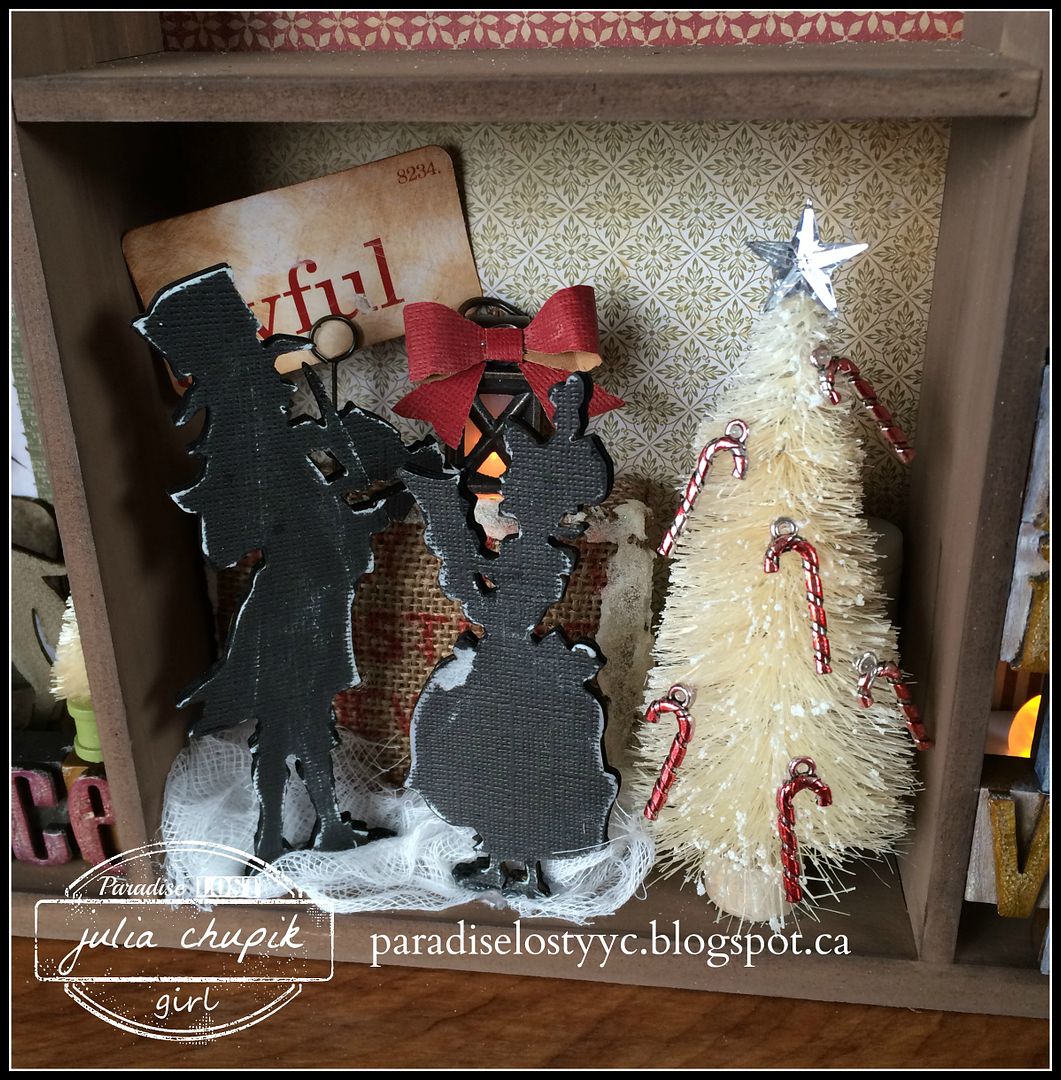
make the perfect decoration for my mini tree. I added some Poppy Red alcohol ink from Ranger for a bit of colour.
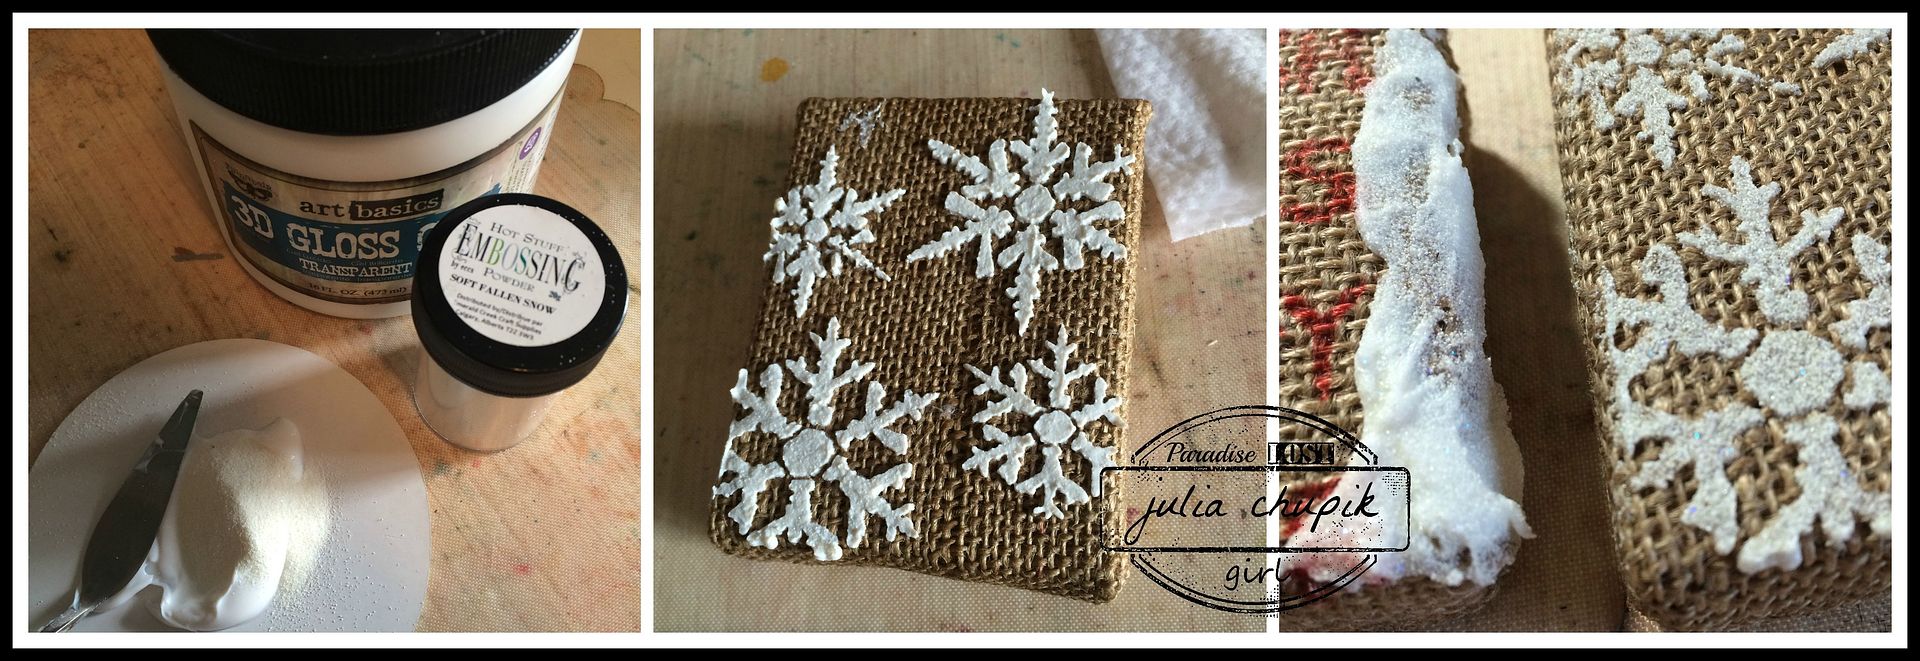
The burlap panel is hard to see in the background but here is another photo of it while I was working on it. I used some Soft Fallen Snow embossing powder mixed with transparent 3D gel to add a snow texture to the edges of this panel. I used the same mixture with my snowflake layering stencil.
Here is the snowflake panel used in another frame with some stacked snowflakes dies and Snowflake charms from Emerald Creek
I couldn't resist using a few Found Relatives for this Holiday project & Festive Ephemera
from Tim Holtz.
Thank you so much for visiting my blog today and I wish you and your loved one an very Merry Christmas and a happy holiday!
Please take some time to visit the rest of the Emerald Creek Design Team for more holiday inspiration.
Check out the new challenge at the Emerald Creek Challenge blog
for a chance to win a $25 credit to the online store

OMG -this is truly amazing!! WOW, love all the those gorgeous details. Merry Christmas xx
ReplyDeleteOh wow, this is so wonderful and what a fabulous way to say Merry Christmas! Backatcha babe!
ReplyDeleteGreat step by step for this festive project. I love your letterpress blocks and crackle. The attention to detail is perfection. The wee burlap panel and texture paste is a great way to add dimension and texture. OH and the layered birch tree is pure genius. There is jusT so much to drool over. WOW... Well done. So happy you started the blog. Now to move you back home!
ReplyDeleteOMG, what a detail work Julia. Very interesting to see each and every square!Love it!
ReplyDeleteWow! Beautiful project! I love all the different details you added to each square! And I agree with you that the found relatives work well with this project!
ReplyDeleteMerry Christmas!
-Katelyn
Love this Julia!! All the little details are awesome and I love the little cardinals in the trees. Each little box is it's own little story. so amazing! And now I feel I need to have some Distress Crackle Clear Rock Candy!! LOL
ReplyDeleteHow do you do it! I can barely think of one project and here you created 6 in a box! I want to tap into that brain of yours
ReplyDeleteSooooo amazing!
ReplyDeleteAh, well...those "long time lurkers" in our stash...I believe they HAVE to be with us for a certain time and wait for the "right moment". And then they will always rise and shine!
Your boxes are all little pieces of artwork each! Such a treasure you have created there!
Claudia x
What a brilliant festive shadow box - I love every window but my favourite is probably the carollers or maybe the birch woods... well, in any case, they're all fantastic, making such great use of all those TH goodies. Love the crackled letterpress letters - what a great touch.
ReplyDeleteAlison x
i love them all but the birch tree box is my favourite!!! i have a few sets of those letters and i can so see me following your tutorial today and playing with mine!! love love love that!! Merry Christmas to you and yours!
ReplyDeleteWow, what an amazing project!! So many wonderful details in every cubby and I love them all, but I think my fav is that amazing birch forest you built with the teeny bird sitting on the branch...LOVE THAT!! hugs :)
ReplyDeleteFabulous montage here, with so many wonderful techniques! Every single box is amazing - love them all! xx Lynn
ReplyDeleteWow, Julia! What a festive masterpiece you have created here! I love every single detail you have dreamed up and executed so perfectly! I could sit and stare at this for hours! I especially love that crackle treatment you have given those Holiday Letterpress sentiments--I bought a set and never got around to using them, so this is inspiration for next year! I am loving those charms and your birch woods to bits! Oh, I just love it all! Merry Christmas! Thank you for all of your fantastic inspiration!
ReplyDeleteSo COOL!!! LOVE each cubby, but the boys with the skates is my fav. Fab project. Happy New Year.
ReplyDelete