Showing posts with label Dina Wakely. Show all posts

Tuesday, 23 January 2018

Happy Everything Card

It's Monday and time for another card.

Over the holidays I did some stamp re-organizing and I came across an old favorite from 
Deep Red Stamps. I love this set of butterflies and decided they needed to see the light of day again.
I have included a link to the process video I  made while making this card.

~~Here is my completed card~~
I used a piece of acetate to apply the Color Burst pigments to the base and a watercolor brush to apply more Color Burst to the butterflies.


Products used:
(this blog uses affiliate links that earn me a small commission at no extra cost to you.
Thank you for your support.)

Deep Red Stamps:


Monday, 16 October 2017

A Gentle Heart Art Journal Page

Welcome my friend! I am so glad you decided to visit today.
I would like to share an art journal page that I created using some new stamps from 
Viva Las VegaStamps.

I started with a page spread in my calculus journal. These pages had already had a light coat of gesso applied. First I took the Tim Holtz Ornate Layering Stencil and pressed my Fossilized Amber Distress Oxide ink pad over it, sprayed it with a bit of water then pressed it to my page. I repeated this step with Wilted Violet Distress Oxide Ink. I also added some additional stamping in the corners with some texture stamps & Archival Inks in Potting Soil & Fern Green.


I stamped my images on cold press water colour paper with Archival Ink - Jet Black. I used my Tim Holtz Stamp Platform to get the best stamped images. 

Once I had them stamped I used my Distress Markers to colour them in. I fussy cut them out and adhered them to my pages.

I used a piece of black thread for the balloon string and added the shadow to the girl with my Hickory Smoke Distress Marker.

Products Used:


Tuesday, 28 March 2017

Get Distracted & Celebrate

Today was the first day in almost a week that I felt like getting creative. I have been fighting off a nasty cold/flu and it was a doozy. To get myself back into a creative groove I decided grab my Distraction Journal.

Click on the photo below to see how I created this journal.

I flipped through my journal, chose these 2 pages and gathered up some materials: Dylusions paints & mini layering stencils.

I applied some stenciled images randomly over both pages. At this point I had no idea where this was going - I was just enjoying the process.

I am really enjoying using mask & silhouette stencils at the moment but I only one set and it was too big to use for these 7"x 5" pages so I decided to make my own. I used a piece of acetate packaging that I had been saving and my Butterfly Duo die from Sizzix.

I used Black Marble Dylusions Paint & a foam applicator with my die cut stencils. I then used some bright Distress Crayons to apply a bit colour to the edges of the butterflies.

I chose the Celebrate Life sentiment from a Dina Wakely Stamp Set to use and the Picket Fence Distress Ink worked great over the black paint. 

To finish off my page I used extra fine point Sharpies in pink & purple to trace the outline of the butterflies and add some splatters.

Creative juices restored! I'm back and ready to get crafty.


Submitted to:


Thursday, 25 February 2016

Lucky Clover - Emerald Creek Dare

It's time for a new Dare at Emerald Creek!

This time we want you to think Irish, greens, lucky clover, pot o'gold & leprechauns.

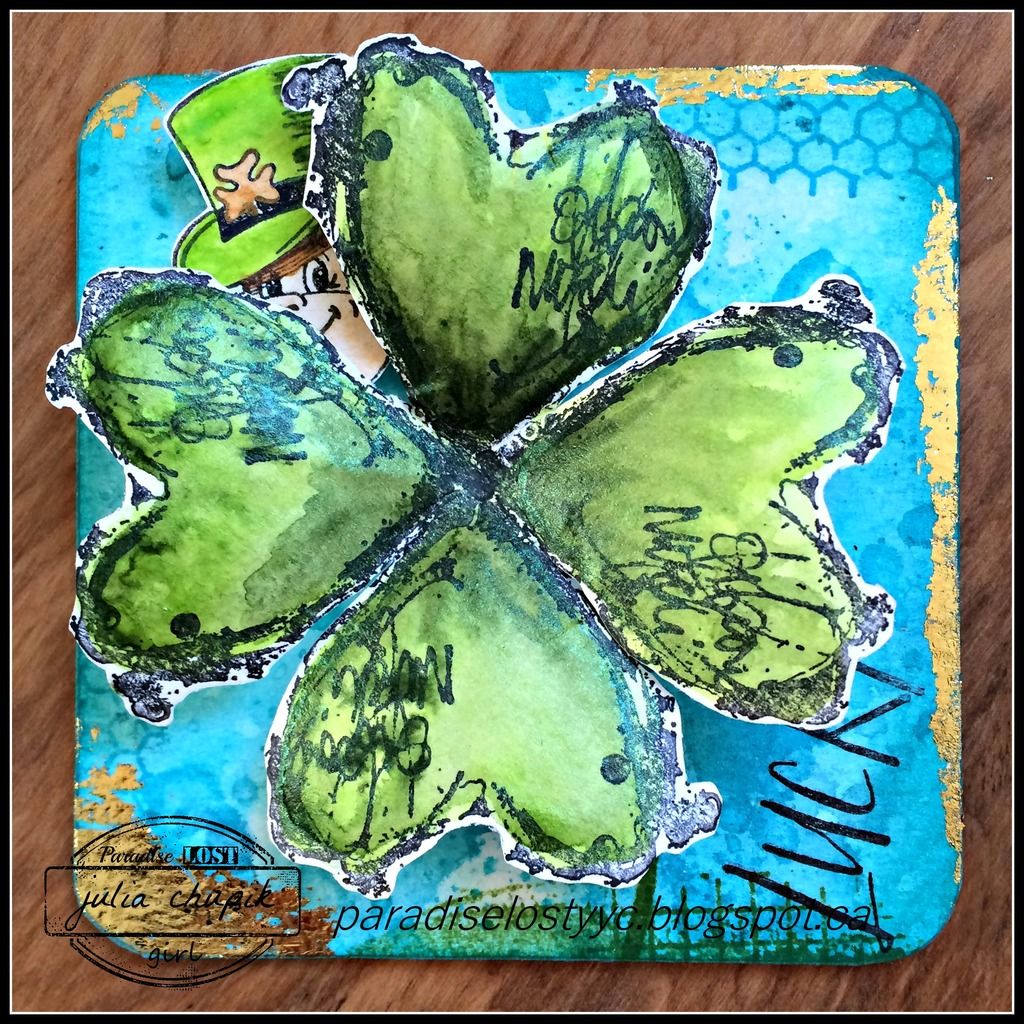
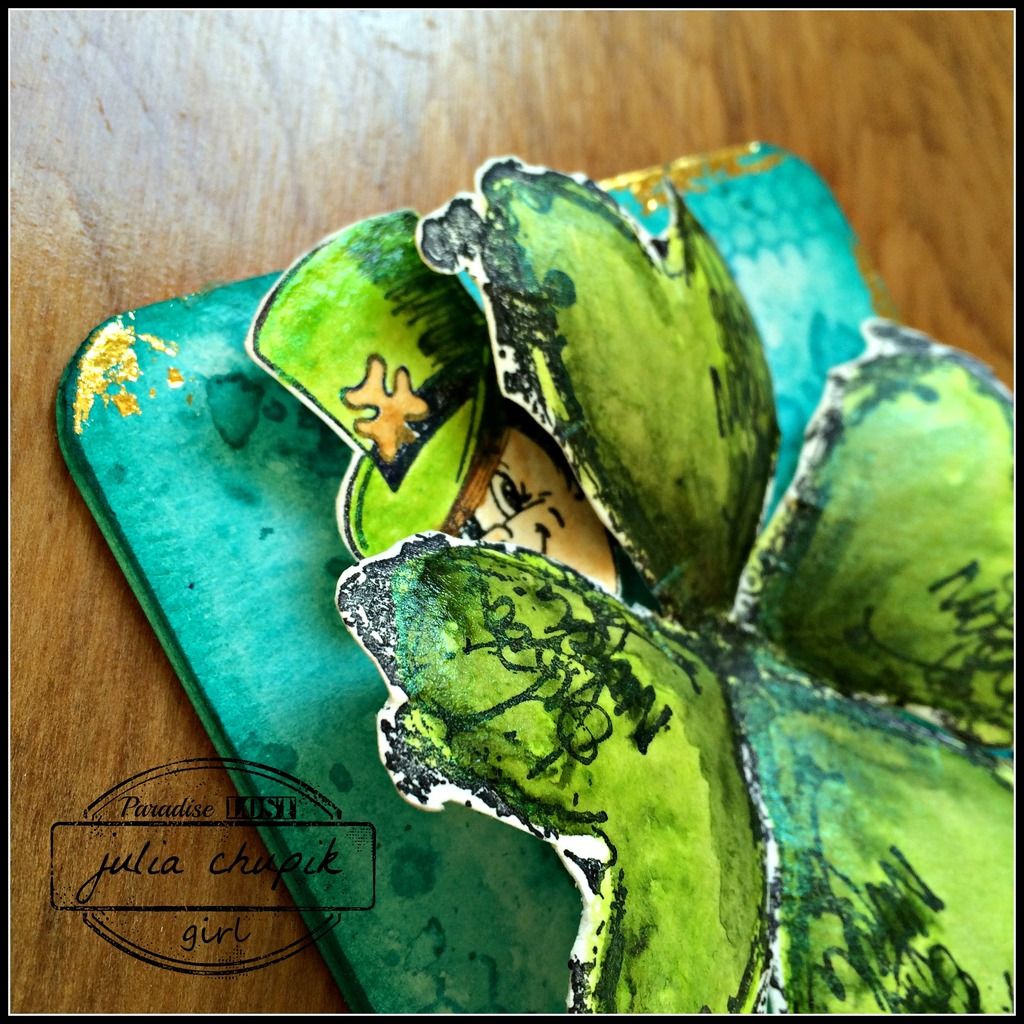
My project is a 4x4 canvas ~ made using watercolour paper and chipboard.
I added a sheet of thin magnet to the back and now it has a new home on the side of my fridge.
Just a little something to remind me of how lucky I really am.

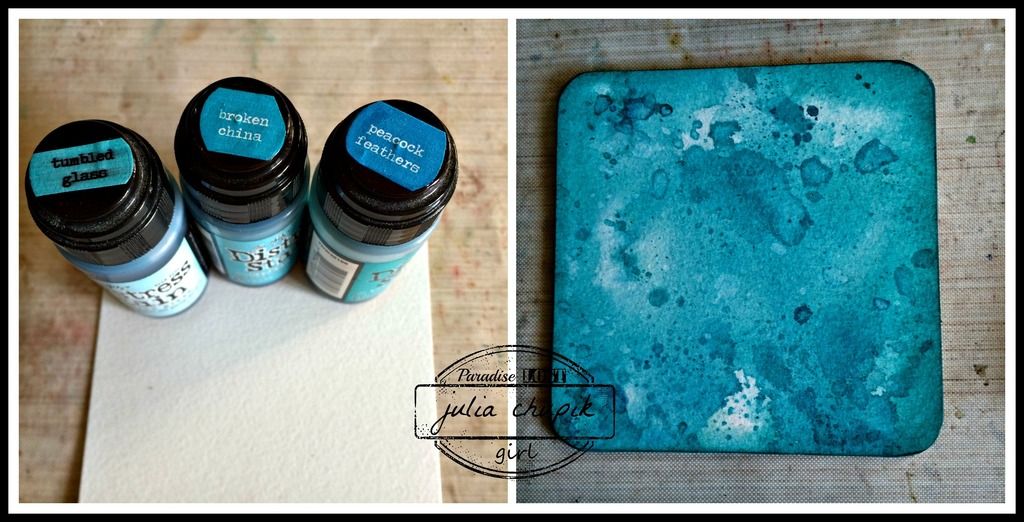
I started with my 4x4 piece of 140lb cold press watercolour paper and 3
shades of blue Distress Stain - Tumbled Glass, Broken China & Peacock Feathers.
I smooshed all 3 colours of stain onto my splat mat before dragging my watercolour paper through it several time, drying the paper with my heat gun in between.

Once I was happy with it I adhered the watercolour paper to my chipboard base and inked the edges with Tumbled Glass Distress Ink. I added some random stamping around the edges and some gold transfer foil.

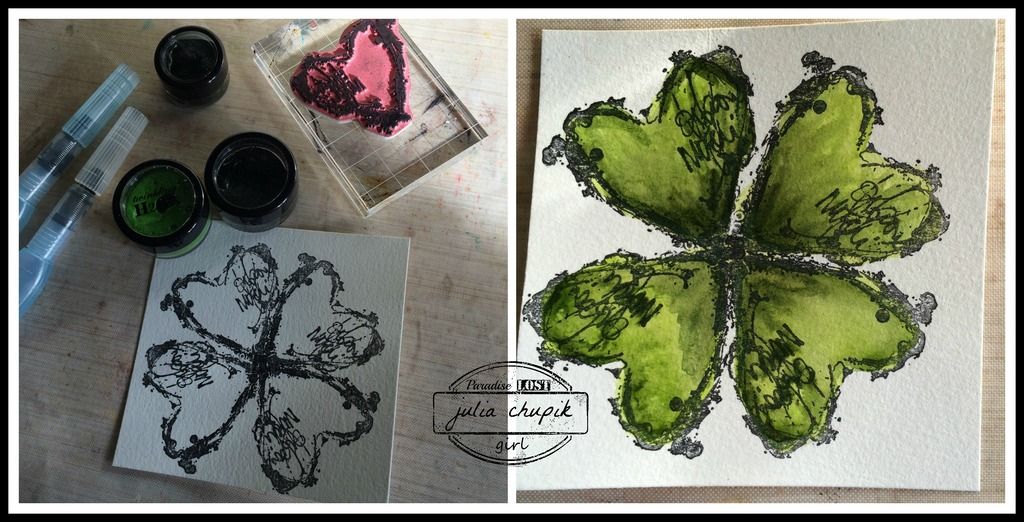
Next I started working on my focal point ~ I used the medium sized heart stamp from the Dina Wakely Collaged Heart stamp set & Staz-On ink pad to create my 4-leaf clover on watercolour paper.
I decided to use Twinkling H20 Shimmer paints to colour my clover. I haven't used my Twinkling H20's is forever and loved the shimmery look my clover ended up with!
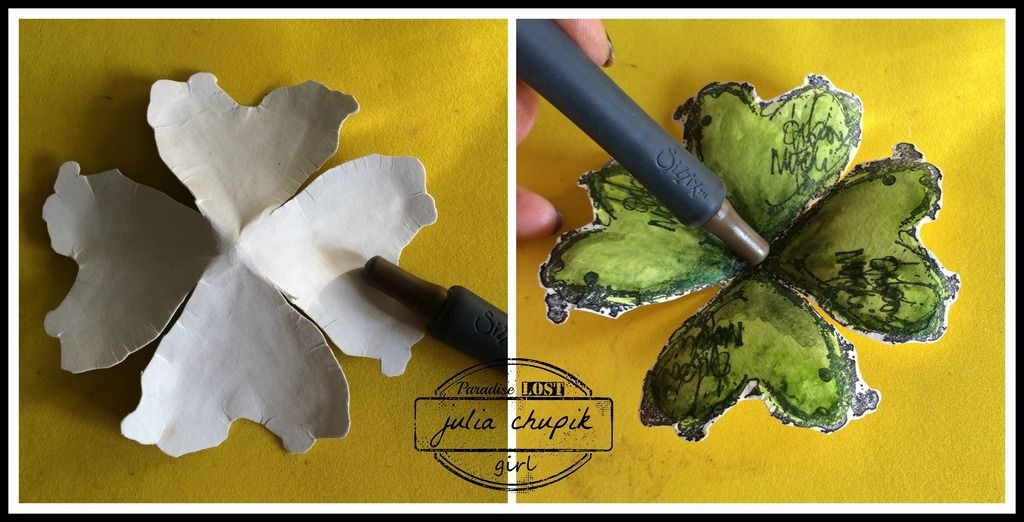
I fussy cut my clover out before using the blunt end of my Sizzix quilling tool to 'shape' my clover leaves.

I used the Paddy stamp from Emerald Creek. I coloured him with Twinkling H20's as well before cutting him out. I just love how he is peeking out from behind the cloverleaf.

Thank you for dropping by my blog today and I hope my project has you feeling lucky.
Visit the rest of the Design Team Blogs for more Lucky Clover Dare Inspiration
and share your project with us at Emerald Creek Dares


Products used:

Emerald Creek Stamp


Distress Stain: Tumbled Glass, Broken China Peacock Feathers
Watercolour Paper
Dina Wakely Collaged Hearts Stamp set
Twinkling H20's 

Monday, 8 February 2016

1 Background.4 Cards.Valentine's Day Edition

I'm back with another quick background that I made into 4 cards
especially for Valentine's Day.


This one I made especially for my husband - this year will be our 25th Valentine's Day together.
I truly believe that our love has made many impossible situations possible. 

Ok - enough of the sappiness let get on to the craftiness!


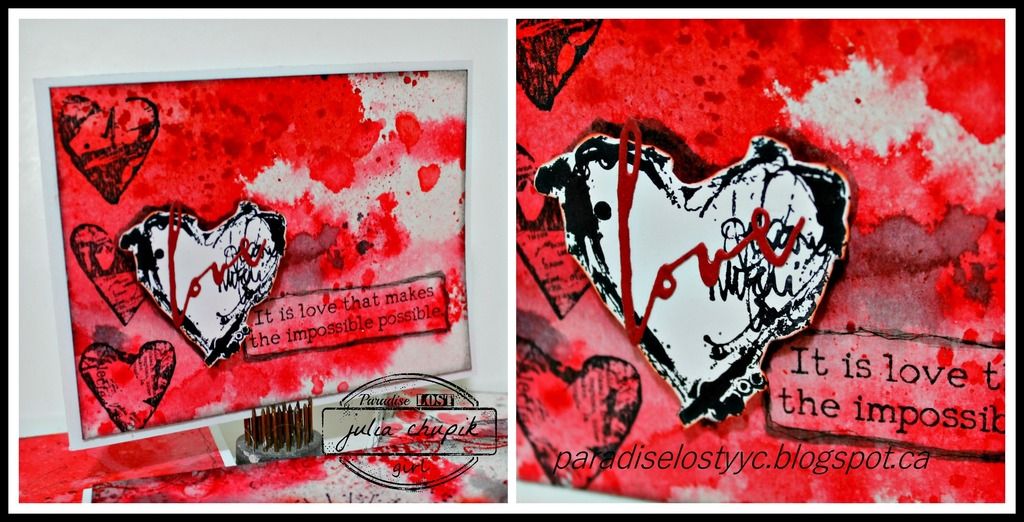
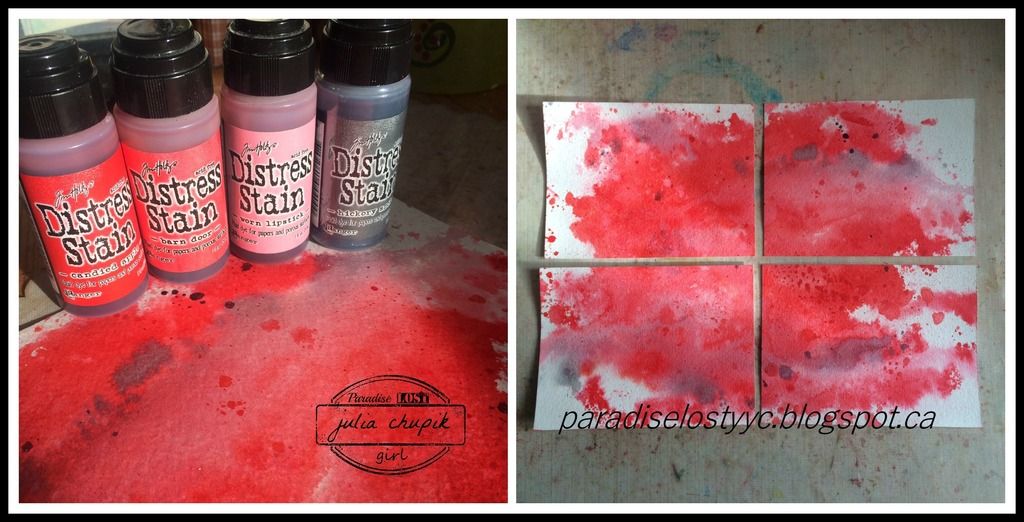
My base is a 9x12 sheet of 140lb cold press watercolour paper that I dragged through 4 Distress Stain Colours that I smooshed on to my splat mat and spritzed with water.
Once I was happy with the result I dried my paper and trimmed it down to 4 card fronts.


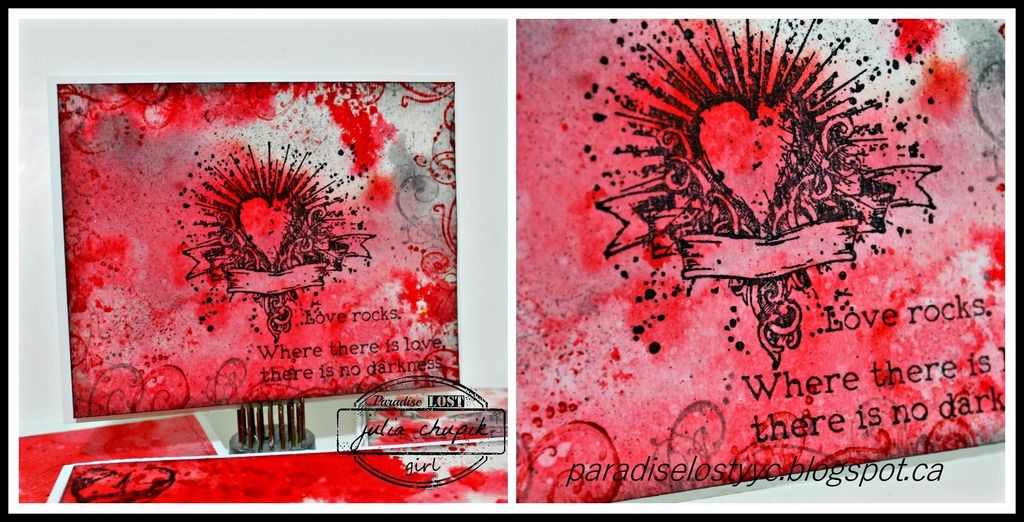
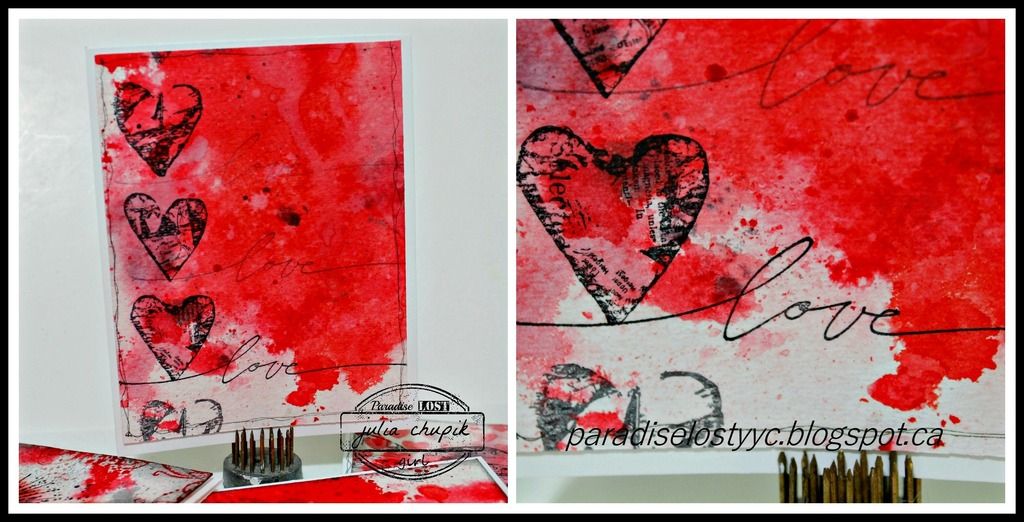
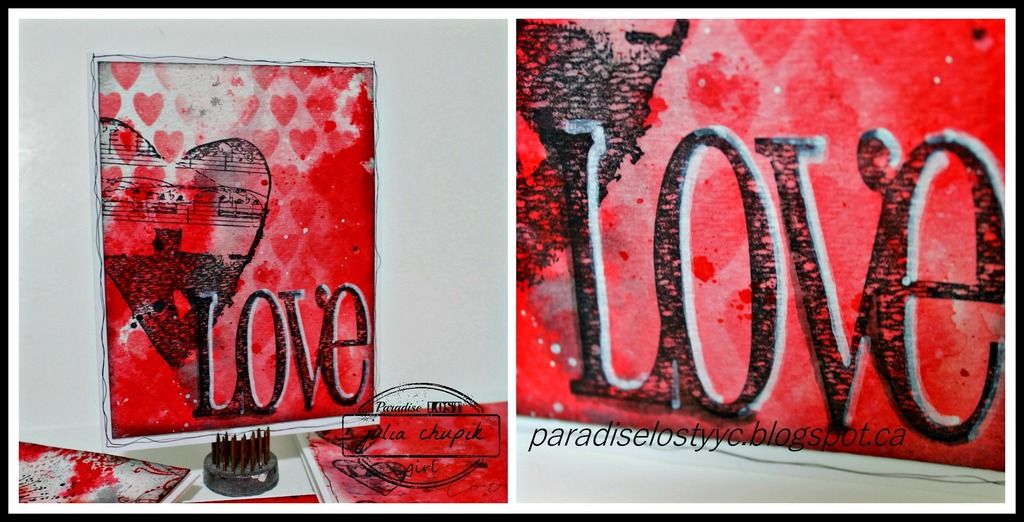
For these 4 cards I used the Collaged Hearts stamp set from Dina Wakely, the Urban Chic stamp set from Tim Holtz/Stampers Anonymous, and the script "Love" stamp from Stampin' Up!.


While rummaging through my stash I found this 'LOVE' stamp - its almost 2" tall and completely awesome! After I stamped it I used a white paint pen to outline one side of the word and then I used my Hickory Smoke Distress Marker on the other side, 
I just love how it makes the word pop off the background.


Thanks so much for visiting my blog today! 

I would like to submit this to the following challenges: