Showing posts with label Ranger Ink. Show all posts

Monday, 5 February 2018

Distress Oxides + Glossy Paper - a birthday card

Hello everyone!

I am OBSESSED with Distress Oxides on Glossy Paper.
Every time the result is different and gorgeous. 

The card was created for a special crafty friend's birthday recently and she loved it. I hope you do too.
Be sure to check out the video at the end of the blog to see a full step-by-step tutorial.


~The completed card~

When making these backgrounds I like to try some different color combo's with the Distress Oxides.
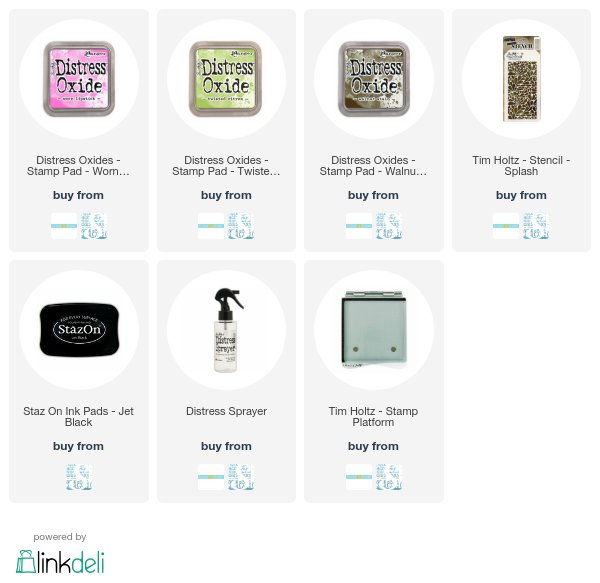
This one is definitely a fave - Worn Lipstick; Twisted Citron and Walnut Stain.

The layering stencil is from Tim Holtz/Stampers Anonymous - Splash THS080

Watch the step-by-step video below to see how I created this card from beginning to end.

Products used:


Saturday, 3 February 2018

Getting Fab with Foil - Scrap 'n Stamp Designer Challenge

It's time for another Designer Challenge at Scrap 'n Stamp.
If you are following along the blog hop then you have come here from Tara's post at the Scrap 'n Stamp Blog. This month the designers were challenged to use Ranger Foil Sheets.
Full disclosure - I haven't used these foil sheets very much so there was a lot of trial & error in creating these cards. I'm sure there are better ways to transfer the foil but I'm pretty happy with these results. I hope you do too.

~Here are the completed cards~

I applied the foil on the background and on my focal point.

I used sticky embossing powder to transfer the foil to my stamped images. The sticky embossing powder didn't give me a perfect transferred image but I sort of liked the result.

Using a bone folder helped to transfer the foil to the sticky embossing folder.

The Sketched Layered Fronds stamp from Dina Wakley Media was fun to use for this technique. The top layer left a fabulous foiled outline to the solid base stamp.

Watch the step-by-step video I made to see how I created these cards from beginning to end.

Be sure to check out the other designers blog for more Fab With Foil inspiration.  Be sure to leave comments at all the stops along the way and you could win a pack of  Ranger Foil Sheets!

Julia Chupik -------> You're here!


Products Used:


Wednesday, 13 December 2017

Leave A Little Sparkle - Distress Oxides + Perfect Pearls

Hello everyone!
I am back and ready to share a card I made for a friend. 
I have included a link to the YouTube video for this card as well.

~Here is the finished card~
I love using Perfect Pearls Pigment Powders with the Distress Oxides.
The little bit of shimmer looks lovely against the matte finish of the inks.

YouTube Video Link:


Products Used:
(This blog contains affiliate links that earn me a small commission when used to purchase products.
These links do not cost you any extra. Thank you for your support)

Monday, 16 October 2017

A Gentle Heart Art Journal Page

Welcome my friend! I am so glad you decided to visit today.
I would like to share an art journal page that I created using some new stamps from 
Viva Las VegaStamps.

I started with a page spread in my calculus journal. These pages had already had a light coat of gesso applied. First I took the Tim Holtz Ornate Layering Stencil and pressed my Fossilized Amber Distress Oxide ink pad over it, sprayed it with a bit of water then pressed it to my page. I repeated this step with Wilted Violet Distress Oxide Ink. I also added some additional stamping in the corners with some texture stamps & Archival Inks in Potting Soil & Fern Green.


I stamped my images on cold press water colour paper with Archival Ink - Jet Black. I used my Tim Holtz Stamp Platform to get the best stamped images. 

Once I had them stamped I used my Distress Markers to colour them in. I fussy cut them out and adhered them to my pages.

I used a piece of black thread for the balloon string and added the shadow to the girl with my Hickory Smoke Distress Marker.

Products Used:


Saturday, 15 July 2017

Celebrate......Botanicals & Distress Oxides

Hello & welcome!

I'm here to share a card I made to give to my grandma who is turning 90 years young next week.
She is an amazing woman and I am so happy to be able to be with her on her special day.

Here is the finished card


For this card I used the Flower Jar Stamp Set with matching framelits, Distress Oxides, Archival Ink and watercolor paper.

I started by applying my Distress Oxides on to my splat mat (which is actually a bbq mat I bought at the $ store) then I gave these a spritz of water. Next I took my 5"x 5" square of watercolor paper and began creating my background. 

To create an edge or frame for my card I swiped just the edges through the leftover ink on my craft mat. Normally I would use my blending foam applicator to do this but this was a happy accident on one edge. I loved it so much I did the same on the other 3 edges.

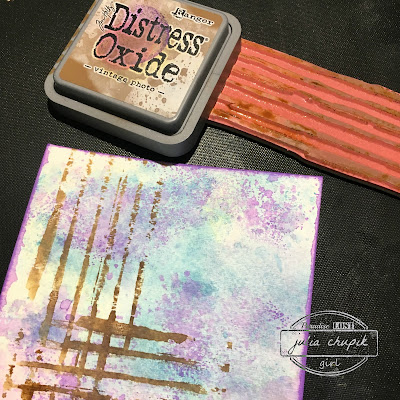
Here is the background

I needed something to help ground my focal point to the card so I took a stamp from the Tim Holtz Mixed Media 2 stamp set to create this loose crosshatch on my background.

I used some scraps of watercolor paper that I had on my desk to create the mason jars.
I love my Misti. I get perfect placement and a sharp, crisp stamped image every time.
I used the Flower Jar framelit set to die cut out my jars. Its hard to see in the photo but I also applied some glossy accents to the jars to give them some highlights.

To create my flowers, I first took some scrap watercolor (again!) and applied some Distress Oxides using the same technique as described above. I then stamped my flowers (using my Misti) then die cut these images out using the coordinating framelits.

It was time to stamp my sentiment and assemble my jars. I used pop dots for the jars then used liquid glue to tuck my flowers in behind the jars.
Products used:

Tim Holtz Flower Jar Framelit set from Sizzix
140lb cold press water color paper
Archival Ink - Jet Black

Thursday, 4 May 2017

My Paper Doll Family

Hello & welcome back!

I'm here to share yet another Etc tag. I love these! LOVE!


Here is one I made using the medium size tag -
click on the photo to see more details and close-up photos.


The tag I have to share with you today is using the large Etcetera Tag.
The first thing I did was paint my tag with white gesso then set it aside while I 
worked on my focal point piece.


I started with a Tim Holtz Idea-ology Cabinet Card frame. I carefully opened it up and removed the front frame part from the back.

I used the smoosh technique to add some Distress Oxides ink to the inside of the back piece.
(not shown in photo - I smooshed the front frame into the left over ink to add some splotches to it)

Then used some Distress Ink & the Ornate Layering stencil with the stencil monoprint technique to add some interest over the Distress Oxide.

I added my Paper Doll parents to the background with some foam dots then added the frame
 with 2 layers of foam tape. To finish off the edges of my frame I cut strips off the packaging insert from a layering stencil and adhered them with tacky tape.


The gesso is now dry on the tag so its time to start adding my paint. I chose to use Pomegranate Seed & Black Marble Dylusions Paint for this. First I applied the Pomegranate Seed with a
dry brush. I then applied the black with a brayer. Once the paint was dry I used a sanding
block to distress the edges a bit.

Taking the same Ornate Stencil that I used on my cabinet card frame, I applied the some Picket Fence Distress Ink in a few spots on the tag. I also added some script stamping with black Archival Ink.

My next step was to mix some Distress grit paste with some Peeled Paint Distress Oxide.
I applied this through the Floral Layering Stencil on to the tag. Once the green grit paste dried I decided to add another layer of grit paste in a contrasting colour - this was Worn Lipstick Distress Oxide ink.

I assembled my focal point with my 3D cabinet card frame and various pieces of ephemera from my stash. 

I still wasn't happy with the edge of my cabinet card frame so I added some 
jute twine with a bit of hot glue. 

I used a couple of metal embellishments that I found in stash to cover the hole in the tag.

My finished tag -