Showing posts with label distress oxides. Show all posts

Saturday, 24 March 2018

Easter Treat Trinket Box - Scrap 'n Stamp Designer Challenge

Hello and welcome back!

It is time for another designer challenge at Scrap 'n Stamp.
This month the team was challenged to use one of the new  Side Order sets from Tim Holtz/ Sizzix.
If you are following along the blog hop you should have come here from Nancy's blog and her fabulous project. 

I chose to use the Springtime set and decided to pair it with the Eilleen Hull Trinket Box Die to make a sweet-filled place setting for Easter dinner.

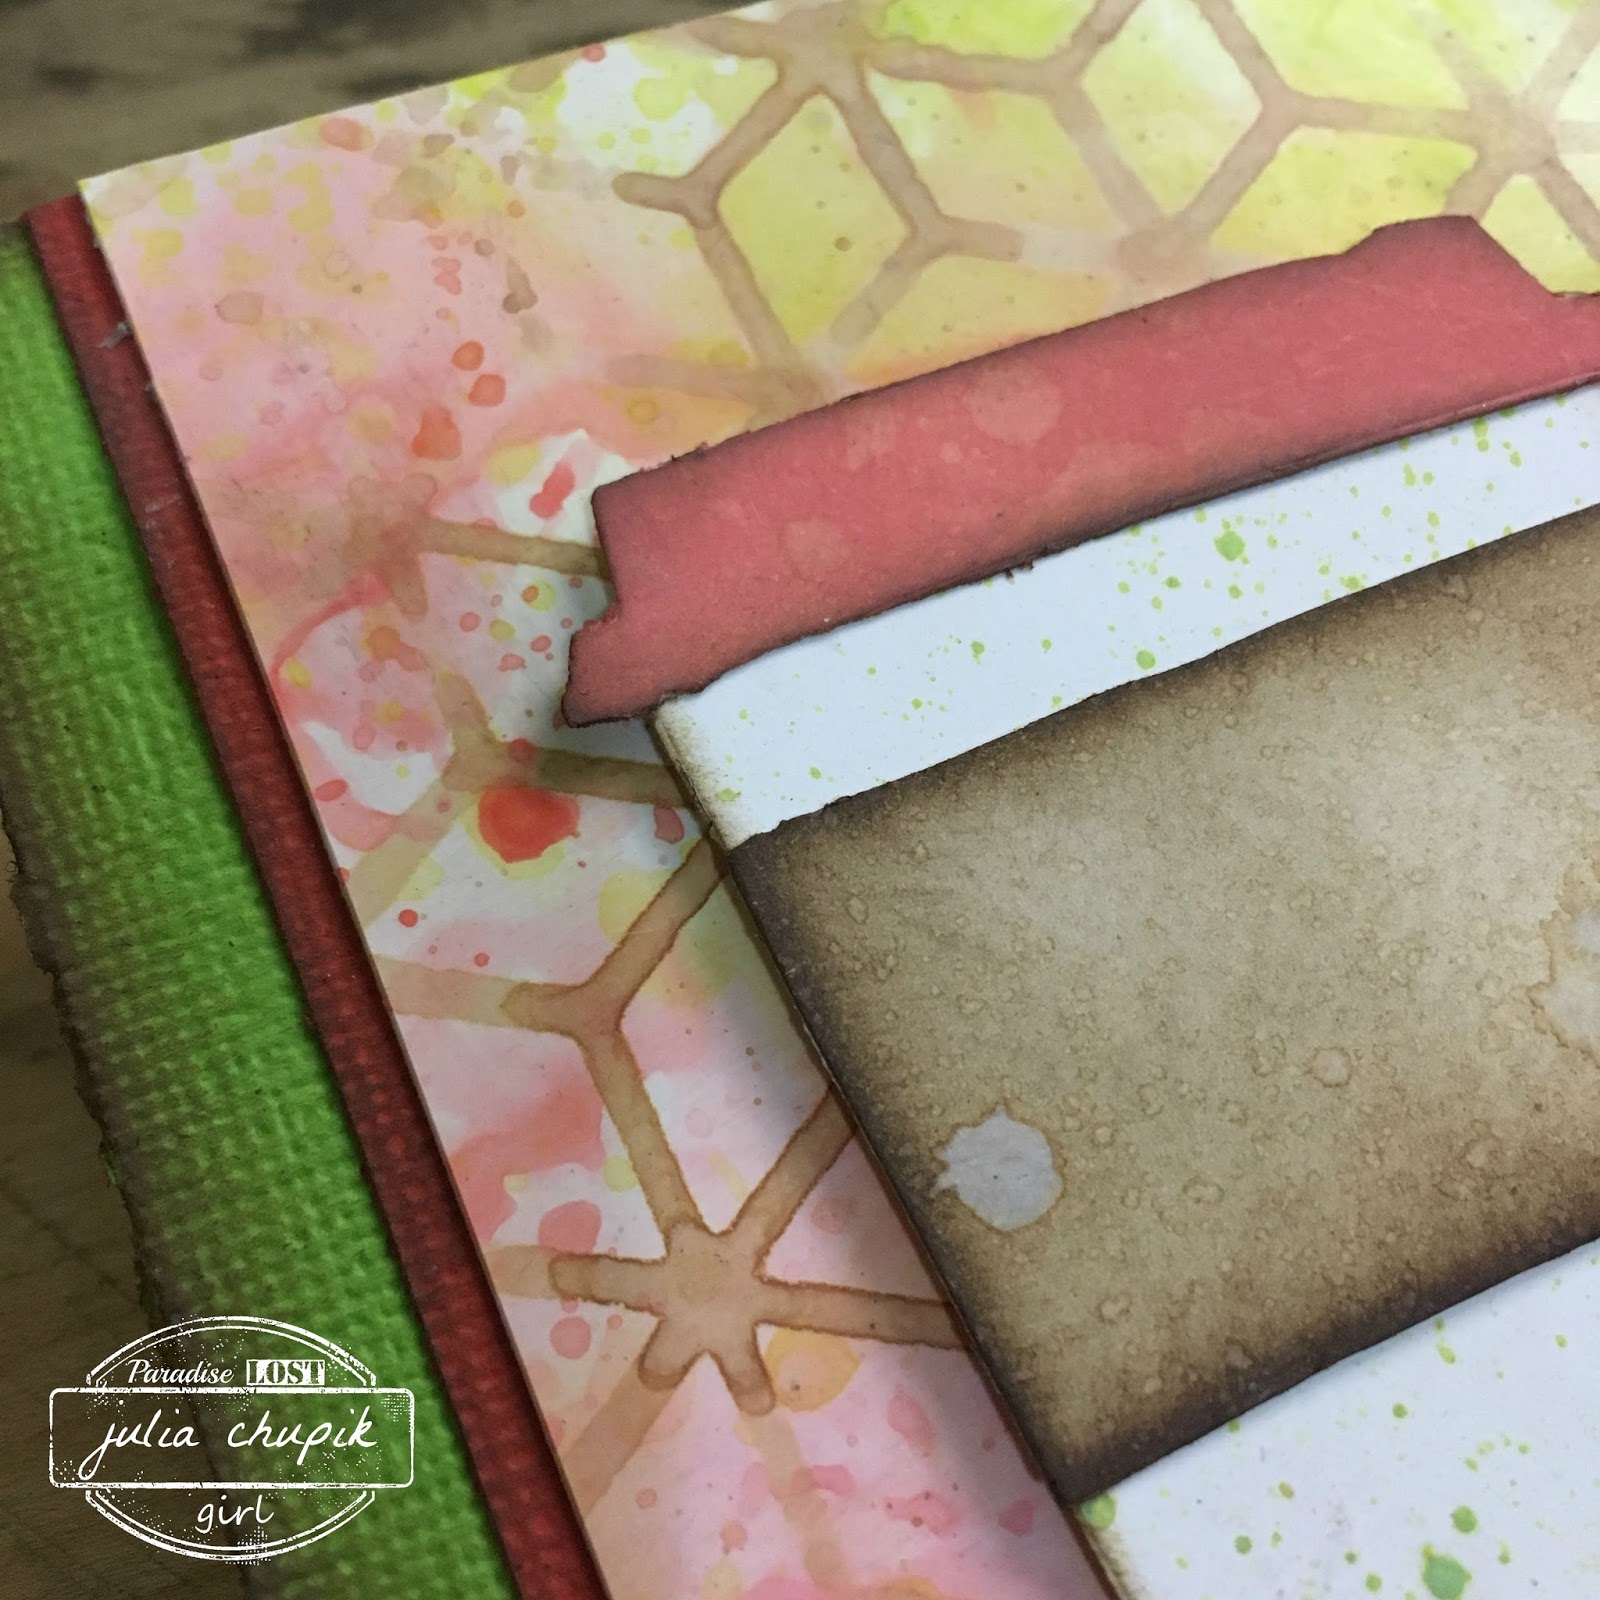
Distress Oxides on glossy paper made for a fabulous spring background for my trinket box.

The bunny, bow & script word from the Springtime Side-Order set
are super cute and look fabulous with some green velvet rick rack I had in my stash

The trinket box makes a great little treat box for dinner. Who doesn't like candy easter eggs?!?!

Check out the process video below:


Now head over to Karen's blog to see what amazing inspiration she has in store for you.

Julia Chupik ----> you're here!
Karen Warner

Products Used:

Eileen Hull Trinket Box Die

Distress Oxides:


Thursday, 15 March 2018

Distress Oxides + Glossy Paper + Art Journal

Welcome back!

Today I have an art journal page to share with you.

This page was inspired by the mermaid stamp from the new Wild Whimsy collection

I started by stamping the mermaid image on to water color paper. I colored the image in with
Distress Markers and then fussy cut it out.


The background is Distress Oxides, molding paste & stamping.

The circles were made with glossy paper that I applied Distress Oxides to and then
shined up with Micro Glaze.

Check out the video below to see a process video on how I created
the background of my journal page.


Make sure to check out the Wild Whisper blog all month long to see some amazing inspiration from the design team.


Products Used:

Wild Whimsy Stamp Set - Wild Whisper

Distress Oxide Ink:
Wilted Violet
Salty Ocean
Walnut Stain

Distress Micro Glaze

Tim Holtz Layering Stencil:
Mosaic

Tim Holtz Idea-ology:
Small Talk

Ranger Ink:
Glossy Paper

Molding Paste

Gesso


Monday, 5 February 2018

Distress Oxides + Glossy Paper - a birthday card

Hello everyone!

I am OBSESSED with Distress Oxides on Glossy Paper.
Every time the result is different and gorgeous. 

The card was created for a special crafty friend's birthday recently and she loved it. I hope you do too.
Be sure to check out the video at the end of the blog to see a full step-by-step tutorial.


~The completed card~

When making these backgrounds I like to try some different color combo's with the Distress Oxides.
This one is definitely a fave - Worn Lipstick; Twisted Citron and Walnut Stain.

The layering stencil is from Tim Holtz/Stampers Anonymous - Splash THS080

Watch the step-by-step video below to see how I created this card from beginning to end.

Products used:


Friday, 26 January 2018

Distress Oxides + Distress Micro Glaze + Glossy Paper

Hello and welcome back!
Did anyone else spend last weekend glued to social media waiting and watching for live updates from Creativation? It was so much fun and I wasn't jealous at all. There are so many exciting products being released this spring!

One of the most exciting demos I watched was this one from Tim Holtz.....watch and be amazed.

This technique of absolutely blew my mind and I rushed to my craft room to try it out.
After a few attempts and being dazzled by the results I decided to take it one step 
further with a stencil.

Here is the final result.


After using the smoosh technique to apply the Abandoned Coral & Twisted Citron Oxides to the glossy paper - I took my Tim Holtz Layering stencil (THS059 Blocks) placed it over the glossy paper and applied Distress Micro Glaze with an ink blending tool.

I then dragged my glossy card through some Vinatge Photo Distress Oxide on my craft mat. This left the Vintage Photo only on the stenciled image not covered with Distress Micro Glaze.

The last step was to go voer then entire card again with the Distress Micro Glaze to remove the chalky white finish left from the oxidation.
This is such a fantastic technique and one that I am sure to use over and over.

Click below to watch the step-by-step video I made while making this card.


Tuesday, 23 January 2018

Happy Everything Card

It's Monday and time for another card.

Over the holidays I did some stamp re-organizing and I came across an old favorite from 
Deep Red Stamps. I love this set of butterflies and decided they needed to see the light of day again.
I have included a link to the process video I  made while making this card.

~~Here is my completed card~~
I used a piece of acetate to apply the Color Burst pigments to the base and a watercolor brush to apply more Color Burst to the butterflies.


Products used:
(this blog uses affiliate links that earn me a small commission at no extra cost to you.
Thank you for your support.)

Deep Red Stamps:


Sunday, 24 December 2017

Merry Christmas & Happy New Year!

I just wanted to take a few minutes to wish all of you a very 
Merry Christmas & a happy, healthy & crafty 2018.

I have an art journal page page I created to celebrate the season -
 I used the Home For The Holidays Paper Pack from Wild Whisper Designs.

I absolutely love the pattern paper from Wild Whisper. It's heavy weight makes it
durable for mixed media which I love. Each pack come with 6 sheets of double sided paper and the designs are fresh and unique.
Look below for a complete list of products I used to create this page.


Click below to watch how I created this page:

Watch for more inspiration from me for Wild Whisper as I will joining their 2018 Design Team.


Products Used:
(This blog uses affiliate links that earn me a small commission at not extra cost to you)

Wild Whisper Designs:
Home For The Holidays Paper Pack

Home For The Holidays Stamp Set

Wednesday, 13 December 2017

Leave A Little Sparkle - Distress Oxides + Perfect Pearls

Hello everyone!
I am back and ready to share a card I made for a friend. 
I have included a link to the YouTube video for this card as well.

~Here is the finished card~
I love using Perfect Pearls Pigment Powders with the Distress Oxides.
The little bit of shimmer looks lovely against the matte finish of the inks.

YouTube Video Link:


Products Used:
(This blog contains affiliate links that earn me a small commission when used to purchase products.
These links do not cost you any extra. Thank you for your support)

Thursday, 30 November 2017

So many snowflakes.....more Christmas cards!

I'm back with another post about my Christmas card making for 2017.
Here is the finished set of cards - I only needed 4 but I was having so much fun blending, stamping and heat embossing I just kept going!

The Swirly Snowflake stamps and coordinating die are brilliant. I love the details in the stamped images and the dies are fabulous for those of us who dislike fussy cutting.

  I started by choosing some Distress Oxides in purple and blue tones.
Foe these cards I used Wilted Violet, Seedless Preserves, Salty Ocean,
Peacock Feathers, Faded Jeans and Black Soot.
 These inks blend so beautifully and leave such a gorgeous matte, chalky finish.
I inked the edges of my background with the Faded Jeans to frame the edge.

I gave each background a spritz & flick of water then gave then a quick blast from my heat gun to dry them before stamping some swirly snowflakes with Champagne Versamark. I love the sparkly watermark this makes over the Oxides.

To create my snowflake focal point I used my Tim Holtz stamping platform.
I applied 2-4 different colours of ink om my stamp, gave it a quick spritz of water them stamped it.
 I then cleaned off my stamp without removing it from the platform, inked it with my Ranger Emboss-It dauber then stamped my image again. I then heat embossed it with clear embossing powder.
I die cut out my snowflakes and adhered them to the backgrounds with an action wobble.
I added a sentiment then adhered them to my card base. I now have another set of
cards ready to be mailed out.
Products Used:
The blog contains affiliate links that earn me a small commission at no extra cost to you. 
Thank you for your support!

Card backgrounds and bases were made using
Creative Scrapbooker Superstock