Showing posts with label Paint. Show all posts

Friday, 8 September 2017

Stamptember Blog Hop with Scrap 'N Stamp

Welcome back! I am so excited to be back as a guest designer for 
Scrap N Stamp's September Blog Hop.

This month Scrap N Stamp is featuring
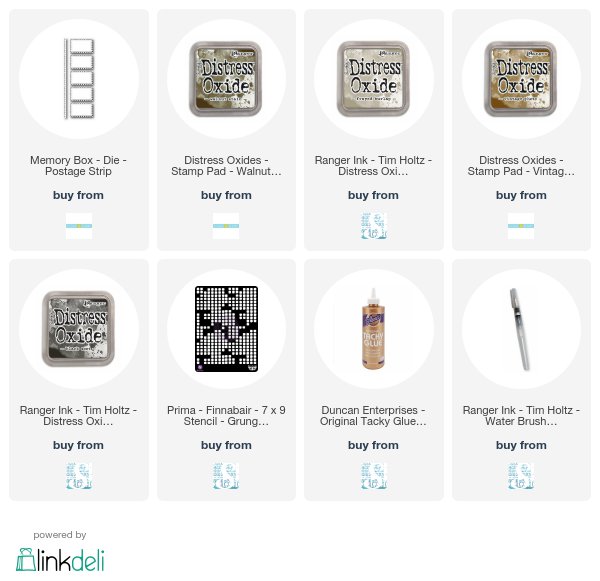
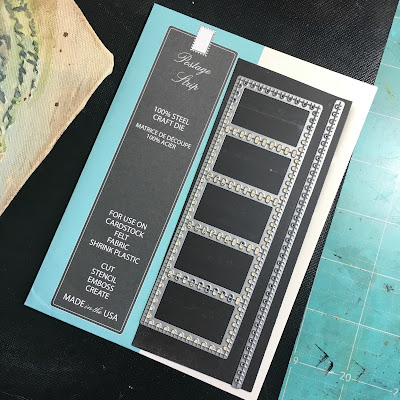
The Postage Strip Die from Memory Box.
This is such a fabulous and versatile die that can be used in so many ways!

Here is my finished project - a vintage photo inspired 5 sided frame.

The 5-sided frame came from a project my dad was working on. I knew I would use it some day but was waiting for inspiration. To make the insert for the frame I first took a piece of 12x12 chipboard and cut it to fit my frame. I then used natural canvas and Aileens Tacky Glue to adhere it to the chipboard. This took a couple of days to dry completely.
Once it was dry, I applied a layer of white gesso to seal the canvas.

Next I took a couple of stencils: Prima Grungy Grid and Stencil Girl Encouraging Scribbles and used these with  molding paste to create my focal point.
I painted the entire surface with vintage white acrylic paint once the molding paste was dry.

To start adding some colour to my canvas, I took some cheap acrylic paint I bought at the dollar store in blues, greens and browns. I added the blue and green paints with a brush then sprayed them water, letting the drip over my stenciled images. Next I added the brown by dry brushing along the edges and splattering some across the canvas.

The help the raised parts stand out a little more I used some Distress Oxides: Frayed Burlap; Walnut Stain; Vintage Photo and Black Soot. I 'painted' the Oxides over the stenciled areas to help them pop off the background. 

Next I collected some ephemera: vintage photos,  post card, book page, ration stamps, lace doily and a Wildflower Bouquet chipboard die from Southern Ridge Trading Co.
I used the Postage Strip die from Memory Box to die cut out 6 pieces from my vintage postcard and painted the Wildflower Bouquet die with some black acrylic paint.

 I began to assemble these pieces into my focal point. Before using the postage stamp die cut I did use some Distress Oxides to grunge them up a bit. After I got everything adhered down I decided that the black Wildflower Bouquet was a bit much - so I gently dry brushed some light brown acrylic paint over it It was just enough to help the flower die blend a bit into the background.

Here is my finished project again.
Check out some more inspiration from the
Guest Designer Team.


Tuesday, 17 January 2017

Wanderlust 2017 - Week 2

It's week 2 of my Wanderlust adventure. 
This weeks instructor was the insanely talented Mary Wangerin.
Check out her blog The Turquoise Paintbrush for lots of mixed media inspiration


I created my mixed media layout on a 12x12 sheet of chipboard & taking inspiration from a quote I found ~ "Advice from a Tree: Stand tall & Proud, Sink Your Roots Deep Into The Earth, Drink Plenty Of Water, Go Out On A Limb, Be Content With Your Natural Beauty, Remember Your Roots, Enjoy The View"

I really enjoyed building up layers of paint, gesso, paper scraps, stamping & stenciling.

I just love all the layers of paint.

I created my focal point with a stencil, some doodling & stamping. 
Don't look to close or you'll see my typo. Oops. 

Here is my finished mixed media project.


Products Used:

Acrylic Paint
Distress Paint
Dylusions Paint
Gesso
Stencils
Paper Scraps


Wednesday, 11 May 2016

Many Thanks!

Ever since the weather turned nice I have had a hard time staying in my craft room.
I just want to be outside enjoying the sun, warm temps. My garden needed some well deserved attention and the patio was screaming for the planters to be filled with flowers.

I did manage to sit down and make a few Thank You cards for my daughter to give to her co-workers
at the lab she is finishing her practicum up at. It felt good to get messy & I may just find myself back in the craft room again today. It is delightfully sunny outside though. ;)

Here is one of the finished cards ~ you'll just have to stick around until the end of this post to see the other three.

I started with my favourite 140lb cold press watercolour paper,
Peacock Feathers Distress Spray & a floral stencil (Sorry, I have no idea what company it is from. Its an oldie but a goodie).

After spraying the stain I gave it a quick 2 spritzes of mist before flipping the stencil over onto a second piece of watercolour paper and rolling my paper towel over it.
I repeated the same technique on 2 more pieces of watercolour paper but used Wilted Violet
Distress Spray & Tim Holtz Gothic Layering Stencil.
I inked the edges of all the cards using the coordinating Distress Inks & my round blending tool
Next I added some random stamping before applying some Dylusion Paint through a stencil with some blending foam.
All that was left to do was to add my sentiment and emboss it with fine detail embossing powders.