Showing posts with label Southern Ridge Trading Company. Show all posts

Friday, 8 September 2017

Stamptember Blog Hop with Scrap 'N Stamp

Welcome back! I am so excited to be back as a guest designer for 
Scrap N Stamp's September Blog Hop.

This month Scrap N Stamp is featuring
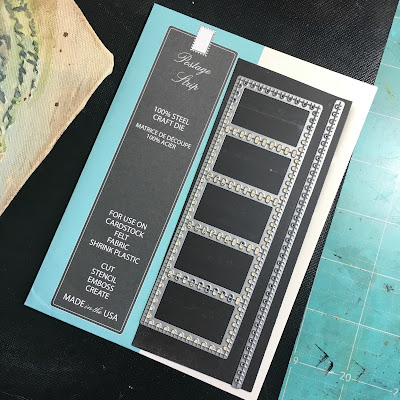
The Postage Strip Die from Memory Box.
This is such a fabulous and versatile die that can be used in so many ways!

Here is my finished project - a vintage photo inspired 5 sided frame.

The 5-sided frame came from a project my dad was working on. I knew I would use it some day but was waiting for inspiration. To make the insert for the frame I first took a piece of 12x12 chipboard and cut it to fit my frame. I then used natural canvas and Aileens Tacky Glue to adhere it to the chipboard. This took a couple of days to dry completely.
Once it was dry, I applied a layer of white gesso to seal the canvas.

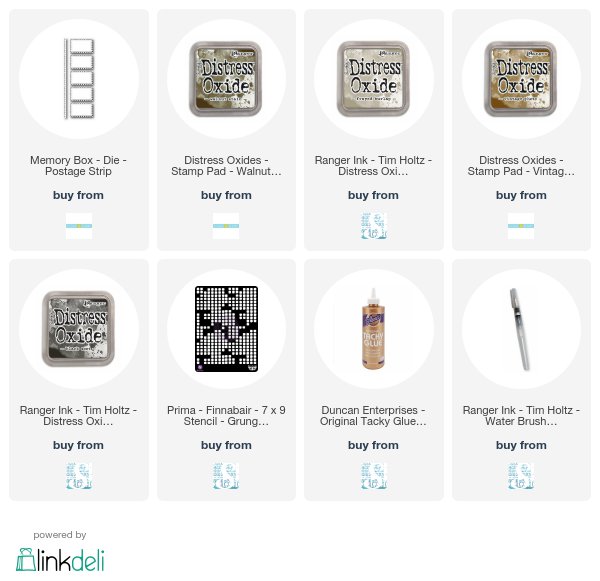
Next I took a couple of stencils: Prima Grungy Grid and Stencil Girl Encouraging Scribbles and used these with  molding paste to create my focal point.
I painted the entire surface with vintage white acrylic paint once the molding paste was dry.

To start adding some colour to my canvas, I took some cheap acrylic paint I bought at the dollar store in blues, greens and browns. I added the blue and green paints with a brush then sprayed them water, letting the drip over my stenciled images. Next I added the brown by dry brushing along the edges and splattering some across the canvas.

The help the raised parts stand out a little more I used some Distress Oxides: Frayed Burlap; Walnut Stain; Vintage Photo and Black Soot. I 'painted' the Oxides over the stenciled areas to help them pop off the background. 

Next I collected some ephemera: vintage photos,  post card, book page, ration stamps, lace doily and a Wildflower Bouquet chipboard die from Southern Ridge Trading Co.
I used the Postage Strip die from Memory Box to die cut out 6 pieces from my vintage postcard and painted the Wildflower Bouquet die with some black acrylic paint.

 I began to assemble these pieces into my focal point. Before using the postage stamp die cut I did use some Distress Oxides to grunge them up a bit. After I got everything adhered down I decided that the black Wildflower Bouquet was a bit much - so I gently dry brushed some light brown acrylic paint over it It was just enough to help the flower die blend a bit into the background.

Here is my finished project again.
Check out some more inspiration from the
Guest Designer Team.


Saturday, 1 July 2017

Scrap n' Stamp Canada Day Blog Hop

Happy Canada Day! 
Today we are celebrating Canada's 150th birthday with a special blog hop over on the Scrap 'n Stamp blog, sharing projects featuring the cute new 'Busy Beaver' stamp & die set by Taylored Expressions. Be sure to leave comments along the way because Scrap n' Stamp Canada has some prizes to give away randomly - $150 in gift certificates (3 lucky people will each win a $50 gift certificate) and a Busy Beaver Stamp & Die Set with a bonus maple leaf die. Winners will be randomly chosen and announced on the Scrap N' Stamp blog on Monday!

Here is sneak peek of the finished card - cute, right?

Here is the Busy Beaver Stamp & Die Set I received from Scrap 'n Stamp.
So adorable and check out those sentiments. So funny!

I couldn't create a Canada Day card without using some products from a couple of 
my fave Canadian manufactures. 


After stamping and die cutting my Busy Beaver image I coloured him in with Distress Markers.
His birthday hat is from the Crazy Accessories stamp with matching thinlit die. I love these sets - it makes it so easy to create accents for cards.

My background was created with the help of my Misti.
 I first stamped my circle background stamp (Halftone & Rings - Stampers Anonymous) with Candy Apple Distress Ink two times to get a nice bright red. 
I made a note of where my paper was before removing it from the Misti, giving it a spritz of water and then drying it 

I then placed the paper back on my Misti in the same place and then stamped the same image with Black Versafine Ink. I love this layered look/

The wood pieces from Southern Ridge  were painted with Candy Apple & Picket Fence Distress Paints. 

Now head on over to Karla Yungwirth's blog for even more inspiration and don't forget to leave a comment for your chance to win!

Karla's Blog - Creative Love Affair


Friday, 26 May 2017

An Altered Book - The Castaways

Welcome back to my blog! things have been a bit quiet around here.
A word of warning before we continue - yes, an old book was altered, glued, torn and ripped in the making of this blogpost. Viewer discretion is advised. 

I have a lot of old books - some up to 100 years old - that I have collected over the years. Some I bought at garage sales, some of them once belonged to my grandfather and some were given to me by my crafty BFF, Nicole.

For this project I chose a book that came from my grandfather - The Castaways.
To begin I took the largest die from a rectangle nesting die set and traced out the shape on the front of the book, making sure to leave the title.
I took my x-acto knife and carefully cut out the traced shape from the cover. I made sure to a cutting pad under the cover before doing this.  Next I took my x-acto knife and trimmed a smaller sized rectangle shape through the first 50 pages or so.

To curl the pages - first I put my cutting pad in the book to protect the uncut pages; then i took my mister bottle and sprayed the pages a couple of times; next I took my fingers and gently starting curling the pages outwards. This took some time and required some additional sprays of water but I loved the results. while the paper was still wet I ran my Walnut Stain Ink pad over the curled pages and then let them dry.
My happy castaway couple is a card from the Found Relatives pack that I coloured with Distress Markers before adhering into my book behind the curled pages. Once I had this done I starting gluing these curled pages together along with the page with my castaways. Then I glue the lot to the front over. The remaining pages of the book were glued together in groups of 50 pages or so.


These became my journal pages - although I didn't actually journal as this was meant as a decorative piece. I did gesso the pages, add some Distress Oxide Ink, some stamping and then added some pieces that stick out the top and side edges.

Some of these pieces are die cuts, paper, vintage postcards and half of a stereoscope card. I happen to have a few of these and the palm tree one was perfect.


This is how the finished book looks and how it will be displayed. I just love all the bits and bobs peaking out of the pages.

To finish off the front cover I added a few of the wood starfish pieces from Southern Ridge Trading Co. They take paint very well and I love that they have a bit of dimension to them.


Friday, 3 February 2017

Cherish Moments - Mixed Media Layout

Welcome to my blog!
Today I'm here to share a 12x12 mixed media layout I created for The Scrap Shack.
The Scrap Shack now carries a selection of chipboard from Southern Ridge Trading Co.

I created this layout with a couple of Southern Ridge Trading Co chipboard die cuts;
some discontinued papers from my stash in reds & browns & a
Found Relative card from Tim Holtz Idea-ology.

I started by trimming down one patterned paper down to 11.5"x11.5" to layer over a darker
12x12 pattern paper.

I used my Tim Holtz Distress Tool on the edges.

Next I sprayed some Prima Color Bloom (Worn Leather) randomly over the 
11.5"x11.5" pattern paper & I dried it with my heat gun.
I took the spray cap off the bottle of irRESISTible Ink (Danube Blue) and 
dripped it over the paper next.

I torn a page out of an old novel and used inks & stains to age it before
layering it under the distressed edge of the patterned paper.

The chipboard from Southern Ridge Trading Co is amazing and can be altered by painting,
staining, spraying, ink. It can also be distressed by sanding. The photo on the left shows the chipboard after one layer of paint. The one on the right shows the chipboard after 2 coats of paint.

After the paint was completely dried, I took my sanding tool and roughed up 
the paint before adding some Ground Espresso Distess Ink with a blending tool.
The butterfly on the right was first sprayed with Prima Color Bloom
 (Summer Sky) then I stamped over it with a texture stamp &
Ground Espresso Distress Ink.


I distressed the Found Relative Card by sanding & inking it. I used the Tim Holtz 
Distress Tool on the edges then inked the edges with Ground Espresso Distress Ink 
and a blending tool. I then spritzed some ink over the card.

You can see this layout on display at The Scrap Shack in Ponoka, Alberta.


Wednesday, 23 November 2016

Grandma's Roses

Hello! Today I am here to share a layout I made featuring a photo of my 
Grandma when she was a teenager.

I bought this sheet of paper from Treasured Memories during the Great Canadian Scrapbook Carnival in September. It is part of their exclusive dark edged paper line.

I also used some Fancy Frame chipboard and some tiny paper roses from Southern Ridge Trading Co.

First I coated the paper with matte medium. Once that was dry I applied a coat of clear gesso over the entire surface. (not shown). While I waited for this to dry I prepped my chipboard frames.

I began by painting the frames with two coats of Victorian Velvet Distress paint.

Next I tapped my Clear Embossing Ink pad over the surface of each frame and covered with Burnt Copper Leaves Embossing Powder from Emerald Creek Craft Supplies. Before heating the embossing powders I rubbed off some of it off so it exposed some of the pink paint underneath.

Next I took some of my white gesso and applied some on over a portion of my paper
 using a palette knife.

After the gesso had dried I applied some Distress Crazing Medium over the gesso. 
My next step here was to take some Distress paints in browns, grey and black and use my finger to apply it over the cracks left by the crazy medium.

Next I took a background stamp, some embossing ink & some Distress Powder in Aged Mahogany to add another texture over the focal area.


Just before assembling my focal point I decided to splatter some paint over the background too.