Showing posts with label blog hop. Show all posts

Saturday, 24 March 2018

Easter Treat Trinket Box - Scrap 'n Stamp Designer Challenge

Hello and welcome back!

It is time for another designer challenge at Scrap 'n Stamp.
This month the team was challenged to use one of the new  Side Order sets from Tim Holtz/ Sizzix.
If you are following along the blog hop you should have come here from Nancy's blog and her fabulous project. 

I chose to use the Springtime set and decided to pair it with the Eilleen Hull Trinket Box Die to make a sweet-filled place setting for Easter dinner.

Distress Oxides on glossy paper made for a fabulous spring background for my trinket box.

The bunny, bow & script word from the Springtime Side-Order set
are super cute and look fabulous with some green velvet rick rack I had in my stash

The trinket box makes a great little treat box for dinner. Who doesn't like candy easter eggs?!?!

Check out the process video below:


Now head over to Karen's blog to see what amazing inspiration she has in store for you.

Julia Chupik ----> you're here!
Karen Warner

Products Used:

Eileen Hull Trinket Box Die

Distress Oxides:


Thursday, 14 December 2017

Emerald Creek Craft Supplies & Stencil Girl Blog Hop

Hello blog friends!
Today I am very excited to be participating in a blog hop with 
One lucky winner will receive a $25 Gift Certificate to StencilGirl Products
AND a $25 Gift Certificate to Emerald Creek!
Enter to win by leaving a comment below.
Then be sure to visit the other blogs in the hop and comment to win.
The more blogs you comment on, the more chances you have to WIN!
One winner will be chosen at random from all blog comments!
(One comment per blog please.)
You have until Tuesday, December 19th at 11:59PM Central Time to leave your comments.
Winner will be announced on
StencilGirl's Facebook page on Wednesday, December 20th.

Now lets get to my project.
I created an art journal page - there are lots of layers and yummy textures.

I started with a sheet of kraft mixed media paper from the Dylusions Large Journal and sprayed Distress Spray Stain through the Be Free stencil.

Next I added some torn paper pieces from an old book. I adhered these with matte medium & dried it completely before moving on to the next layer.

My next step was to add some acrylic paint with a brayer - leaving some white space.

After making sure the paint was dry I added molding paste through the Corrugated Lines 
& Urban Insiders stencils. I left this to dry on it own. I love how the Distress Stains seep up through the paste as it dries.

After the molding paste was completely dry I added some gesso by dry brushing on - just in random spots. I them brayered on some purple acrylic paint over the molding paste to highlight it a bit.
To create my focal point I applied some Black Soot Distress Oxide through the Swallows stencils on to a piece of white cardstock. I then cut these out to use on my journal page.

I then pressed my Spiced Marmalade Distress Oxide pad across the Urban Insiders stencil, spritzed with some water then laid it over cardstock. I did this a few times because I wasn't sure how many I wanted to use. Once these were dry I tore them out and inked the edges.

I used the Be Free stencil for the main part of my page.
First I fixed the stencil to a piece of cardstock then applied some Distress Oxide through the stencil with a blending tool. 

Next I used the mask of the stencil to add Black Soot Distress Oxide for the letters.
To fill in the white spaces left by the stencil I used my water brush. I then trimmed this out.

Now back to my page - I sprinkled some Burnt Copper Leaves embossing powders randomly over the page and heated it from underneath.
Next I assembled the pieces of my focal point and adhered them with white glue.

One last step to finish page - I added some Wilted Violet & Black Soot Distress Oxide to the edges.
My page is now complete and ready to be added to my art journal.

Be sure to check out the designers from Day 1 of our blog hop and leave 
your comments for a chance to win the giveaway!
December 13


December 14
Julia Chupik ------> you're here!
Check back tomorrow for inspiration from these fabulous designers

December 15

Products Used:
(This blog uses affiliate links that earn me a small commission at no extra cost to you. Thank you for your support!)

Emerald Creek Craft Supplies:


Saturday, 9 December 2017

Bright Lights Blog Hop - Scrap 'n Stamp Designer Challenge

Hello & welcome! You should have arrived here from Tara's post on the Scrap 'n Stamp blog.
Be sure to visit each blog on the hop and leave a comment for a chance to win a Lawn Fawn die from this months new release. Let's get hoppin'.

This month we were given the challenge of using the Lawn Fawn String of Lights die set.

- Here is my finished card -

I started with a piece of white cardstock that was 4 7/8" x 4 7/8". I took the 'string' part of the die set and placed it across the cardstock like in the photo below. I put it through my Big Shot and then removed the 'string' part. This left me with
I cut out the top layer of my balloon in red glitter paper, the bottom layer of the balloon in white cardstock, the string and lightbulb base in gold glitter paper.
I inserted the gold glitter string between the two pieces of the cardstock from step one and adhered with some doubled sided tape. I then flipped it back over and stamped my sentiment.

I then adhered my lightbulbs down along the gold string. 
Next I adhered my white cardstock to a piece of 5 1/8" x 5 1/8" black cardstock.
I added some Tarnished Brass Distress Crayon to the edge and Barn Door Distress Crayon around the lightbulb with a detailer water brush.


Julia Chupik - that's me!

Products Used:
(I use affiliate links on my blog. These links earn me a small commission at no 
extra cost to you. Thank you for your support)


Tuesday, 14 November 2017

Designer Challenge: Distress To Impress

Hello, my crafty friends!
It's time for another designer challenge from

This month the designers were given Distress Crayons Set 9 to create and inspire with.
Until the end of the month all sets of Distress Crayons will be 25% at Scrap 'n Stamp so its a great time to try them out or to complete your collection.
Be sure to leave a comment on my blog for a chance to win a set of Distress Crayons. Increase your chances of winning by visiting all the designers blogs and leaving some love.

Here is my finished project:

I started by gathering up my Distress Crayons, a couple of tags (covered in white gesso) 
and a couple of stencils. These stencils are the Autumn layering stencils from Tim Holtz. 
I used both the large and mini sizes.


Distress Crayons Set #9 includes these colours: Barn Door, Ripe Persimmon, Pine Needles, Faded Jeans, Dusty Concord & Brushed Corduroy.
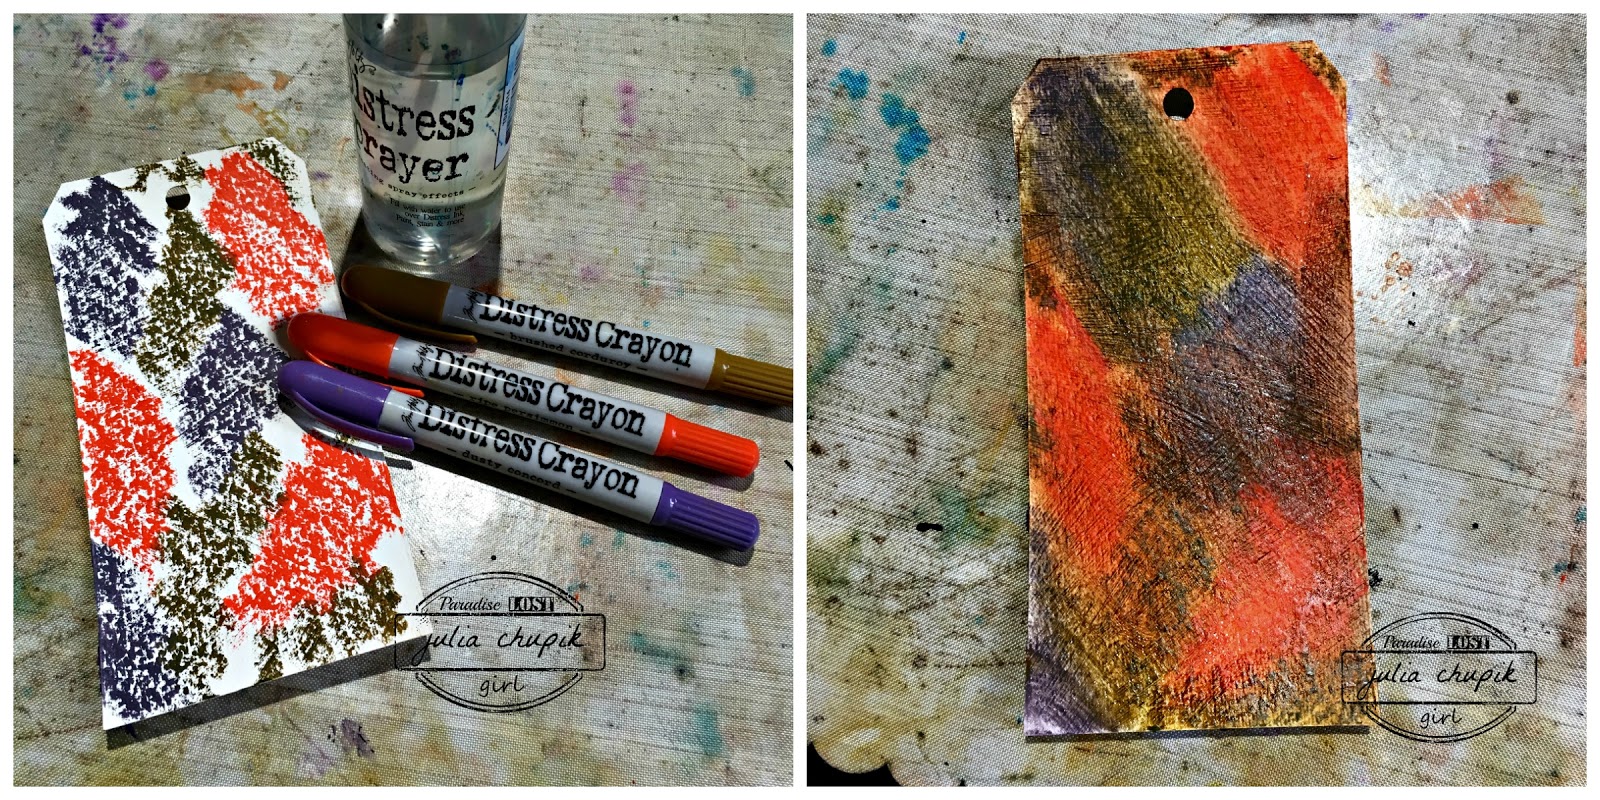
I started by scribbling Dusty Concord, Ripe Persimmon, & Brushed Corduroy randomly over my gesso covered tag. I find the colours blend best over gesso. I sprayed some water on my spalt mat and used my finger to blend the colours on my tag.

Next I took the large Autumn tag and with a baby wipe removed some of the crayon.

I repeated this technique with the mini Autumn stencil.

For my second tag - I used the same colours of Distress Crayons and stencils bu changed my technique. This time I used a blending tool and a slightly damp blending foam to apply the crayon through the stencil. Again this tag has been covered with white gesso. 

These were both tags at this point - one very bold & the other very subtle.

Before continuing I finished the edges of the tag with Distress Crayons - Dusty Concord on this one an Ripe Persimmon on the other (sorry, no pic)

I used my Bird Crazy & Crazy Dog stamp & die set for my focal points & coloured them in with a water brush pen and Distress Crayons. 

 I used the coordinating dies and cut out my images in black fun foam.
This game my stamped images a bit of dimension when adhered to my tag.

For my foliage I created a third tag using the distress crayons & the Bubbles Mini Stencil.
I used the small smallest dies from the Fall Foliage die set to cut out a bunch of leaves.

After adhering the leaves and stamped image to my tag I finished it off with a Small Talk sticker from the occasions pack.

Thank you so much for stopping by my blog today! Now head over to Karen's blog for even more Distress Crayon Inspiration.
Don't forget to leave a comment - you could win a set of Distress Crayons from

Design Team:

Julia Chupik (you're here!)


Products Used:
(This blog post contains affiliate links)