Showing posts with label Design Team. Show all posts

Saturday, 24 March 2018

Easter Treat Trinket Box - Scrap 'n Stamp Designer Challenge

Hello and welcome back!

It is time for another designer challenge at Scrap 'n Stamp.
This month the team was challenged to use one of the new  Side Order sets from Tim Holtz/ Sizzix.
If you are following along the blog hop you should have come here from Nancy's blog and her fabulous project. 

I chose to use the Springtime set and decided to pair it with the Eilleen Hull Trinket Box Die to make a sweet-filled place setting for Easter dinner.

Distress Oxides on glossy paper made for a fabulous spring background for my trinket box.

The bunny, bow & script word from the Springtime Side-Order set
are super cute and look fabulous with some green velvet rick rack I had in my stash

The trinket box makes a great little treat box for dinner. Who doesn't like candy easter eggs?!?!

Check out the process video below:


Now head over to Karen's blog to see what amazing inspiration she has in store for you.

Julia Chupik ----> you're here!
Karen Warner

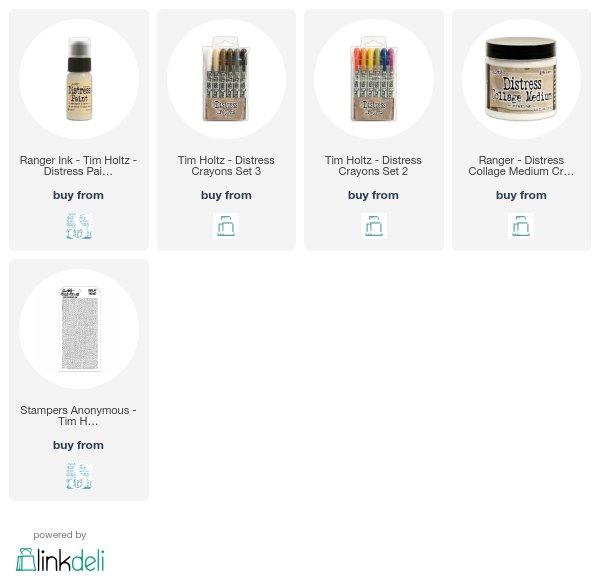
Products Used:

Eileen Hull Trinket Box Die

Distress Oxides:


Thursday, 15 March 2018

Distress Oxides + Glossy Paper + Art Journal

Welcome back!

Today I have an art journal page to share with you.

This page was inspired by the mermaid stamp from the new Wild Whimsy collection

I started by stamping the mermaid image on to water color paper. I colored the image in with
Distress Markers and then fussy cut it out.


The background is Distress Oxides, molding paste & stamping.

The circles were made with glossy paper that I applied Distress Oxides to and then
shined up with Micro Glaze.

Check out the video below to see a process video on how I created
the background of my journal page.


Make sure to check out the Wild Whisper blog all month long to see some amazing inspiration from the design team.


Products Used:

Wild Whimsy Stamp Set - Wild Whisper

Distress Oxide Ink:
Wilted Violet
Salty Ocean
Walnut Stain

Distress Micro Glaze

Tim Holtz Layering Stencil:
Mosaic

Tim Holtz Idea-ology:
Small Talk

Ranger Ink:
Glossy Paper

Molding Paste

Gesso


Tuesday, 20 February 2018

Celebrate Love - Mixed Media Layout for Scrap Shotz Design Team

Hello!

I am over on Scrap Shotz Snap Shotz Blog today sharing a 12x12 layout I made using products from the Prima Marketing - Amelia Rose Deluxe Kit

This is a special kit that is not part of the regular monthly kit subscription.

Check out the Scrap Shotz blog for a full list of products used and a link to the process video.

Thanks for stopping by....now head over to Scrap Shotz to see the full reveal of my mixed media layout.


Wednesday, 7 February 2018

Life Is Good - Mixed Media Layout designed for Wild Whisper Designs

Hello & Welcome!

Today I am over at the Wild Whisper Designs blog sharing a 12x12 layout I designed using the new release - Classic Woodgrain paper pack.


 Here are a couple sneak peeks at my layout.

Head over to the Wild Whisper blog to get all the details, a link to the step-by-step tutorial video and a list of the products used.


Sunday, 3 September 2017

Scrap Shotz September Kit Reveal

Hello! Welcome to the September Kit reveal!
Today is my first project for Scrap Shotz using the September Kit and add-ons.
 These kits are fabulous and bursting with wonderful goodies.

September's kit features the Transatlantic Travel paper from Carta Bella. 

The design team is using a page sketch from Stuck?! Sketches

Here is my take on the sketch using the September Scrapbook Kit.

I created a mixed media layout  - first I choose a pattern paper from the kit and used matte medium to adhere is to piece of chip board. *Full Disclosure - I don't do a lot of scrapbooking so when I create a layout like this it will usually be framed and hung up in my house - thats why I use the chipboard**
I cover the front of the paper with matte medium and let it dry completely.

When this was done I took some Distress Crayons and applied these through a stencil on to my background.  

Next, I took a palette knife and applied Distress Crazing Medium over my entire page leaving some areas thicker than other. This gave me larger crazing in spots. I left this to dry overnight.

I took my Black Soot and Walnut Stain Distress Crayons and went over the areas with the larger cracks to highlight them. Being sure to get the crayons in the cracks before wiping off the excess.
To create my focal point I used various ephemera from the kit along with 2 photos from my stash.

To create the 'O' in the word Explore I used this cute new stamp from Emerald Creek Craft Supplies.

This stamp is brand new and will be available from Scrap Shotz in September and is included in the September Kit.


BONUS PROJECT:
I was having so much fun creating with this kit that I created another mixed media home decor item.
This time I used a small Etcetera Tag as my substrate.


Be sure to check out the Scrap Shotz blog for even more September Kit inspiration from the Design Team.


Thursday, 17 December 2015

Merry Christmas & Happy Holidays from Paradise Lost & the Emerald Creek Design Team

2015 is quickly coming to an end and what a year it has been for me!
If someone had told me a year ago that I would be living in Edmonton, Alberta,  have my own blog and be on a design tem I would thought they were crazy! 
But here I am and I am so happy! 
I hope, that no matter how you spend this holiday season, you are able to spend time with your family & friends making memories! I really appreciate each and every single of you that follow or visit my blog ~ you bring crafty inspiration into my life and I am forever grateful!

Now on to my Holiday project for Emerald Creek Craft Supplies.
This project is a bit of a de-stash project, with  a whole lot of Sizzix dies, Tim Holtz Idea-ology and my favourite charms & embossing powders from Emerald Creek.
 I used a 6 frame shadow box from KaiserCraft that I had in my stash. The 'Merry Christmas' sign sitting on top is also a KaiserCraft and a long time lurker in my stash.
Let's take a closer look at each box and some of the techniques I used.


Oh! Look! More KaiserCraft! I decided that these wood veneer 'ornaments' would make a great base for a wreath. I first used Barn Door & Lucky Clover Distress Stains to add colour before using Walnut Stain Ink to tone down the bright colours. Festive Foliage die set was used for the wreath and I added a few Pinecone charms from Emerald Creek Craft Supplies.


I bought a set of Tim Holtz Holiday LetterPress just for this project. I added some Distress Paint before dipping my letters in Distress Crackle Clear Rock Candy. I just love the look of this stuff when it dries!

I just love bottle brush trees. I usually will tint my trees with Distress Stain but for this project I decided to leave them natural. Except in the next frame - I decided to add some Soft Fallen Snow Embossing Powder from Emerald Creek Craft Supplies to the tips to give my tree a frosty feel.
make the perfect decoration for my mini tree. I added some Poppy Red alcohol ink from Ranger for a bit of colour.
The burlap panel is hard to see in the background but here is another photo of it while I was working on it. I used some Soft Fallen Snow embossing powder mixed with transparent 3D gel to add a snow texture to the edges of this panel. I used the same mixture with my snowflake layering stencil.


Here is the snowflake panel used in another frame with some stacked snowflakes dies and Snowflake charms from Emerald Creek
I couldn't resist using a few Found Relatives for this Holiday project & Festive Ephemera
 from Tim Holtz.

Thank you so much for visiting my blog today and I wish you and your loved one an very Merry Christmas and a happy holiday!

Please take some time to visit the rest of the Emerald Creek Design Team for more holiday inspiration.
Check out the new challenge at the Emerald Creek Challenge blog 
for a chance to win a $25 credit to the online store
http://blog.emeraldcreek.ca/
 

Wednesday, 11 November 2015

Remember The Fallen.....Emerald Creek Dares Challenge

Earlier this year I was fortunate enough to visit the John McCrae Birthplace & Memorial Gardens in Guelph, Ontario. Did you know that 2015 is the 100th anniversary of the poem "In Flanders Field"?  I know I didn't. 
Standing in that quiet garden in Guelph and reading the beautiful words of Colonel McCrae's poem was a very sobering reminder about how lucky I am to be living in Canada. I am so very thankful for the sacrifices made by the men and women who fought for our rights & freedoms in wars past and for those who continue to fight today. 
Now on to my project ~~~
I started with an 8x10 canvas that, in a previous life, was going to be another project. That planned project didn't quite turn out how I hoped so I just painted over it with black gesso and tucked it away. 
Never waste a canvas! 
I first started by applying a thin layer of white gesso with my paint brush. I wasn't too neat about it, I just knew I wanted a bit of black left around the edges as a border. Next I applied a dollop of  heavy gesso to the centre of my canvas and used an old hotel key card to spread it out a bit. I then used the same card to make vertical drag lines through the thick gesso and one horizontal line.
Once that was good and dry, I applied an few dabs of Fired Brick & Aged Mahogany Distress paint along the horizontal line, spritzed it with a bit of water then tip my canvas to & from until I got the finished look you see on the right panel. 
I then added so stamping along the bottom edge of the canvas using
Carnation Red Archival Ink from Ranger and these amazing Canada themed stamps from Emerald Creek Craft Supplies.
 Canada
We Grow On You
Maple Leaf
 Check out the rest of the Canadiana stamps from Emerald Creek - here.
The tag I made using a #8 black tag from Ranger that I trimmed down after I die cut the word "Remember" from the Friendship Words Block thinlit die set from Sizzix.

I then layered this over a small piece of cream cardstock using foam tape for dimension and some Picket Fence Distress paint along the edges.
The wreath was made using  Holiday Greens Thinlit die set from Sizzix & Tim Holtz. I die cut a bunch out using 3 different shades of green cardstock and gluing these around a base made from jute string. I used my spritzer tool & Peeled Paint Distress Marker to add some detail to the wreath and added a few Pine Cone Charms from Emerald Creek Craft Supplies.

Before adhering my wreath & tag to my canvas I used my spritzer tool & Hickory Smoke Distress marker to add some small details and stamped a few Maple Leafs with black Archival Ink to the canvas.

Lest We Forget


Don't forget to check out the rest of the projects from the rest of the
Emerald Creek Dares Design Team:

Cathy - Amethyst Dragonfly's Alcove
Karon - Karon's Krafty Korner
Diana - missusgmoments

http://www.emeraldcreek.ca/

Thank you so much for visiting my blog today!

Friday, 30 October 2015

Happy Halloween Eve.....

Happy Halloween Eve my crafty friends!
I know a lot of you have been busy creating spooky, creepy and all things ghoulish projects because I have seen so many in my trip around blogland.
Emerald Creek Craft Supplies is hosting a Trick or Treat Dare over on the blog.
Come visit us and share your Halloween Tricks with the Design team for a chance to win a Treat!
Click on the button below to enter your Halloween themed project today!

 photo ECD Button.png