Showing posts with label Ranger. Show all posts

Saturday, 3 February 2018

Getting Fab with Foil - Scrap 'n Stamp Designer Challenge

It's time for another Designer Challenge at Scrap 'n Stamp.
If you are following along the blog hop then you have come here from Tara's post at the Scrap 'n Stamp Blog. This month the designers were challenged to use Ranger Foil Sheets.
Full disclosure - I haven't used these foil sheets very much so there was a lot of trial & error in creating these cards. I'm sure there are better ways to transfer the foil but I'm pretty happy with these results. I hope you do too.

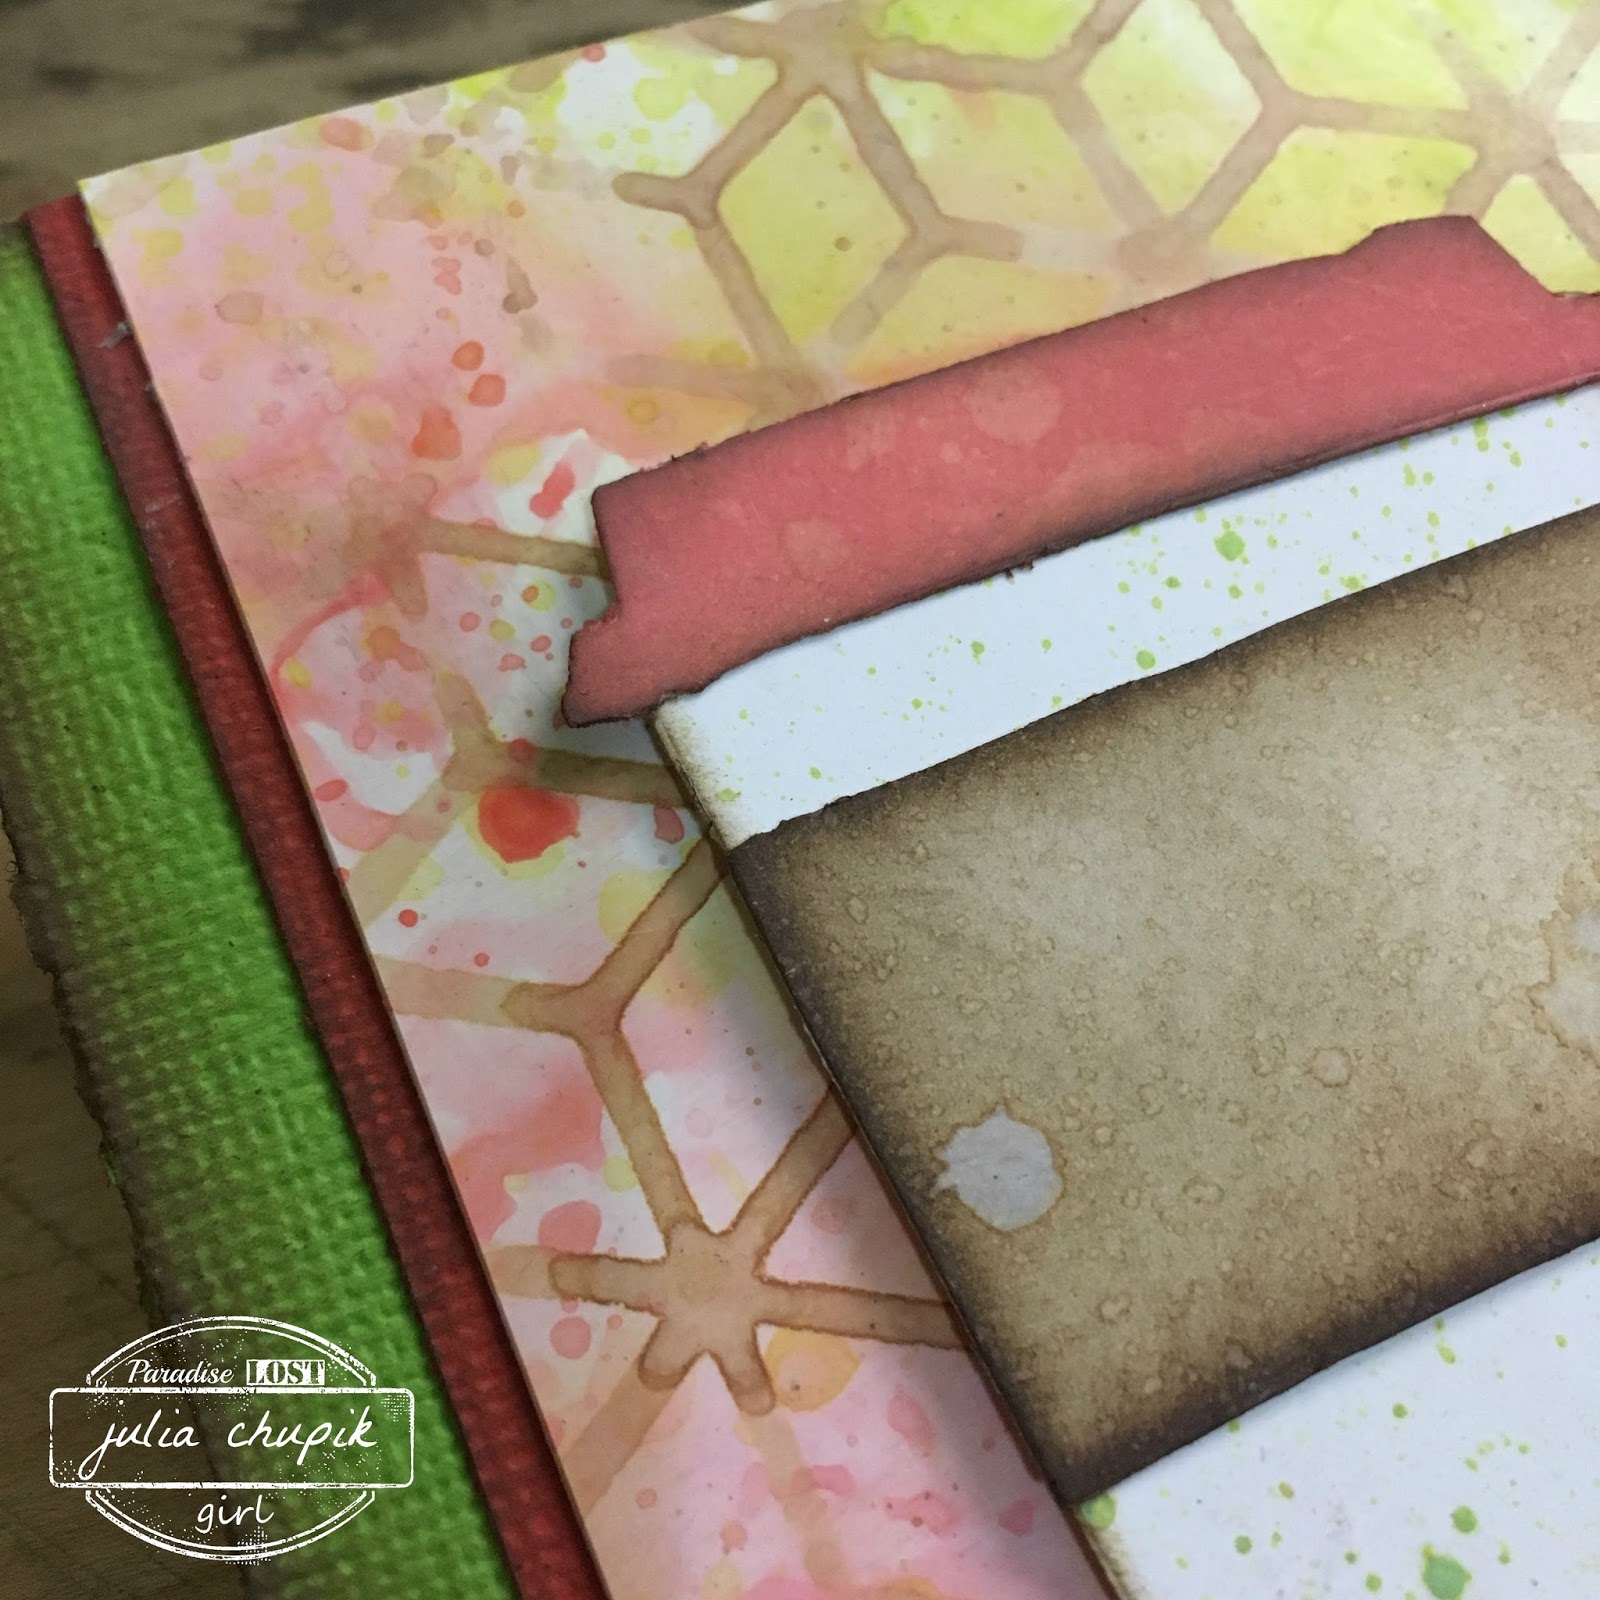
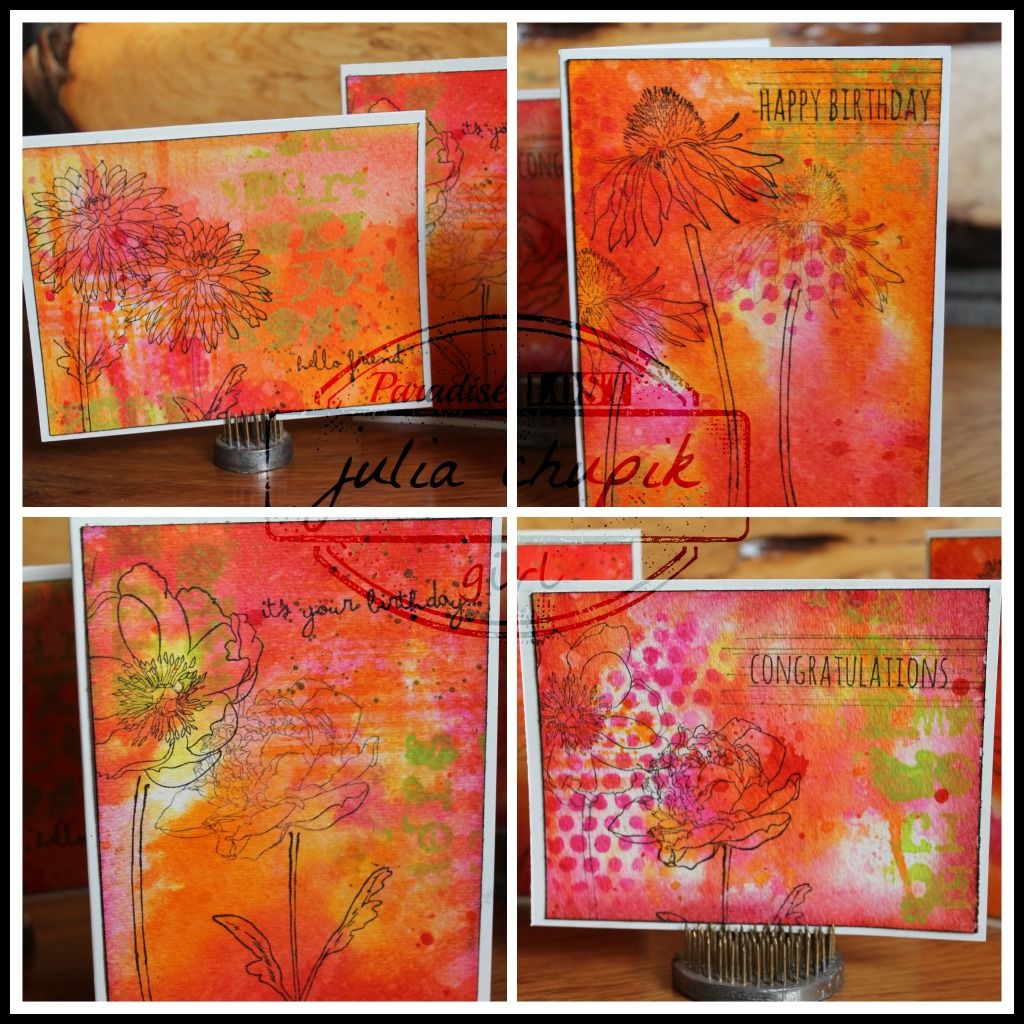
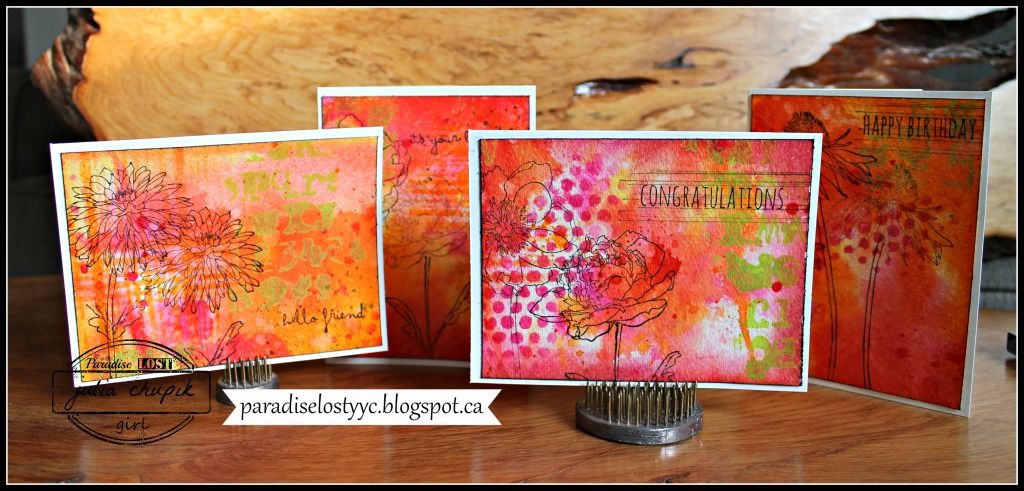
~Here are the completed cards~

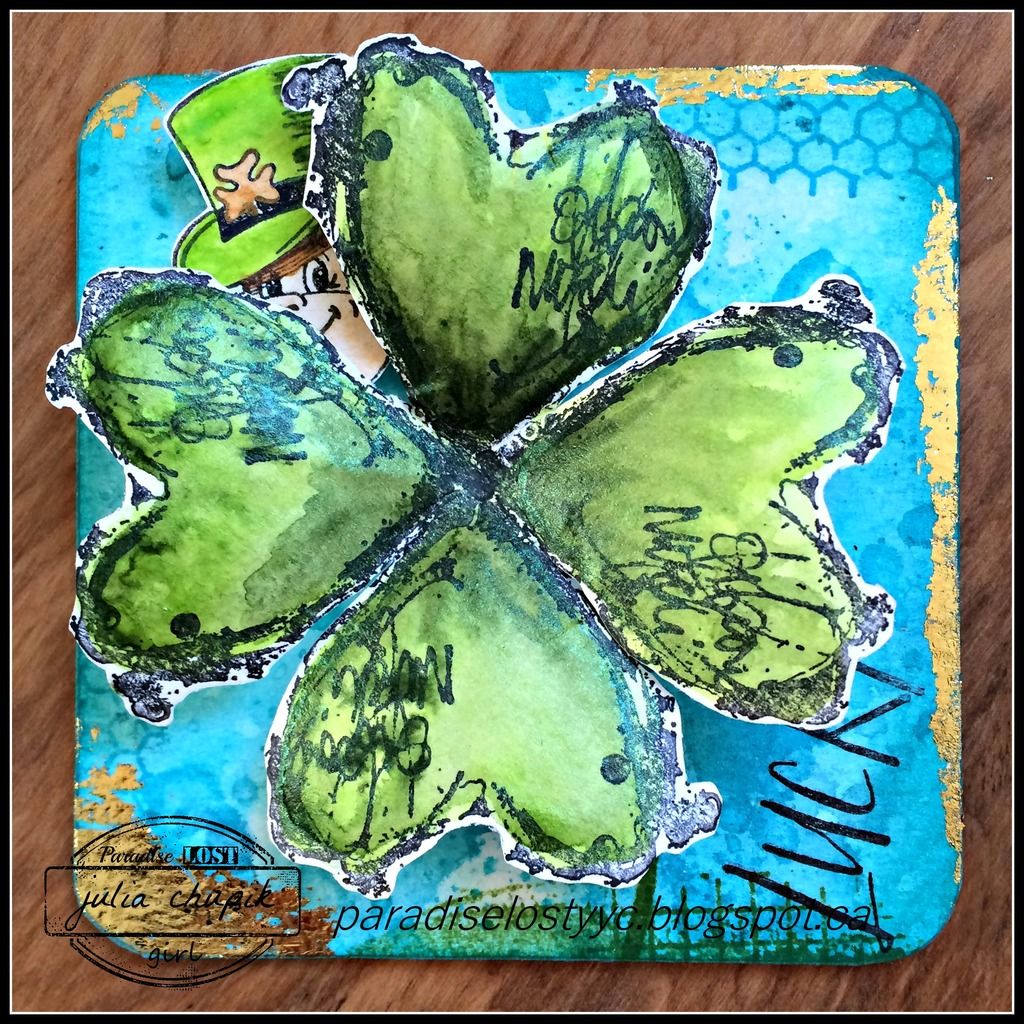
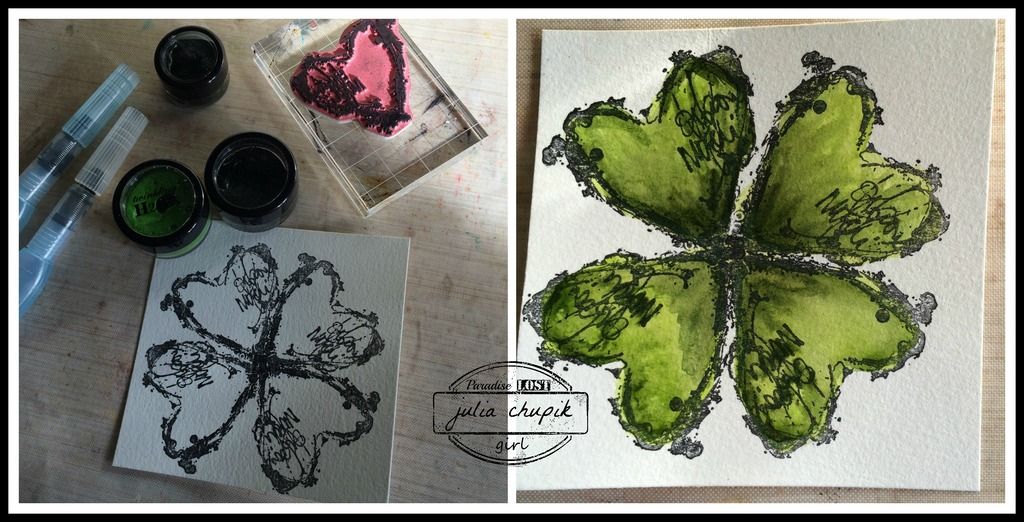
I applied the foil on the background and on my focal point.

I used sticky embossing powder to transfer the foil to my stamped images. The sticky embossing powder didn't give me a perfect transferred image but I sort of liked the result.

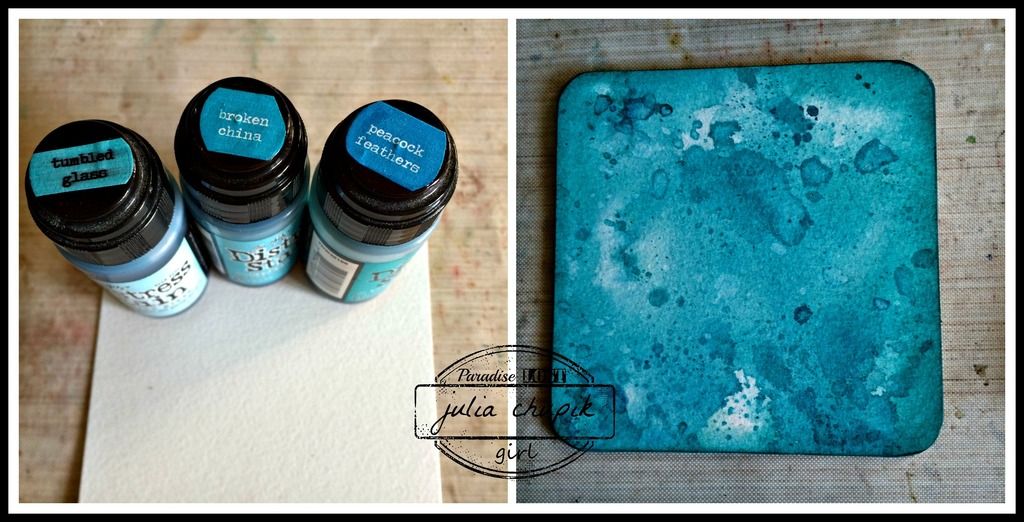
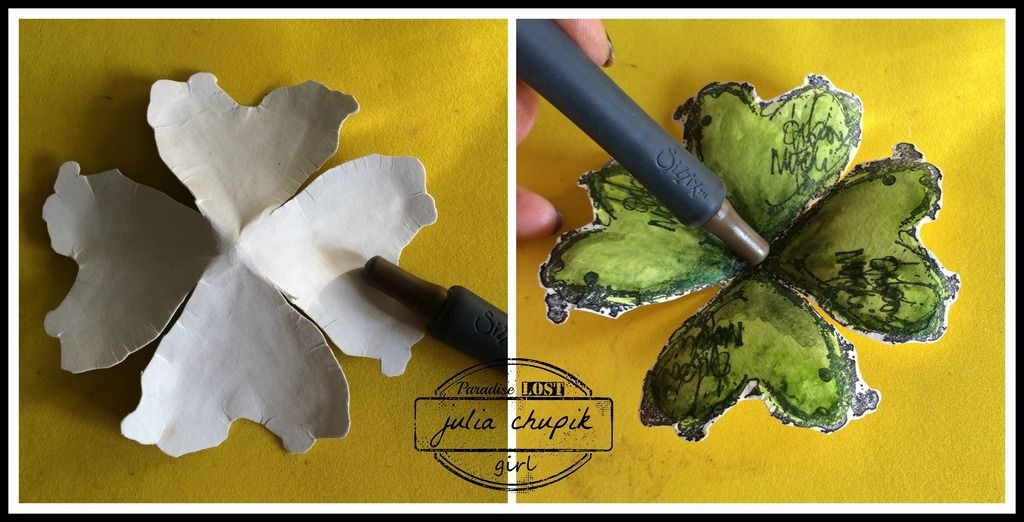
Using a bone folder helped to transfer the foil to the sticky embossing folder.

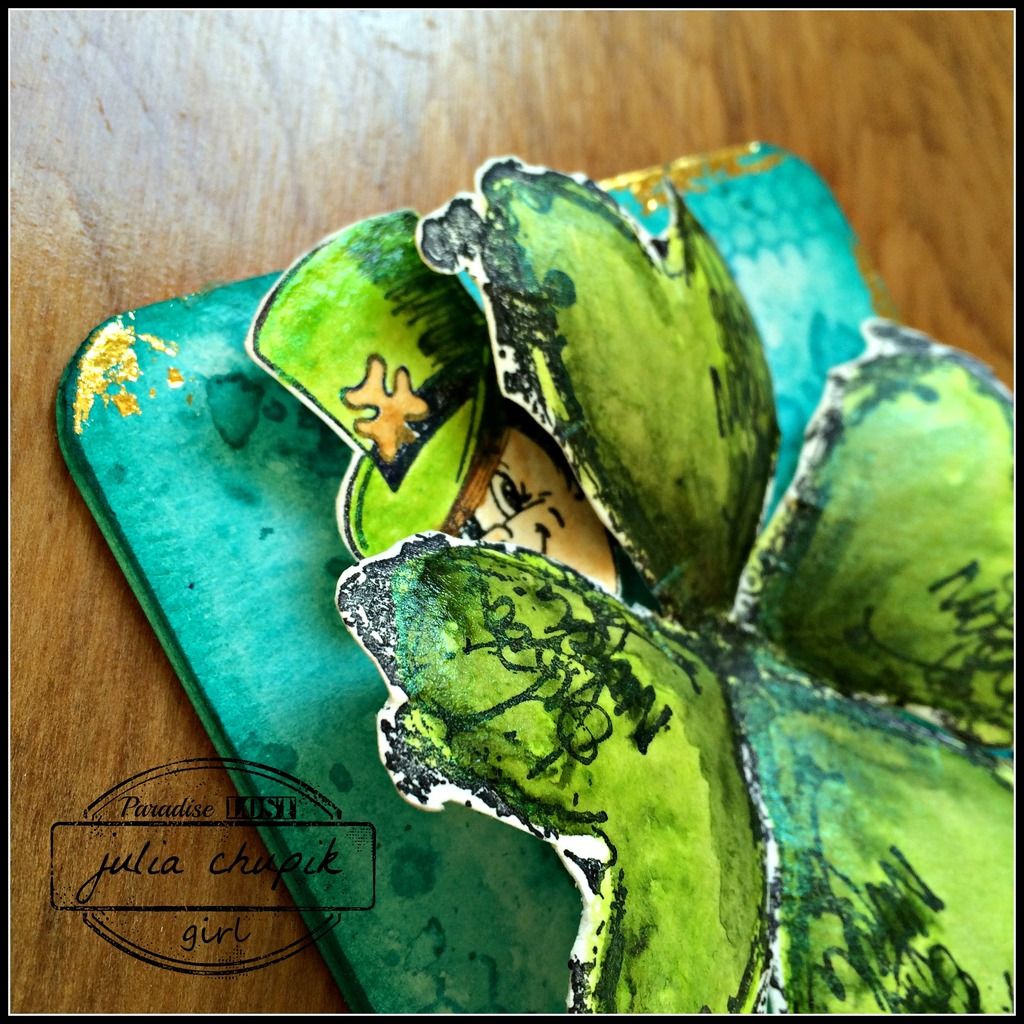
The Sketched Layered Fronds stamp from Dina Wakley Media was fun to use for this technique. The top layer left a fabulous foiled outline to the solid base stamp.

Watch the step-by-step video I made to see how I created these cards from beginning to end.

Be sure to check out the other designers blog for more Fab With Foil inspiration.  Be sure to leave comments at all the stops along the way and you could win a pack of  Ranger Foil Sheets!

Julia Chupik -------> You're here!


Products Used:


Friday, 26 January 2018

Distress Oxides + Distress Micro Glaze + Glossy Paper

Hello and welcome back!
Did anyone else spend last weekend glued to social media waiting and watching for live updates from Creativation? It was so much fun and I wasn't jealous at all. There are so many exciting products being released this spring!

One of the most exciting demos I watched was this one from Tim Holtz.....watch and be amazed.

This technique of absolutely blew my mind and I rushed to my craft room to try it out.
After a few attempts and being dazzled by the results I decided to take it one step 
further with a stencil.

Here is the final result.


After using the smoosh technique to apply the Abandoned Coral & Twisted Citron Oxides to the glossy paper - I took my Tim Holtz Layering stencil (THS059 Blocks) placed it over the glossy paper and applied Distress Micro Glaze with an ink blending tool.

I then dragged my glossy card through some Vinatge Photo Distress Oxide on my craft mat. This left the Vintage Photo only on the stenciled image not covered with Distress Micro Glaze.

The last step was to go voer then entire card again with the Distress Micro Glaze to remove the chalky white finish left from the oxidation.
This is such a fantastic technique and one that I am sure to use over and over.

Click below to watch the step-by-step video I made while making this card.


Wednesday, 13 December 2017

Leave A Little Sparkle - Distress Oxides + Perfect Pearls

Hello everyone!
I am back and ready to share a card I made for a friend. 
I have included a link to the YouTube video for this card as well.

~Here is the finished card~
I love using Perfect Pearls Pigment Powders with the Distress Oxides.
The little bit of shimmer looks lovely against the matte finish of the inks.

YouTube Video Link:


Products Used:
(This blog contains affiliate links that earn me a small commission when used to purchase products.
These links do not cost you any extra. Thank you for your support)

Monday, 27 June 2016

Tim Tag Remix - June

Wow! I can't believe June is almost done!
Thankfully, I remembered to get my tag done for Tim's Tag Remix.


This month Tim's tag was created using two techniques from 
~My finished tag~

I didn't have the plain tissue wrap so I used some plain white tissue paper that I had on hand.
I chose a few stamps for my background and stamped them onto the tissue paper with
Black Archival Ink.

Once my tissue paper was ready I used Distress Collage Medium in Vintage tint to apply it to a piece of lightweight watercolour paper. I don't have the new substrate paper so I needed to make sure to use a paper that was thin enough to use with my thinlit die butterflies.

While this layer was drying I began working on my base. Tim uses the Stripe Layering stencil to create a plaid pattern. I decided to use two different layering stencils to create a different effect.

Once my tissue paper layer was dry I used 2 small, thin metals dies to cut out my butterfly images.
I adhered it over my base with Distress Collage Matte Medium then added a bit of stitching around the edge.

I layered my butterfly die cuts then adhered it over a piece of burlap to the lower corner of my tag and added a simple sentiment.


submitted to:


Tuesday, 7 June 2016

Summer Of Creative Chemistry - Week 1

Did you hear the exciting news? Tim is introducing a brand new technique series - Creative Chemistry 103. CC103 will begin in August but in the mean time Tim will guide students through
CC101 & CC102 - with brand new challenges & giveaways.
Check out all the exciting details here and join in the fun!

For week one students were challenged to use four or more Distress Inks to create a tag, card or something else using a technique used in class.

I decided to make a tag using 2 of the 3 techniques and 6 Distress Ink colours.

The Distress Inks I used for the Spritz & Flick are Twisted, Abandoned Coral, Salty Ocean and Tumbled Glass. Once I had flicked water over my tag and let it dry then I applied the brush-less watercolor technique. I applied Picket Fence Distress Ink to my Rings background stamp from the Halftone & Rings stamp set from Stampers Anonymous, spritz my stamp with my mister then stamped it on my tag.

I love how this technique turned out over my inked background.
I applied Hickory Smoke Distress Ink with my round blending tool to the edges to finish it off.
Finally adhering a die cut of Umbrella Man and a sentiment stamp from the Stuff To Say set from Stampers Anonymous to complete my week 1 homework.


Submitted to: 


Thursday, 21 April 2016

Emerald Creek Dares - It's A Charmed Life

It's time for the next challenge at Emerald Creek Dares - and this one features the wonderful charms from Emerald Creek Craft Supplies. Kim has a fantastic selection of charms available at her online store. 

This will be my final Design Team post for Emerald Creek ~ I have enjoyed working with Kim & her amazing line of embossing powders, charms & stamps over the last 8 months. Check out the Design Team Call on the Emerald Creek Dares blog if you would like to join this fabulous Canadian design team!

Now on to my project - I created a vintage look canvas.
I started with a flat 8x10 canvas and using matte medium glued down scraps of patterned paper from the Emporium Of Curosities Mixed Media Paper Pack from IndigoBlu.
Next I applied molding paste through the Flourish & Harlequin Layering stencils form Tim Holtz/Sizzix. I also applied DecoArt Crackle Paste with a palette knife.
After my canvas was completely dry I sprayed it with Dylusions Ink Sprays - Ground Coffee & Postbox Red. 
Still using the Emporium Of Curiosities Paper Pack from IndigoBlu, I placed paper pieces that I inked and distressed. This was going to begin forming my centre focal point.
The flowers were made using paper from the same paper pack and the Jumbo Tattered Foral die from Sizzix. Each flower is made of 6 layers of paper that I sprayed with water and scrunched up before fixing together with a brad.
The greenery is chipboard cut from the Garden Greens Die from Sizzix. I painted it with Peeled Paint Distress Paint. I then randomly stamped  a script stamp over the painted chipboard before covering  the pieces with the new Crazing Collage Medium from Ranger. I absolutely love the crackle finish the crazing medium leaves when it dries.
To add a bit more grunge I added some Burnt Copper Leaves Embossing Powder by first 'painting' on some matte medium over the edges of my canvas then sprinkling on the embossing powder. I let the this dry before heat embossing the powder.
A couple of Copper Filligree Leaf Charms from Emerald Creek perfectly finished off my floral focal point. A couple of vintage photos added to my canvas and I was done!

Now check out the rest of the design team projects for some more amazing inspiration then head over to the blog to share your 'Charming' projects with us for a chance to win!


Products used:

Emporium Of Curiosities Mixed Media Paper Pack - IndigoBlu
DecoArt Crackle Paste
Crazing College Medium - Ranger
Molding Paste
Layering Stencils - Harlequin, Flourish
Doily Die - Sizzix
Jumbo Tattered Florals Die - Sizzix
Garden Greens Die - Sizzix
Dylusions Ink Sprays - Ground Coffee, PostBox Red
8x10 canvas - Dollar Store


Tuesday, 22 March 2016

Distress Ink & Watercolour - My Current Obsession

I love watercolour and have made a lot of cards using watercolour techniques
but I recently became completely obsessed with a no-line watercolour
technique I saw on Scraps & Stamps.
You can check out Nicole's blog post about no-line watercolouring here.


Nicole uses a combo if Distress Ink & Peerless  Transparent Watercolours.
Her finished project is gorgeous but it got me thinking - why couldn't I just stamp the image using Distress Inks and then blend the ink with my detailed watercolour pen?
Easy peasy lemon squeezy.

I stamped the koi image from the Nicole Wright Designs Upstream stamp set
on to 140lb cold-pressed watercolour paper using Twisted Citron & Carved Pumpkin
 Distress Ink Pads. Now it was time to grab the water brush and start blending.


It doesn't take much to get a beautiful watercolour effect and it's oh so simple & quick.
To get a bit more definition I took my Distress Markers in the same colours and added more colour to the fins before blending with water..

To protect my images before the next step I applied a layer of Distress Micro Glaze.

The final step was to swipe the paper through some Distress Stain for a water effect.

My completed card - I love the water droplets made with the stain.

Here is another card made using the same steps but this time when I applied the
Distress Micro Glaze I made sure to spread it a bit past the image. I wanted to have more a 'halo' effect when I applied the stain layer.

Thank you so much for visiting my blog today!

~~stay crafty~~

julia


Tuesday, 1 March 2016

4 Quick Cards - Spring Edition

Ah...can you smell that? It's the sweet smells of SPRING!

Today I'm showing you the make & take I taught at the Paradise Lost One Day Crop on Feb 27.
I based it on another blog post I did back in December - 4 Quick Christmas Cards

I start with a pallet of spring colours - Squeezed Lemonade, Carved Pumpkin & Picked Raspberry 
Distress Stain ~ and a sheet of 140lb cold press watercolour paper 9"x11".


I start by smooshing my 3 colours of Distress on to my splat mat and giving them a good spray of water. Then I start laying my watercolour paper on top of my stains. The middle picture shows the first & the right photo is about the 5th. I dry between layers and keep adding stain and water until I like what I've got. I don't worry about the white spaces and you'll see why in the next step.
This layer is all about Distress Paint & Ink Pads. I use all the same colour and start layering these on over the stains. I give this layer a really good dry with my heat gun before trimming my paper to 4 - 4"x 5.25" panels. This will leave a few small scraps that I toss in my scrap bucket to be used for future projects.


I add a stamp image (SA/Tim Holtz - Flower Garden)  and a sentiment (SA/Tim Holtz - Crazy Talk) to each card front before using my blending tool to ink the edges. Lastly I ran my Black Archival Ink pad along the edges to 'frame' them. 


I really enjoy this technique to make a set of cards - I get to combine my love of a large mixed media surface and cardmaking. 

Thanks for dropping by my blog today & I hope I was able to inspire you!

~stay crafty~

julia

Thursday, 25 February 2016

Lucky Clover - Emerald Creek Dare

It's time for a new Dare at Emerald Creek!

This time we want you to think Irish, greens, lucky clover, pot o'gold & leprechauns.

My project is a 4x4 canvas ~ made using watercolour paper and chipboard.
I added a sheet of thin magnet to the back and now it has a new home on the side of my fridge.
Just a little something to remind me of how lucky I really am.

I started with my 4x4 piece of 140lb cold press watercolour paper and 3
shades of blue Distress Stain - Tumbled Glass, Broken China & Peacock Feathers.
I smooshed all 3 colours of stain onto my splat mat before dragging my watercolour paper through it several time, drying the paper with my heat gun in between.

Once I was happy with it I adhered the watercolour paper to my chipboard base and inked the edges with Tumbled Glass Distress Ink. I added some random stamping around the edges and some gold transfer foil.

Next I started working on my focal point ~ I used the medium sized heart stamp from the Dina Wakely Collaged Heart stamp set & Staz-On ink pad to create my 4-leaf clover on watercolour paper.
I decided to use Twinkling H20 Shimmer paints to colour my clover. I haven't used my Twinkling H20's is forever and loved the shimmery look my clover ended up with!
I fussy cut my clover out before using the blunt end of my Sizzix quilling tool to 'shape' my clover leaves.

I used the Paddy stamp from Emerald Creek. I coloured him with Twinkling H20's as well before cutting him out. I just love how he is peeking out from behind the cloverleaf.

Thank you for dropping by my blog today and I hope my project has you feeling lucky.
Visit the rest of the Design Team Blogs for more Lucky Clover Dare Inspiration
and share your project with us at Emerald Creek Dares


Products used:

Emerald Creek Stamp


Distress Stain: Tumbled Glass, Broken China Peacock Feathers
Watercolour Paper
Dina Wakely Collaged Hearts Stamp set
Twinkling H20's