Showing posts with label Acrylic Paint. Show all posts

Monday, 9 October 2017

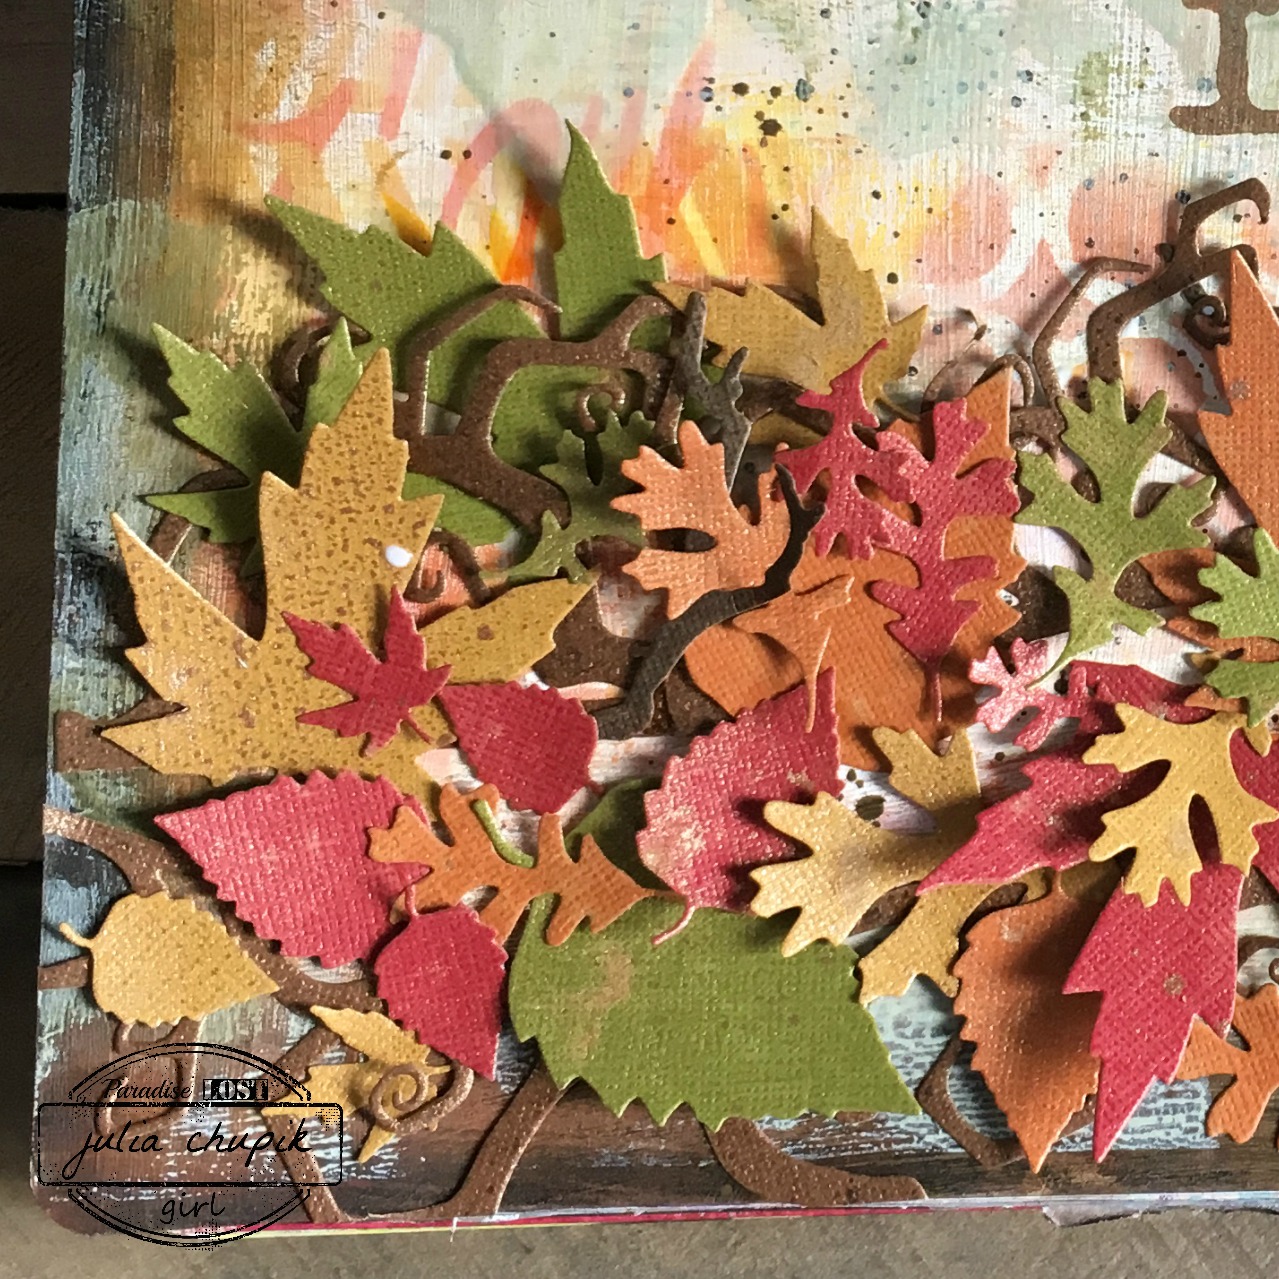
Happy Fall Art Journal

Happy Thanksgiving to all my Canadian friends wherever you may be in the world.

This will be a short post today.....an art journal page I did in my large Dylusions journal.

Here are the steps I used to create this page:
1. Brayered on acrylic paints in orange & yellow; random and didn't cover then entire page
2. Dry brushed on a light coat of gesso; let dry
3. Applied Distress Inks - Squeezed Lemonade, Carved Pumpkin & Ripe Persimmon through stencils
4. Around the edge of my page, I scribbled Distress Crayons - Walnut Stain & Black Soot and smudged them with my fingers.
5. Brayered on 2 different colors of green acrylic paint randomly over the page; let dry
6. While may page was drying I used my Fall Foliage and Twisted Edge dies from Tim Holtz/Sizzix and cut out some shapes with various colors of Distress Kraft Cardstock
7. I sprayed all of my die cuts with a light listing of Distress Mica Spray - Antiqued Bronze
8. I glued down all my die cuts along the bottom of the page 
9. I used the Tim Holtz Foam Cling Stamp - Type Lower, to stamp my sentiment.

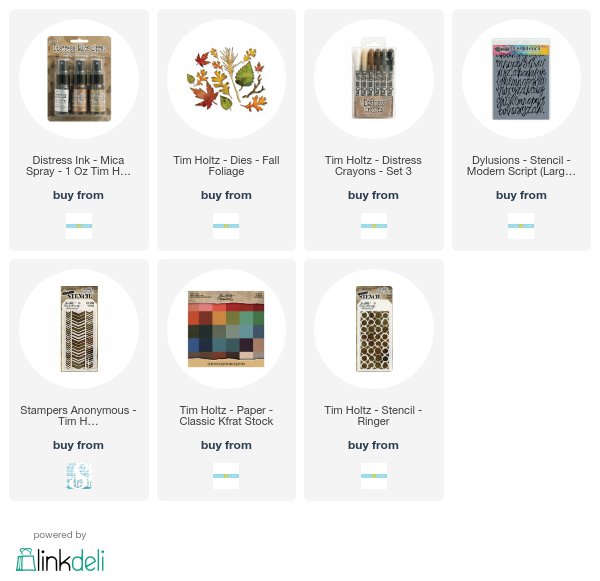
Below are the affiliate links for the products used for this project.

Monday, 13 February 2017

My One True Love......Wanderlust Week 6

Hello to all my crafty friends!
It has been a busy time in Paradise. My husband & I are in the process of moving back to
Calgary. There has been lots of packing and driving which has left little time for crafting & creating.

I did manage to find a little this weekend to get caught up on my Wanderlust adventure and now have a 2 page art journal spread to share - just in time for Valentines Day.


The teacher for Week 6 was Amanda Grace. Her style is refreshing and very enlightening - I hope that one day I can use my art journaling to express my deepest thoughts and feelings in such a beautifully raw way as she does. This week was an exploration of textures and techniques while at the same time creating a love letter to my husband.

My page ended up being a bit messy but in the spirit of "embracing imperfection" I left it - blobs of ink, spelling mistakes and all.

**********

submitted to the following challenges:


Friday, 13 January 2017

Distraction Journal

Hello, crafty friends! 
I'm going to share a little secret with you....I'm an over-thinker.
I over-think lots of stuff in my life but I do it a lot when I'm creating.
I can over-think myself into a virtual paralysis when it come to 
creating. So in order to help myself and to help embrace art journaling I have made myself a distraction journal. It's small enough to take with me, I can doodle in it, write down thoughts or memories, basically distract my brain when I begin to feel overwhelmed.


I started by grabbing a stack of 12x12 pattern paper from my stash.
I dry brushed acrylic paint in several different colours across the paper. 
It was so messy & so much fun! I think I did about 50 sheets of double-sided paper
by the time I was all done.

For the cover of my journal I used a Worn Cover from Tim Holtz Idea-ology.
I stamped some plain tissue paper and stamped on it with some of my fave background
 stamps and Jet Black Archival Ink.
I then used matte medium to adhere the tissue paper to the journal.
After the matte medium was completely dry I dry brush some Distress Paint over
 the entire journal, inside & outside. (sorry, I didn't take photos).

To finish off the outside I applied some Remnant Rubs and used some 
ribbon to attach the binder rings.


I filled my new little journal with pages made from my painted 
pattern papers.

Here is my first page in my new distraction journal.


Monday, 9 January 2017

Wanderlust 2017 - Week 1

I decided that in 2017 I needed to start art journaling more. To express myself in new ways
while learning new things about myself and my art journey.

So I searched for and without overthinking it, I signed up for Wanderlust 2017 from Everything Art.

Week one was for discovering my statement for 2017.
After sitting down, with a cup of tea and thinking about what I wanted to accomplish, I noticed 2 statements that I kept writing over and over in my journal.


There it is. Out in the open for all to see.


If you are looking for a wonderful way to explore your journey into art journal & mixed media arts, I highly recommend Wanderlust 2017. Go to Everything Art  to find out more.


Tuesday, 26 January 2016

I {Heart} You

I {heart} you! Yes, you! 

I have been blogging for almost 11 months and what started out as a terrifying experience has become one of the most rewarding experiences in my crafty world.


I have you to thank for that! 

Every person who has visited my blog, commented & shared has made me 
feel a little more confident & a whole lot more inspired!

So this is for you......

~stay crafty~

julia

Friday, 15 January 2016

Red & Black and Altered All Over....

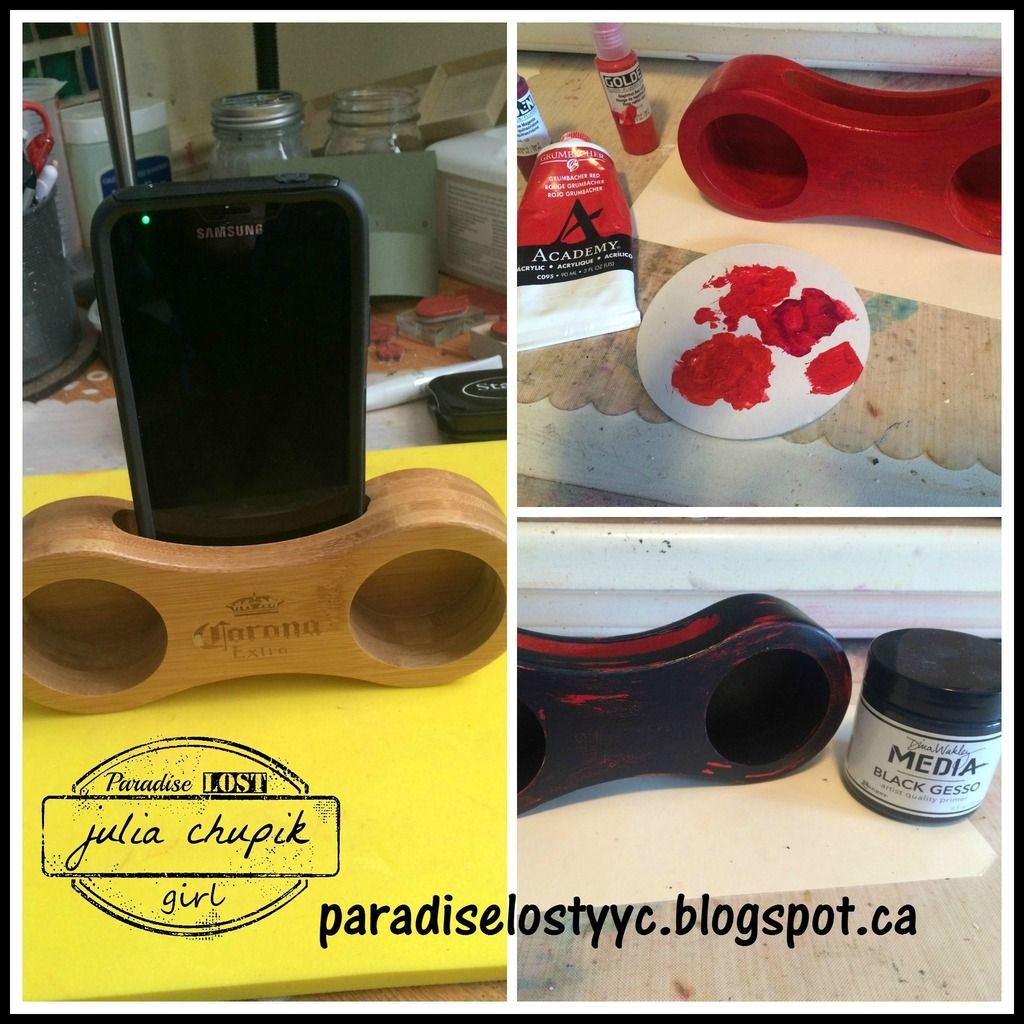
Over the holidays, I went to the my local liquor store and was told I was getting a free
gift with my purchase. Oooooo.....free stuff!

I opened up my free gift when I got home and was stumped.
I had no idea what it was. I almost tossed it into the trash (as I am trying to curb
by hoarding ways.) when my son came into the room and dropped his phone
into the slot. It was a smartphone amplifier and it must be altered! With all the "Something New" Challenges out there I thought this was the perfect project to get started with!
First step ~ I sanded it to remove the shiny finish.
Next step was to paint on 3 shades of red. Lightest shade first, then the next 2 shades were randomly painted on.
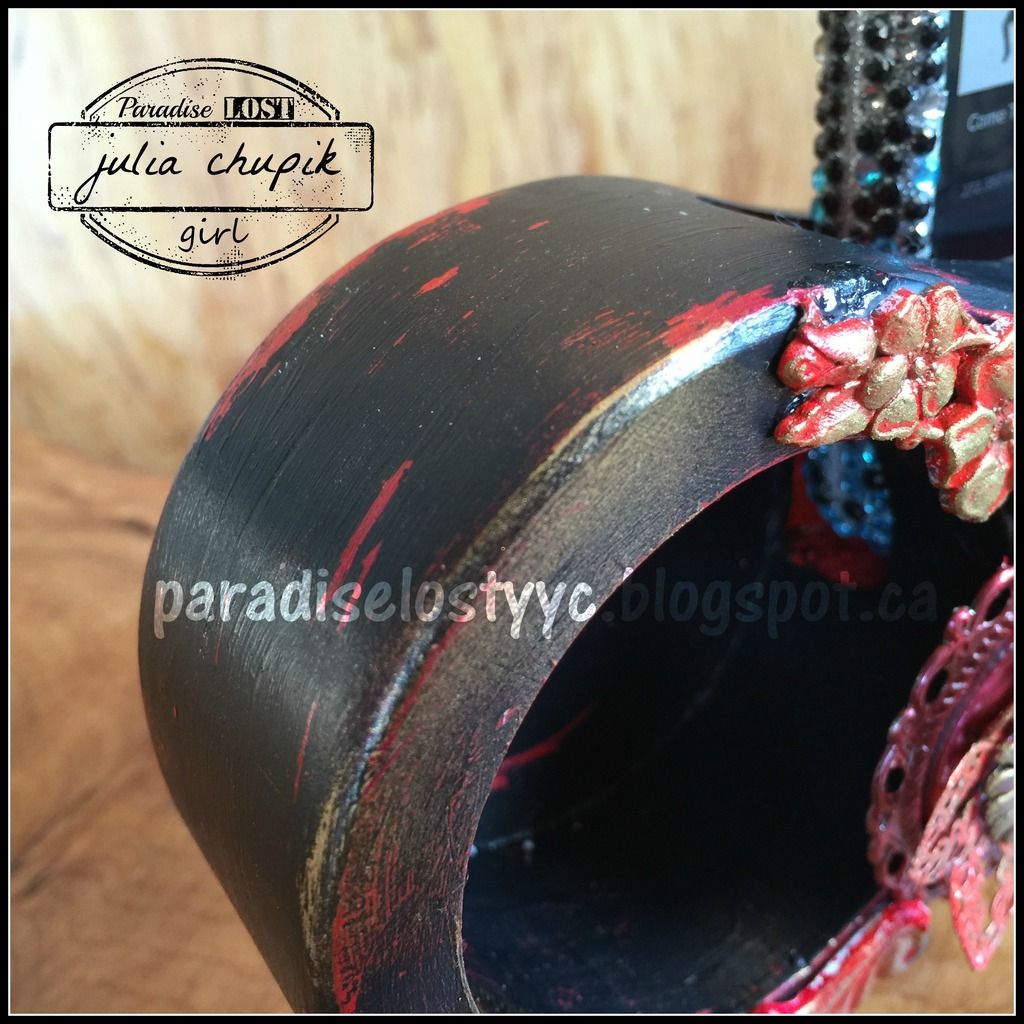
After that layer was completely dry I painted on one coat of black gesso. I used my heat gun to only dry it until it turned matte then used a baby wipe removed some of the gesso to reveal the red underneath. 
I love the aged look it gives it. I added some gold metallic rub-ons as well.
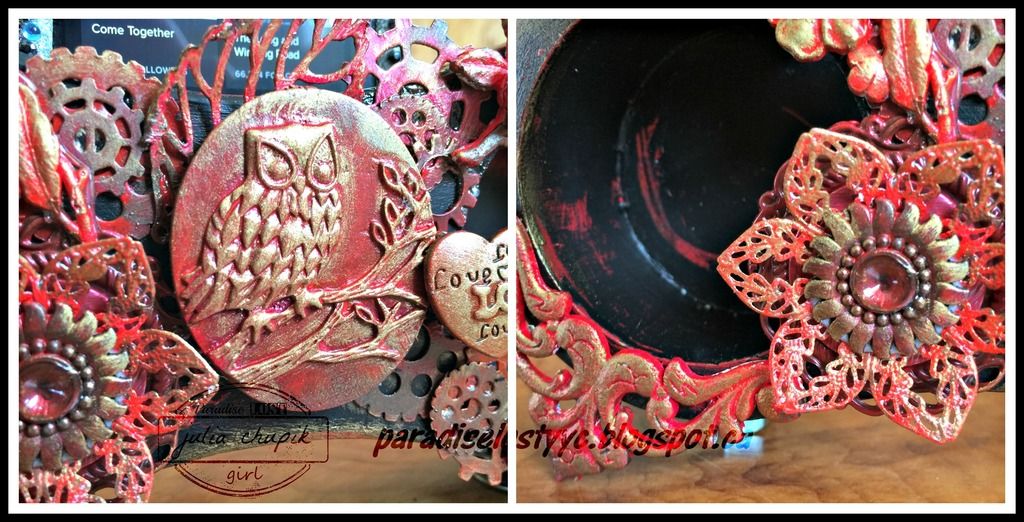
All my metal embellishments were painted before I adhered them to the wood base with 3D gloss gel.
I used metallic rub-ons to highlight the details on the metal pieces.
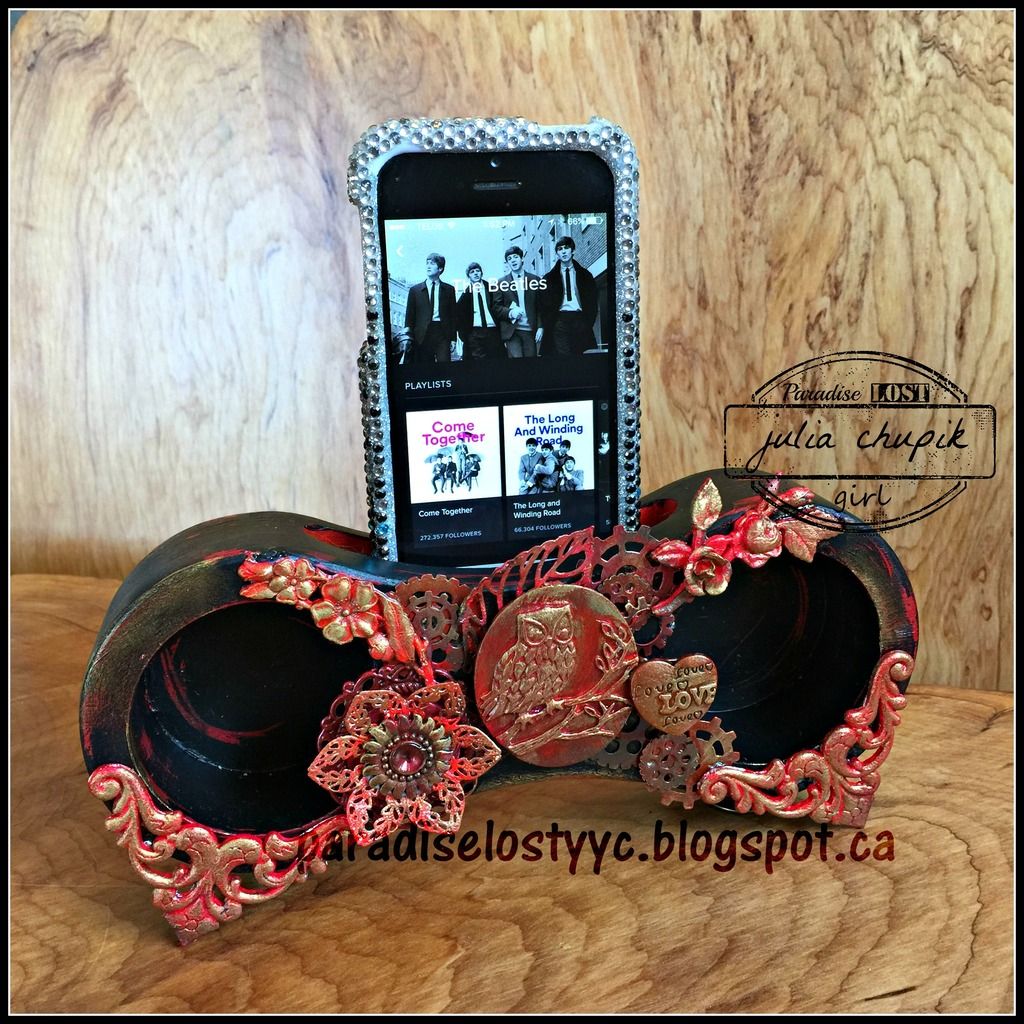
Here is my brand new iPhone amplifier! Perfect for playing tunes while being crafty!

Have a wonderful day everyone & thank you so much for visiting my blog today!

Be sure to visit the Emerald Creek Dares blog and join our 
We are on out way....NEW Adventures Challenge
for a chance to win a $25 credit to use at 
Emerald Creek Craft Supplies


~~stay crafty~~


Tuesday, 6 October 2015

The Journey......Art Journal Layout

I started an art journal a year or so ago and somehow, somewhere along the way I stopped.
I got into the habit of over-planning and over-thinking every creative project instead of just letting the creativity flow naturally.
I decided I just needed to sit down with my art journal and just let the ideas happen.
No planning. No thinking.


It was so refreshing and it reminded why I began an art journal in the first place.
This page a little bit of everything - painting with a brush and some with my fingers; stamping, stencils; texture paste;distress stains; metallic paint; gesso & rub-ons.
From start to finish this took me 45 minutes to finish including the drying time.

Hello, Art Journal. It's nice to see you again.

Thanks for visiting my blog today!
I really appreciate it.


Challenges submitted:

A Vintage Journey: Art Journalling With Tim

Friday, 15 May 2015

A Vintage Canvas

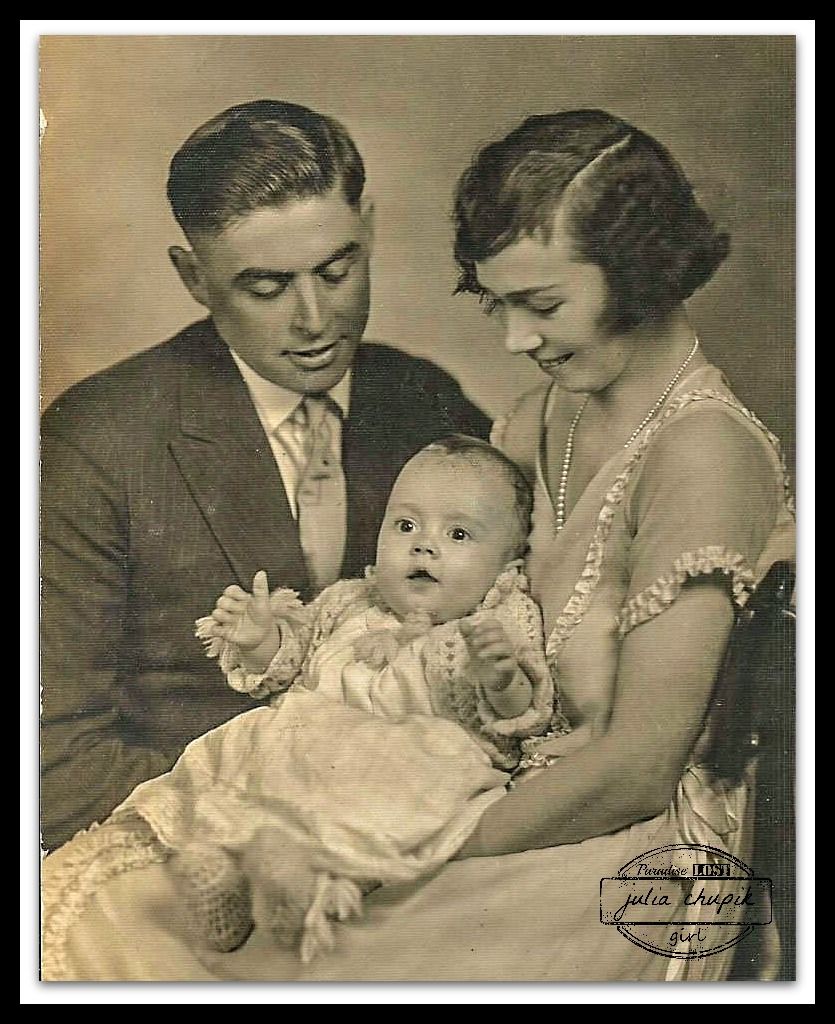
My Great-Grandma Edna was a grand lady. Full of life and a hearty laugh that would
 bring a smile to anyone's face. I give her full credit for passing on the 
scrapbook gene to me.
My great-gram with her husband Septimus & holding my grandfather - circa 1925
I recently inherited her scrapbooks (dating from the 1920's - 1970's), her mother's scrapbook (dating back to the 1870's) and my great-grandfathers scrapbook (dating from 1910-1920's) 
It has been quite a journey going through these old family photos & it has also been quite inspiring.

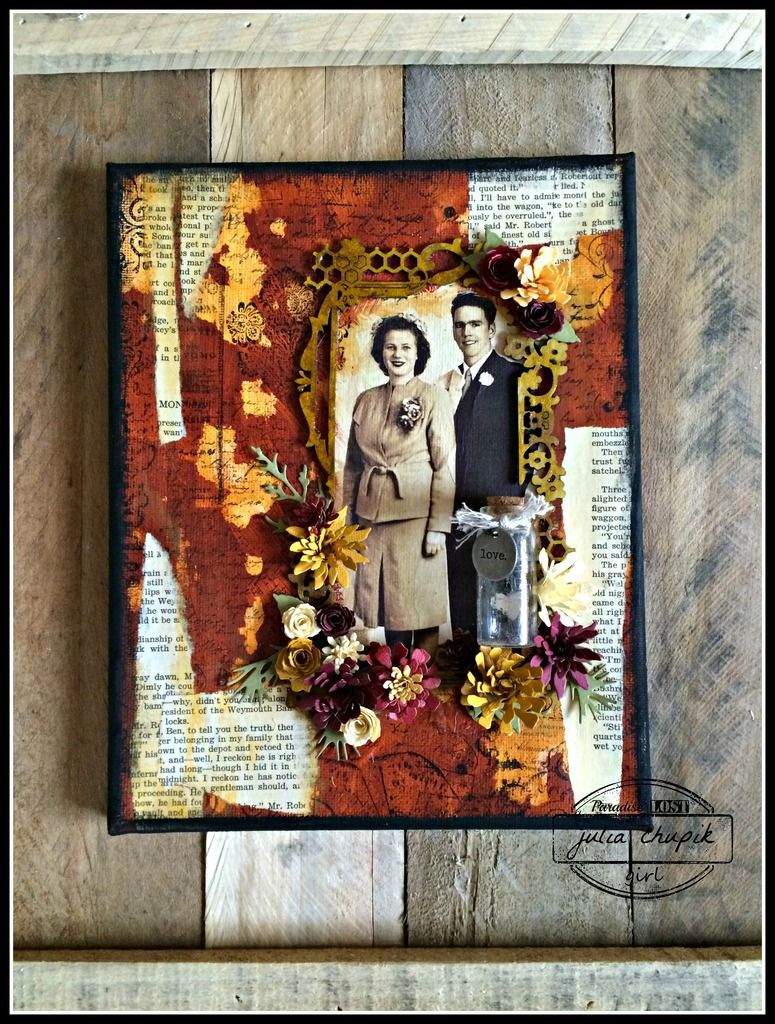
I recenyl started a series of canvases that will displayed in my home using copies of some of my favorites. This is one of them.....

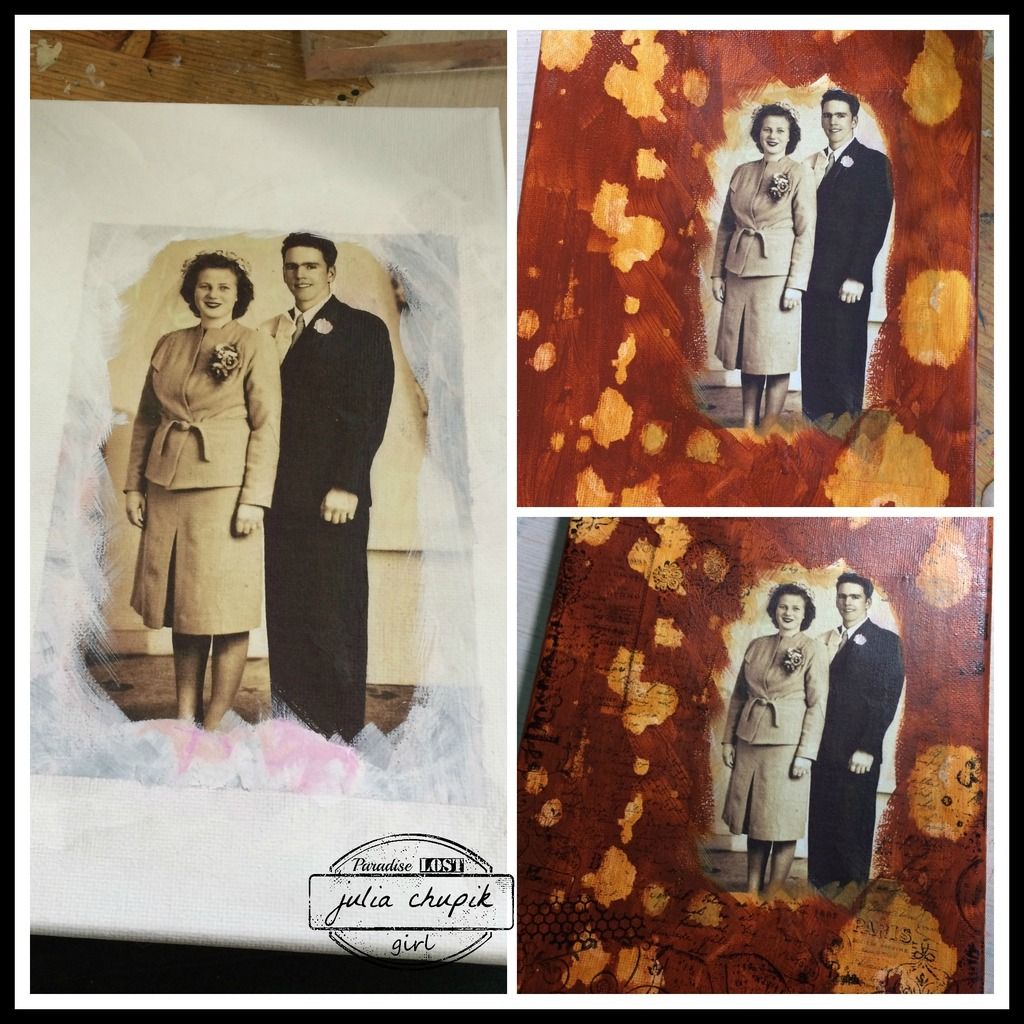
This is a photo of my Grandpa & Grandma Shuttleworth on their wedding day in 1946. After editing the photo I printed it out on white tissue paper. I then used matte medium to adher it to an 8x10 canvas. I applied a light coat of gesso arounf the edges before starting to layer my paint. My next step was to stamp various images across the canvas. 
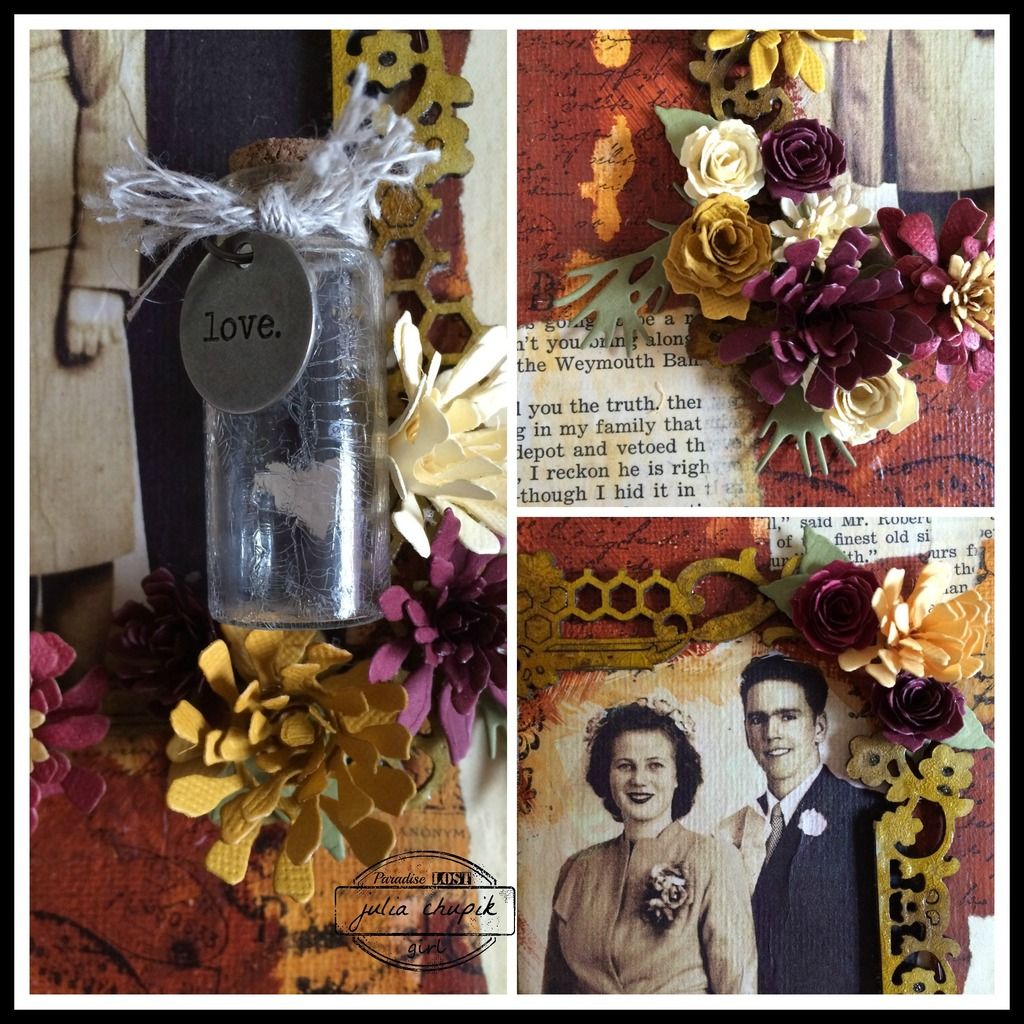
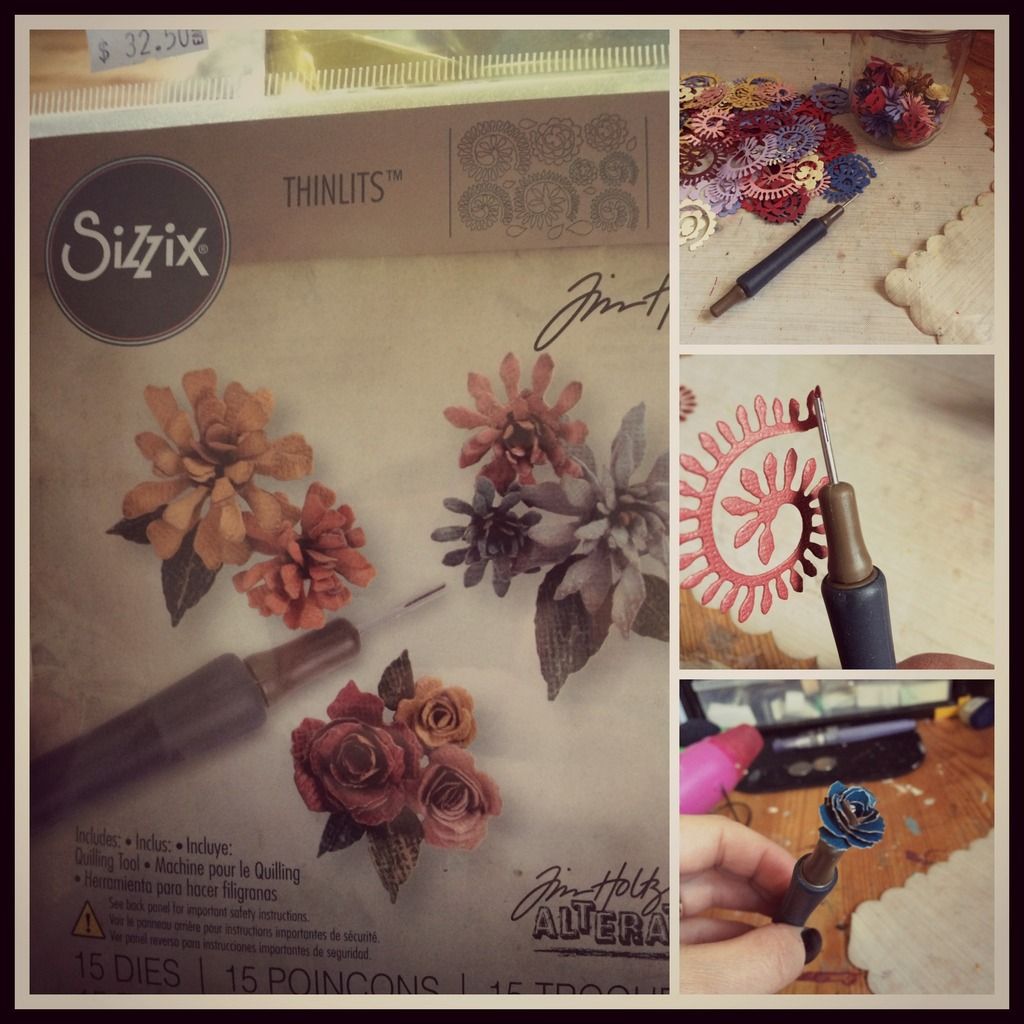
After adding some torn paper pieces to the canvas I started adding my 3D elements. The Foral Medley Frame from Blue Fern Studios was perfect and I couldnt wait to use my new Fossilized Amber Distress Stain on it. I finshed the frame off with a coat of Distress Clear Rock Candy paint for a little more added texture. Check out those Tiny Tattered Florals! It's my new favorite die!
I sat down earlier in the week & made a whole mason jar full of these tiny flowers! The quilling tool that comes with the dies really makes these flowers easy to assemble. 
Check out this demo video by Tim from CHA 2015.....

Finally here is my completed canvas.....
.....all ready to display with my other family canvases.
Check out A Vintage Journey Challenge Blog
for a lot of Tim-Inspired Shabby & Vintage goodness!


Thank for visiting my blog today! I really appreciate all your comments.

~~ stay crafty ~~
julia


Challenge Entry....
A Vintage Journey

Submitted for:

Emerald Creek Dares - Fall 2015 DT Call

Wednesday, 29 April 2015

Lotus on Canvas

I am always looking for new and messy mixed media techniques to try so when I discovered the wonderful world of Andy Skinner I got very excited!
My dear friend and wonderfully creative enabler, Nicole aka Canadian Nickel Scrap'n, recently started using the Mixed Media line of product from Deco Arts. Lucky girl! I have yet to find a Canadian retailer that sells it. *insert sad face here*. (If you know of where it can found in Canada - let me know!)
Shortly after ooooooohing & aaaaaaaaahing over all the yummy products she was sent I went to the Deco Arts blog and discovered the amazing Andy Skinner! Check out his blog, You Tube Channel & Pinterest for amazing crafty inspiration.

Yesterday I watched Andy's Media Media Background on YouTube and I just had to try them out.
I don't have any of the Deco Art products that Andy uses in his video but I didn't let that stop me! 
I started with a couple of 8"x10" canvases that I picked up at the dollar store. One I had used previously to try a photo transfer technique that didn't quite work out as planned so I just covered it in a couple layers of gesso. 
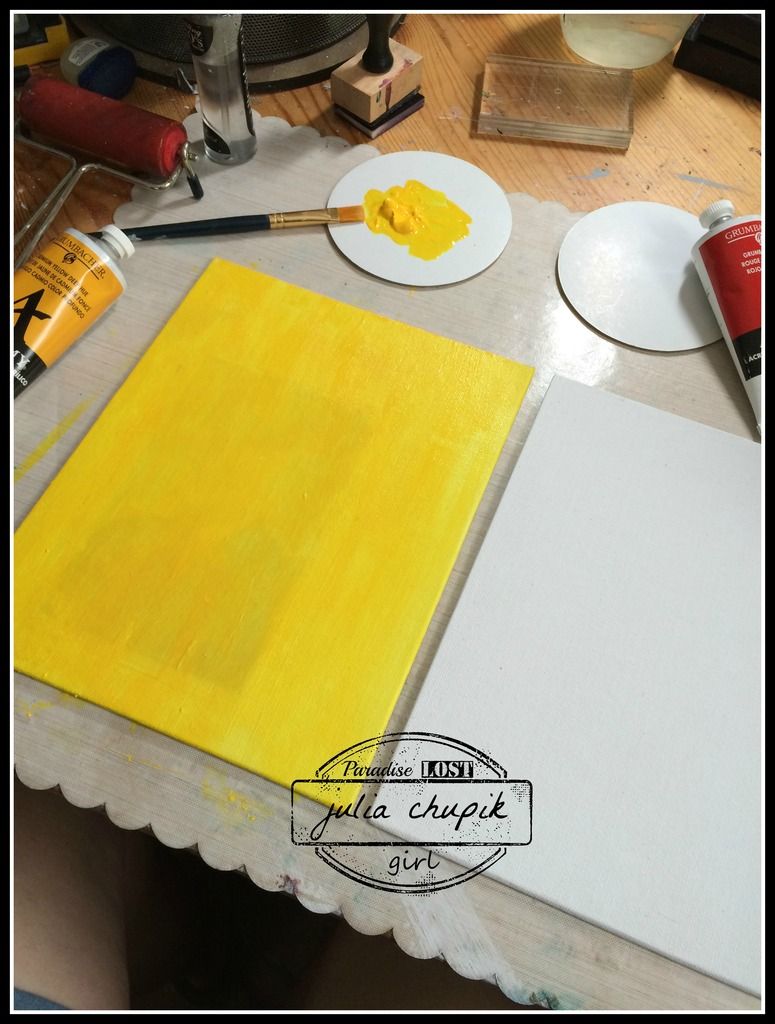
Acrylic & Alcohol Layer
I used Grumbacher Academy Acrylic paint for all my paint colours. This layer was cadmium yellow deep. I painted both canvases then used rubbing alcohol as suggested by Andy. The effect wasn't quite the same as shown in the video but after rolling my paper towel over the alcohol it did leave me with a cool effect. (sorry - forgot to take a photo) 
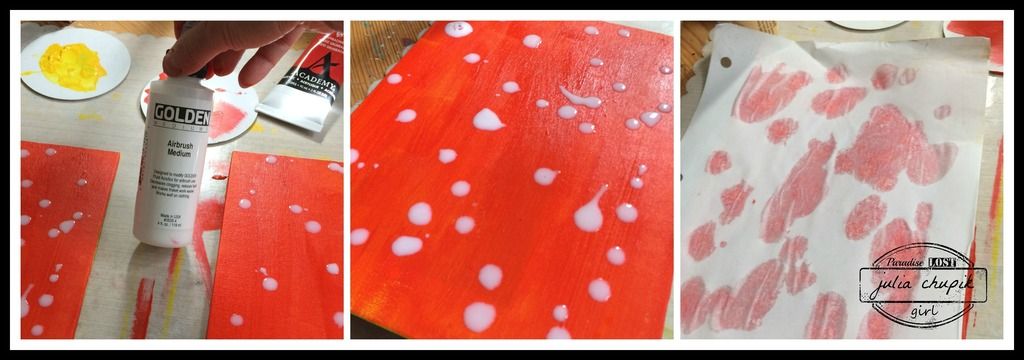
Splash Technique Layer
 This layer was Grumbacher Red and since I didn't have the Deco Art Easy Float I needed to get creative. In his tutorial, Andy suggested water as an alternative but I looked around and saw my bottle of airbrush medium and decided to try that. I splattered that onto the canvas, let it sit for a moments then placed a sheet of paper over top and gently rubbed. This lefted the airbrush medium off the canvas, leaving exposed areas of the first layer. I liked the effect but probably won't use the airbrush medium again.
I won't go into detail for the stamping as Andy does explain that in the video. The next 2 layers used a medium to cover up parts of the canvas that you want to remain exposed. I used petroleum jelly and it worked really well. I did 2 layers using this technique - first with a layer of yellow green acrylic paint, followed by a layer of turquoise green. 
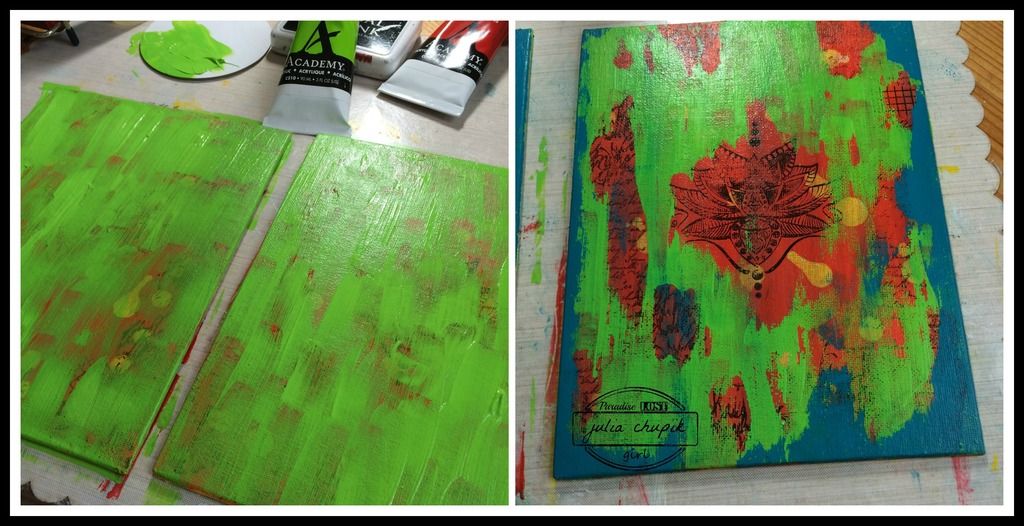
Paint & Petroleum jelly layer

The next technique was probably my favorite and one that I can see myself using over & over.
The torn paper technique used titanium white paint & stamped images with archival ink.
Again, petroleum jelly was used to cover up the parts of the canvas that you want to be exposed later on. 
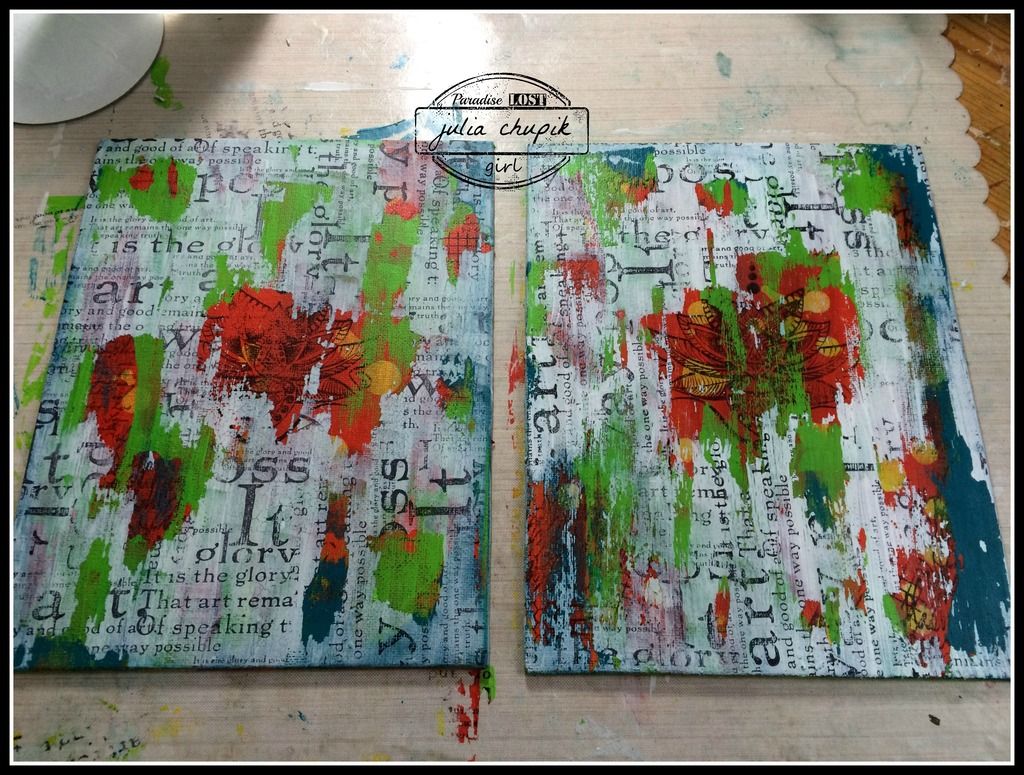
Torn Paper Technique
I wish I had covered up more of the canvas with petroleum jelly so that more of the lotus image showed through but it is all about learning. Over all I am very happy with the results and plan on using these techniques in the future.

Here is the finished canvas. I used a black oil pastel around the edges to give it more of a 'framed' look.

Thank so much for looking! I appreciate your comments, feedback & suggestions!
Have a wonderful day & stay crafty!

~~julia~~

p.s. the Lotus stamp is from Limor Webber Designs