Showing posts with label embossing folders. Show all posts

Tuesday, 2 May 2017

Crafty Friends & Coffee Fairies

A few weeks ago I started getting together on Wednesdays with my very best
 crafty friend, Nicole Wright. We alternate between our houses - she has the mother of all Sizzix die collections and I have everything mixed media. It works out pretty well.


This project was one of the first ones we collaborated on without even realizing it. I was in a bit of funk and not feeling very inspired. Nicole was working on a tea & coffee inspired journal page and I decided to let her creation inspire me.


We ended up using the same dies & some Tim Holtz Paper Dolls & loved how different our journal pages turned out.
My background was created a few weeks before using Distress Oxides, stencils and the stencil monoprint technique. I repeated the technique on the tea cups too. I loved how it looks.


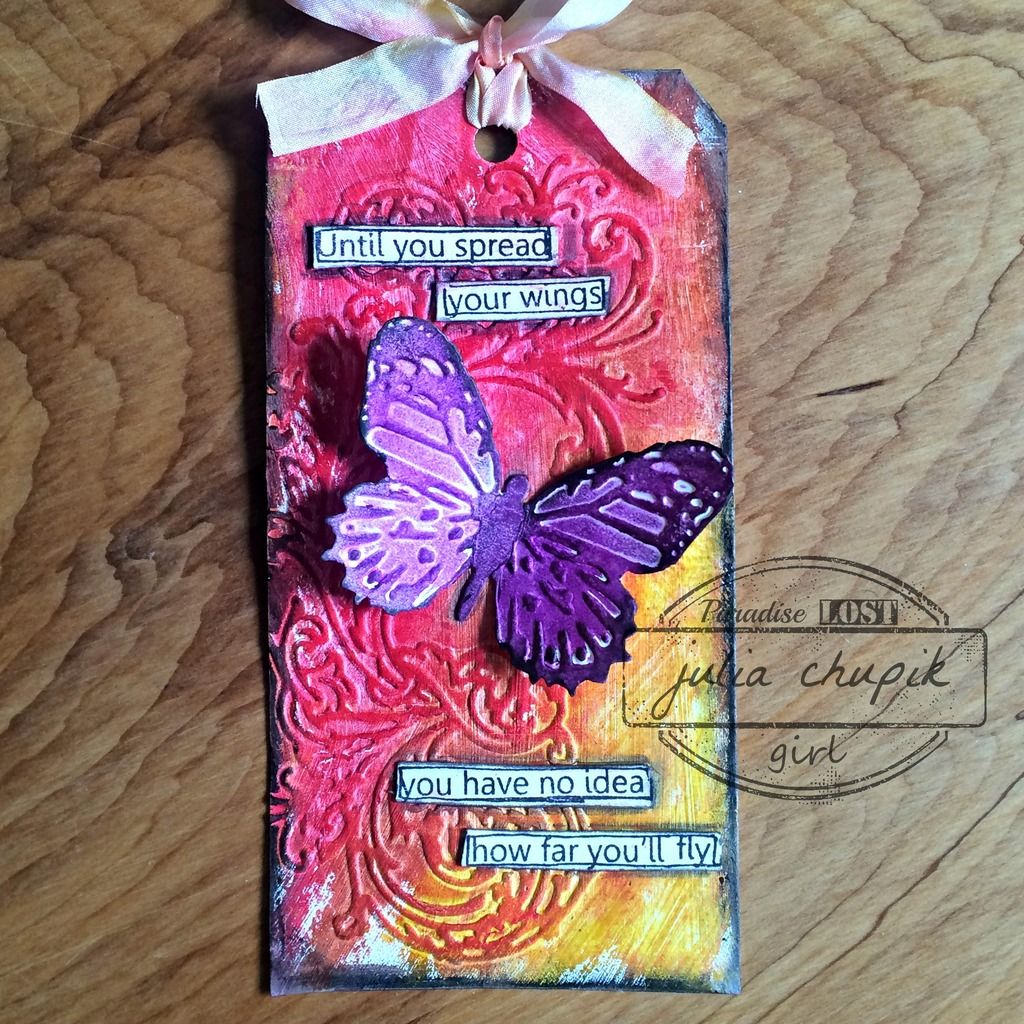
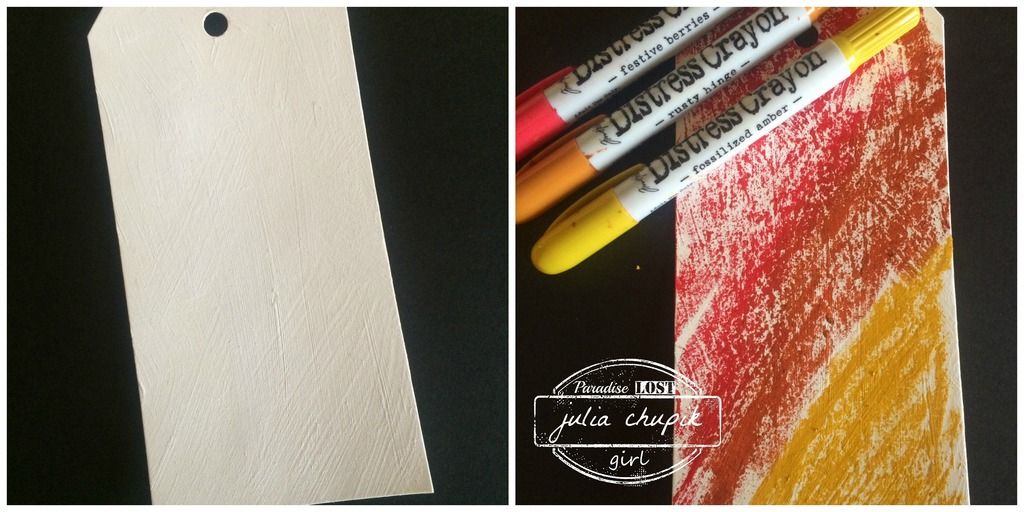
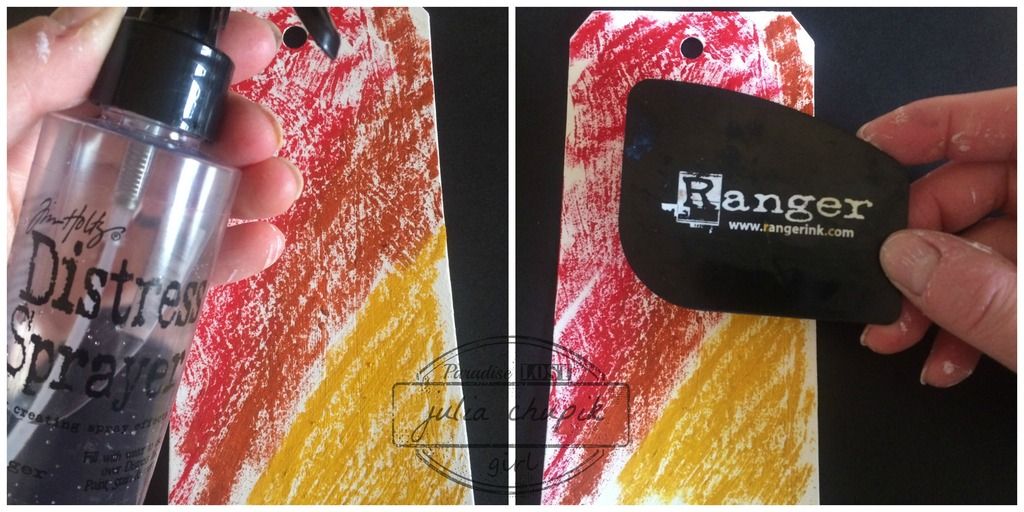
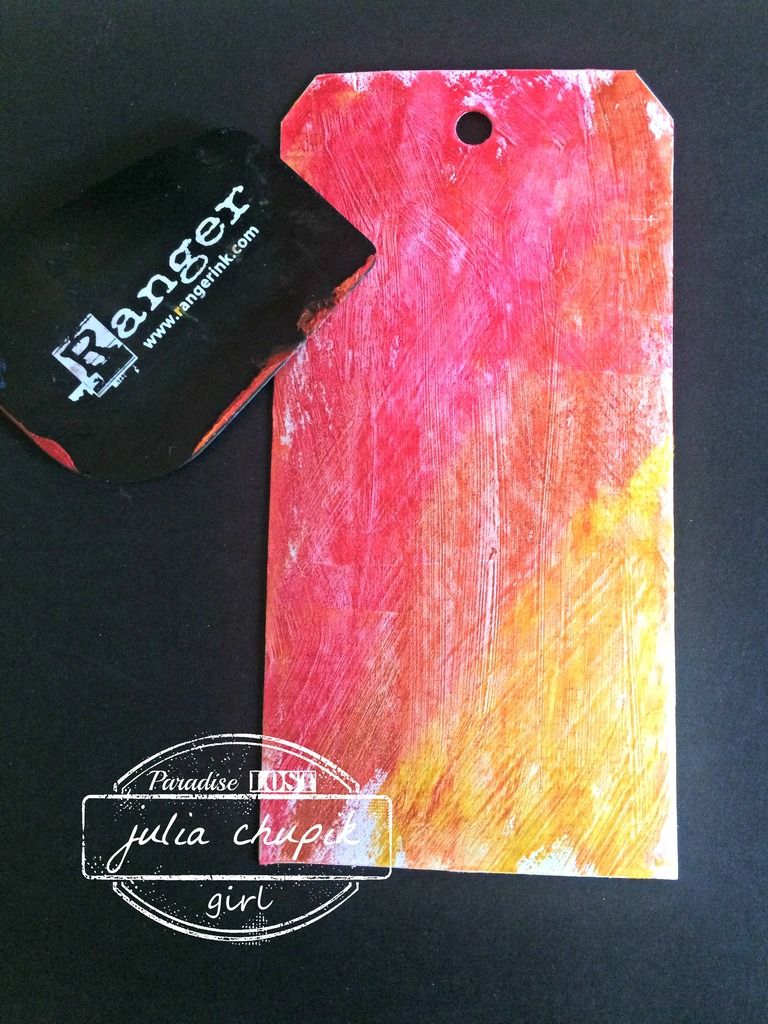
On the coffee side of the page I decided to make wings for my paper doll children. I first inked up some watercolor paper with Scattered Straw and Carved Pumpkin Distress Ink with my ink blending tool, a few spritzes of water and quick dry with my heat tool and I was ready to die cut.
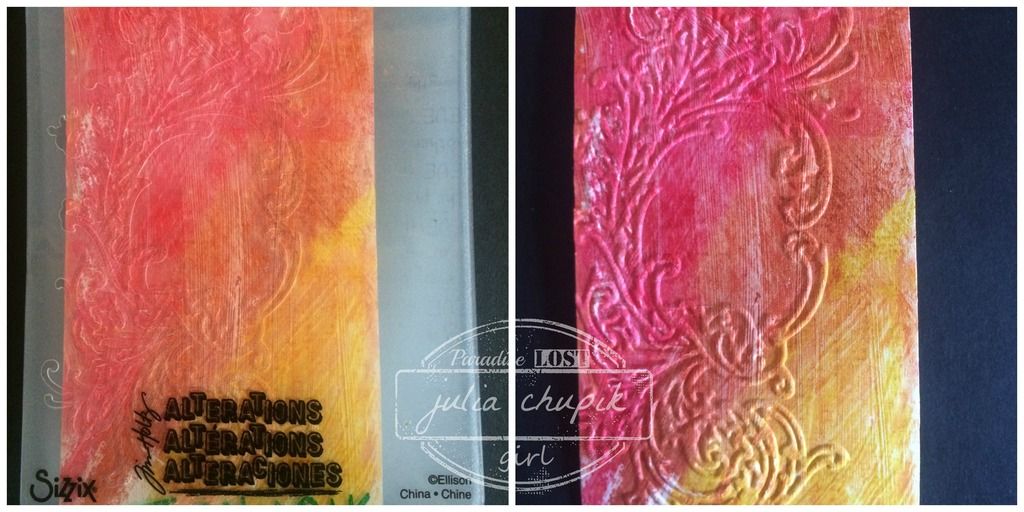
I used the Butterfly Duo Bigz Die from Sizzix & Tim Holtz. I then used the coordinating embossing folder, inked with Vintage Photo Distress Oxide, to emboss my 'wings'.


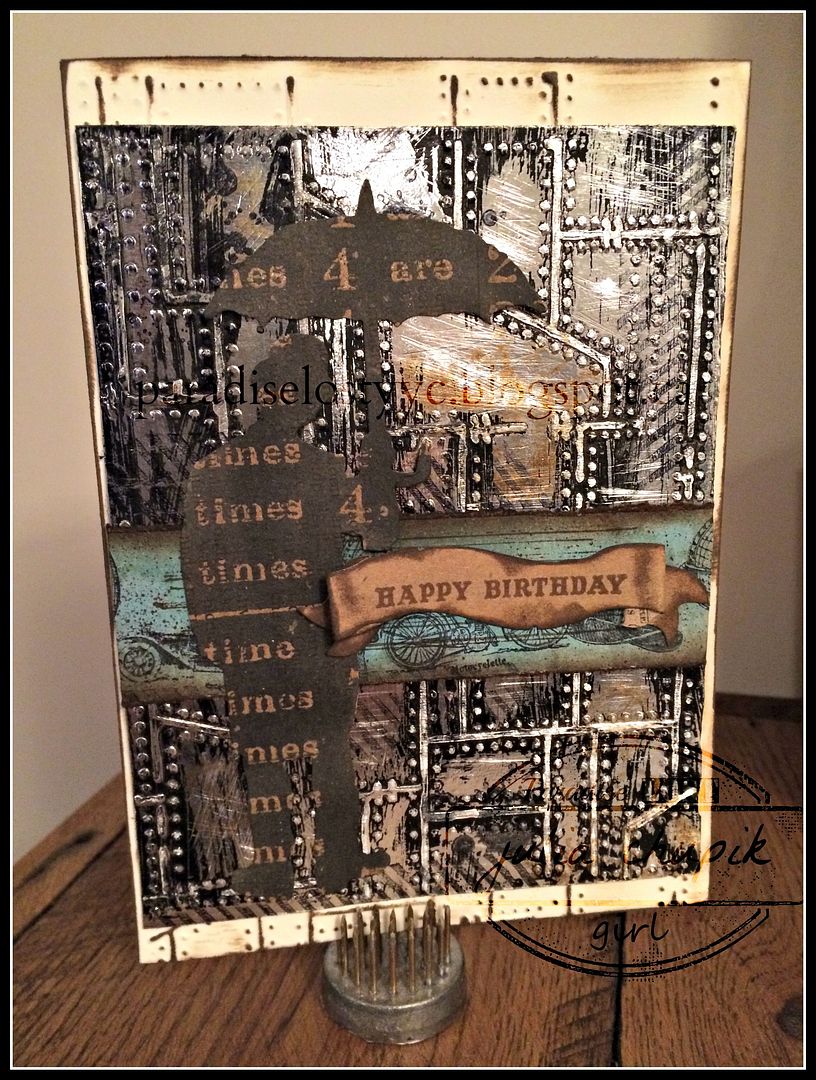
The Paper Dolls & Quote Chips were perfect to finish of my page.


I really loved how this page turned out and dream of the day that I have my own little coffee fairie that will serve me the perfect cup when I wake up in the morning. It's always nice to dream.

Check out Nicole's coffee & tea themed journal page here.
We already have more projects planned to show how to use products in different ways in our own styles. Collaborating with crafty friends is so much fun!

Monday, 7 November 2016

Let It Snow....Christmas Gift Tag

Tis the season for gift tags! 
I absolutely love designing and making these mini works of art.
This gift tag was attached to a pair of treat filled Christmas socks for a gift exchange party with a great group of friends. Yes, we had a Christmas Party this past weekend and it totally got my in mood for Christmas. 

Here is my finished tag ~

I started by cutting out my tag in kraft cardstock and my blue base from Ranger Distress cardstock.

I started with the blue distress cardstock - I applied embossing ink to one side of my chevron embossing folder & embossed the cardstock. Next I sprinkled Weathered White Antiquities Embossing Powder (Ranger Ink) over the embossed cardstock and tapped off the excess.

Before I heat embossed the powder I rubbed the powder off the raised parts and in various spots around the edge.

I distressed the edges and applied some Walnut Stain Distress Ink to 'dirty' it up a bit.

To create my focal image. I first started by cutting out the Dashing Deer die cut from kraft cardstock.
I used a sponge to apply white acrylic paint to the Halftone background stamp from Stampers Anonymous and laid the die cut down on the stamp.

I laid a piece of copy paper over the die and stamp and gently applied pressure. I love the random pattern it made on the die cut.

I made sure the paint was completely dry before covering the die cut with Gathered Twigs Distress Stain. (Sorry - I forgot to get a photo of this step)

For the tag base I applied Ground Espresso Distress Ink over the entire tag, spritzed some water and made sure to dry it completely with my heat gun.

I took some ephemera pieces from the Festive pack and added some Vintage Distress Collage Medium over all them. When this dried I applied some Crazing Medium as well. 
I applied some Crazing Medium to the die cut word 'SNOW' as well. I just love those tiny cracks!
I finished off my Dashing Deer die cut by adding some lines with my Dylusion Paint Pen. It really helped define the edge. I brown sequin for the deer's nose was perfect for a small bit of bling.

There you have it - my finished tag for a pair of treat filled Christmas socks.


Friday, 17 June 2016

Father's Day Cards....for those special men in my life.

I am lucky to have 3 wonderful men in my life that
represent all the best qualities of being a great dad.

First up - my own dear dad. Living in a house with a
menopausal woman and 2 teenage girls must have been trying
but somehow he survived and still likes all of us. Now, he has 2 amazing son-in-laws so
all the drama we gave him was worth it.
Gears Embossing folder, Foil Paper, alcohol inks, bronze & black paint 

Next up my wonderful father-in-law. He set an amazing example of father & husband 
for his 5 sons. 
Distress Marker Water colour, stamping, ephemera

And last but certainly not least my husband and the father of our 2 kids.
For 25 years you have put up with my craziness and for 22 of those 25 years have been
a wonderful father to our 2 kids. Thank you for helping me to not screw them up.
Alcohol Inks on Yupo


Friday, 15 April 2016

More Playing With Crayons - Make & Take Tag

I am still playing my Distress Crayons and learning new techniques. 

Here is one I tried just as an experiment & I loved it so much I used 
it for the make & take at our last Paradise Lost Crop.


I started with a cardstock tag covered with a layer of white gesso before 
scribbling 3 colours across the tag.


Next a quick spritz of water over the entire tag and then I took my scraper tool
to the tag.

I pulled the scraper tool across the tag to drag the colour down the tag. 
I love the rough look it made over the gesso. 

Next I ran my tag through the embossing folder. To make the embossed image pop off the tag I gently rubbed the Festive Berries Distress crayon over it then rubbed it with my finger. 


I added some Black Soot Distress Crayon to the edge, an embossed butterfly from the Sizzix Butterfly Duo die. The sentiment is a stamp from Dyan Reaveley.


Friday, 6 November 2015

Masculine Card - Operation DeStash #2

Just a quick post today to show you a card I made for my sisters future father-in-law.

I am sad to say that this is the first time I used my 12x12 Kraft Resist Paper Stash from Tim Holtz. I've has this in my paper stash for almost 2 years! Well, I can say that I will be using it a lot more now because it is amazing!
I die cut Umbrella Man out of a sheet of this paper then used Black Soot Distress Stain. I like how Umbrella Man looks like a shadow.
The background is Rivet embossed foil paper that I  covered in Black Soot Distress Paint then gently wiped away when it was partially dry. I then scratched it up with some sandpaper and then stamped some images with Staz On Ink.
The blue banner is stamped images from the Tiny Things set. I then using my blending tool to blend Peacock Feathers, Walnut Stain & Ground Espresso Distress Inks over the stamped images.
I just can't resist adding a bit of stamping to the envelope too!

Thank for visiting my blog today & I hope you a have a wonderful weekend!

~~stay crafty~~

Wednesday, 4 November 2015

Genuine Smile......Operation Destash #1

**Since downsizing to a condo I realized that I need to curb my hoarding tendencies and begin using my stash - Today is day 1. Let Operation DeStash begin! Everything I used for this project was stuff I had on hand and some things I have had for years.**
My husband and I became 'empty-nesters' a couple of months ago and I'm still getting used to not seeing them for weeks at a time. I'm happy that they are happy, independent adults off following their dreams but they will always be my babies.
I was recently going through my stash and found these Altered Metal Frames from Prima and decided that they would make fabulous projects to showcase photos of my kids.
Today's project is all about my son, Daylen, and his genuine smile. 


I started out by removing the back of the frames and adding some stenciling with Ranger Archival Ink & Splatters and Burlap Layering stencils from Tim Holtz.
Another stash find was this mini brick wall chipboard from Dusty Attic.


After a layer of Ground Espresso Distress Stain, I applied some Turquoise Embossing Powder from Ranger. After setting this with my heat gun and letting it cool I gently rubbed the embossing powders to reveal the edges. I then glued the bricks down with Tacky Glue making sure to leaves spaces in between.
Bricks need mortar - so I made some using Texture Sand Paste from Deco Art Media and a couple of drops of Ground Espresso Distress Ink. I used a tiny spatula to spread this between the chipboard bricks.I love how this turned out!  


I definitely was going for a Steampunk feel to this project and as luck may have it I have A LOT of gears in my stash. Metal gears, wood gears, chipboard gears.....so many gears!


I wanted a grungy, rusty feel to this gear set so I decided to combine some Vintage Photo Distress Powder with some Burnt Copper Leaves Embossing Powder from Emerald Creek Craft Supplies.
I was absolutely thrilled with the end result - the perfect mix of rust and grunge!
I wish I knew who made this gear set - I checked a few sites but can't find it. Let me know if you recognize it!
The sentiment was embossed foil paper die cut with the word Genuine from the Friend Block Thinlit set and the word 'Smile' from the Friend Script thinlit set. I love this set because it so versatile. I have used it for many different projects & cards.

 Assembling this project was a lot of fun.  I found so many cool charms, gears & do-dads in my stash that worked so well!
Operation DeStash is well underway.


 Thank you so much for visiting my blog today!

 Challenges Entered:


Tuesday, 20 October 2015

Peaceful Wreath

Saturday night was the first Paradise Lost One Day Crop of Fall 2015 and it was fabulous!
It was great to catch up with friends and to make some new friends.
Thank you to all the lovely ladies who attended!

 In the end, I wasn't really as productive as I had planned on being.
12 hours later and I had 6 Christmas cards.
I am so thankful to Heather for bringing her Peaceful Wreath stamp set from Stampin' Up!
I used Fired Brick, Twisted Citron & Peeled Paint to colour in the stamped image of Peaceful Wreath.
I don't use sequins a lot but they worked really well with the dot embossed card base.
and added a wee bit of bling.

I'm starting to feel festive and inspired to make more Christmas themed projects!

Thanks for visiting my blog today!